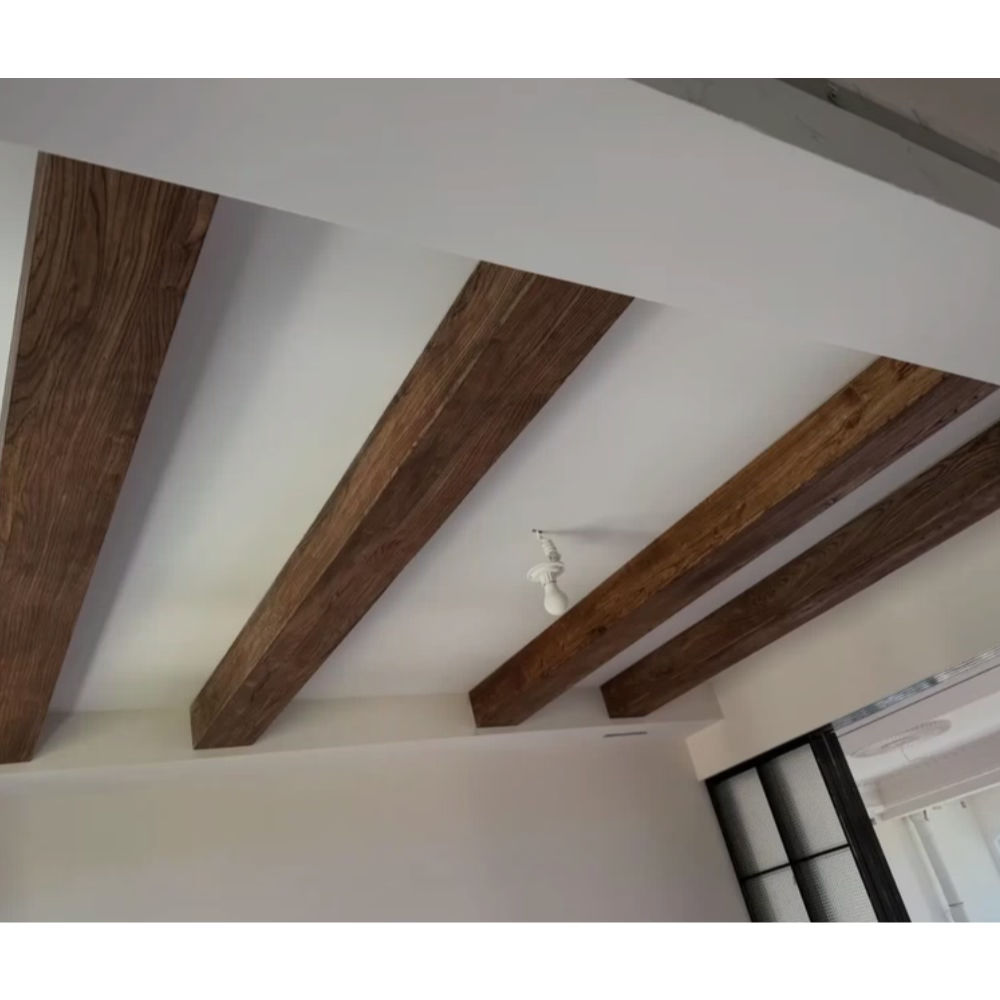
The first time a homeowner wraps a U-shaped polyurethane beam around an existing ceiling joist, the reaction is usually the same: a quiet laugh that the whole project took less time than brewing a pot of coffee. Wrap-around faux beams were designed for exactly that moment. Instead of dismantling the ceiling, mounting heavy blocking, or recruiting two extra pairs of hands, you simply open the hinged seam, slip the beam over what is already there, and click it shut. The result is a vaulted, timber-frame aesthetic that looks like it has been part of the house for decades.
For homeowners chasing a quick refresh before listing a property, hosting family for the holidays, or simply tired of staring at the same flat white ceiling, this product category eliminates the largest obstacle standing between inspiration and completion: time.

Why Wrap-Around Designs Changed Residential Renovations
Traditional faux beam installation requires the installer to lift the entire beam over a mounting block, which means measuring, cutting, drilling, and screwing while balancing a long object overhead. Wrap-around beams solve this by splitting the product into two interlocking halves held together by a concealed hinge or seam.
The Mechanics of a Split-Back Beam
Most wrap-around beams are produced as two mirror-image pieces molded from the same texture mat. The seam runs along the bottom edge or along one vertical side, depending on the profile. When the seam is closed, the joint becomes nearly invisible because the molding process captures grain continuity across both halves. The closed beam performs structurally like a single piece, which matters once it spans a ceiling.
The hinge itself is usually a living hinge molded from the same polyurethane as the body. Because polyurethane flexes far more than wood or MDF, the hinge can be opened and closed thousands of times without fatigue failure. Premium products add a small internal receiver strip along the seam that locks the two halves together once closed, creating a tight fit that resists separation under thermal expansion.
Time Savings Compared to Conventional Install
A standard 16-foot room with three beams typically consumes a full day of work when beams are mounted using blocking and lag screws. Wrap-around installs on the same room routinely finish in two to three hours, even for first-time installers. The reduction comes from skipping blocking fabrication, eliminating overhead drilling, and avoiding the awkward shuffle of lifting long beams into final position.
For property flippers and short-term-rental hosts, that time difference compounds. A wrap-around beam upgrade on a single property opens the door to scheduling two renovation projects in the time that one traditional beam job would consume.

Why Polyurethane Is the Right Material for Wrap Designs
Polyurethane is not the only material molded into wrap-around beams. High-density EPS foam and vacuum-formed PVC also appear on the market, but polyurethane has become the dominant choice because of three structural advantages that directly affect long-term performance.
Closed-Cell Density and Surface Hardness
Polyurethane beams are cast at densities between 1.5 and 4 pounds per cubic foot, depending on whether the product is labeled as architectural grade or lightweight. Higher densities resist denting from ladder bumps, vacuum cleaner handles, and the occasional thrown pillow during a living room pillow fight. They also hold threaded fasteners better, which matters when you hang light fixtures, plants, or seasonal decor from the beam.
Foam-core alternatives compress under point loads. A stepladder leaning against a foam beam can leave a permanent depression within weeks of install. Polyurethane bounces back, which is a small but important quality-of-life detail.
Resistance to Humidity Cycling
Bedrooms above kitchens, bathrooms with vaulted ceilings, and coastal homes experience real humidity swings. Polyurethane does not absorb moisture the way that wood or MDF would, so a wrap-around beam installed over a real wood joist will not cup, swell, or delaminate when the seasons change. The rigid foam core stays dimensionally stable, and the factory-applied finish is engineered to survive years of contraction and expansion cycles without cracking.
Weight Profile That Fits DIY
A typical 8-foot wrap-around beam in a 6-by-8 profile weighs between 6 and 9 pounds. The matching piece weighs another 6 to 9 pounds, putting total handling weight under 20 pounds for most residential installs. That weight makes it realistic for one person to maneuver, position, and secure a beam without recruiting help, which is the difference between a weekend afternoon project and a coordinated work crew.

Planning the Project Before You Order
Ordering the right beam length and profile prevents returns, delays, and the frustration of staring at an oversized box in the garage. Several measurements and decisions should be locked in before the shopping cart opens.
Measuring Existing Joists and Cover Targets
Measure the width and depth of every structural member the beam will cover. Wrap-around products have an interior cavity sized to slide over standard nominal lumber, but older homes sometimes carry actual dimensions that do not match modern catalogs. Note any unusual situations: doubled-up joists, header beams, LVL spans. Each variation affects which profile size you should order.
For non-structural applications, decide what you are trying to hide. Exposed ductwork, cable trays, and patchy drywall repairs all suggest different interior dimensions. Add a half inch of clearance on every side to make the install comfortable rather than forced.
Choosing a Profile That Matches the Architecture
A hand-hewn barn beam profile looks out of place in a mid-century ranch living room. A smooth, clean-lined beam vanishes against a rustic timber-frame great room. Before ordering, look at the existing trim, flooring, and cabinetry for clues. Matching the visual weight of those elements creates the kind of integrated look that makes guests assume the beams have always been there.
Manufacturers typically offer profiles in three or more widths and depths. Order sample chips if available. A two-dollar chip mailed to your door saves a four-hundred-dollar mistake.
Color and Finish Decisions
Most wrap-around beams arrive pre-finished in a base stain that mimics a popular species: reclaimed pine, weathered oak, walnut, driftwood gray. Custom finishes are usually available on request, with lead times ranging from two to eight weeks. For a fast renovation, factory finishes are the obvious choice, but it is worth sampling a few options against the room lighting before committing.
Lighting conditions shift dramatically from room to room. North-facing rooms tend to flatten warm tones, while south-facing rooms can bleach cool tones. A finish that looks rich in a showroom may read muddy in a dim hallway.
The Installation Sequence From Unboxing to Reveal
The actual hands-on work follows a predictable rhythm. Knowing the steps ahead of time keeps the install efficient and avoids the small mistakes that force re-work.
Step One: Acclimation and Inspection
Open every beam in a room-temperature space at least 24 hours before installation. Polyurethane expands and contracts with temperature, and a cold beam forced into position can leave a visible gap when it warms. While acclimating, inspect each beam for shipping damage, color variation between pieces, and seam fit.
Lay the beam halves on a flat surface and close the seam. Run your finger along the joint. Any visible step or ridge suggests a quality issue that the supplier should address before you proceed.
Step Two: Test Fit Over Existing Structure
Lift one half into position and let it rest on the existing joist or support. Place the second half over the first and clip or hinge the seam closed. Mark the resting position. Repeat for every beam location. This dry run reveals whether the cavity clears all obstructions, whether the seam aligns in a visually pleasing direction, and whether additional shimming is needed.
Step Three: Mounting Strategy
Most wrap-around installs use one of three approaches. Adhesive-only mounting works for lightweight covers over smooth drywall or plaster ceilings. Mechanical fastening through pre-drilled pilot holes into the existing structure suits heavier beams and high-traffic areas. Hybrid mounting combines a continuous adhesive bead with strategic screws at every three feet for maximum security.
Choose the strategy that matches the substrate. Adhesive alone is rarely appropriate for ceilings above kitchens, where steam and grease can attack the bond line over years.
Step Four: Closing Seams and Touch-Up
Snap the seam closed once the beam sits in its final position. Use the receiver strip or any included locking tabs to lock the joint. Wipe away any adhesive squeeze-out before it cures. Touch-up kits, usually included with the order, let you address small scuffs and any visible seam line. A light hand with the touch-up marker keeps the repair invisible.
Step Five: Caulking and Edge Transitions
Where beams meet walls, use a flexible painter's caulk matched to the beam color. Where seams between beam sections meet, run a thin bead along the joint and feather it with a damp rag. These finishing touches separate a professional install from a DIY attempt.
Common Pitfalls and How to Avoid Them
Even with a forgiving product category, a handful of mistakes appear often enough to deserve specific attention.
Mismatched Seams Between Adjacent Beams
If you are installing three parallel beams, the seams should all face the same direction. Otherwise, the eye catches the inconsistency and the illusion breaks. Decide the seam orientation before installing the first beam, and stick to it.
Over-Tightening Fasteners
Polyurethane compresses under screw pressure. Driving a screw until the head bites into the surface crushes the material and creates a dimple that the finish will never fully hide. Stop driving when the head sits just above the surface, then back off a quarter turn.
Ignoring Ceiling Irregularities
Old ceilings are rarely flat. A wrap-around beam that touches the ceiling at one end and gaps by half an inch at the other end reveals the irregularity. Use thin shims between the beam interior and the structure to bring the beam line true. The eye reads the bottom edge, not the top.
Skipping the Lighting Test
Adding beams changes how light moves through a room. Bright uplighting that washed a flat ceiling can suddenly create sharp shadow lines on the beam faces. Plan for fixture relocation, dimmer upgrades, or accent lighting additions before the install is finished rather than after.
When Wrap-Around Beams Are Not the Right Answer
Honesty about product limits helps the right customers find the right product. Wrap-around beams are not a perfect fit for every situation.
Long Unsupported Spans
Wrap-around beams cover existing structure. If no structure exists across the span, the beam has nothing to wrap around. In that case, a structural beam or a mountable faux beam with engineered blocking is required. Some manufacturers offer mounting brackets specifically for empty spans, but those products are not technically wrap-around designs.
Heavy Hanging Loads
Wrap-around beams are decorative, not structural. Hanging a swingset, a heavy pot rack, or a ceiling fan directly from a wrap-around beam risks failure. Where heavy items must be supported, mount them to the structure behind the beam and let the beam hide the attachment.
Exterior Installations
Most wrap-around polyurethane products are rated for interior use only. UV exposure and freeze-thaw cycling break down even the best finishes. Manufacturers that offer exterior-rated products usually mark them clearly. Verify the rating before ordering for a porch, lanai, or outdoor kitchen ceiling.
Working With Contractors and DIY Decisions
Some homeowners hire professional installers for wrap-around beams even though the product is DIY-friendly. The decision usually comes down to time, comfort with ladders, and the complexity of the layout.
When DIY Makes Sense
Simple rectangular rooms with parallel beam runs are within reach of any homeowner comfortable on a stepladder. Two people can complete a single-room install in a single afternoon. Tools required are minimal: a drill, a level, a tape measure, and a caulk gun.
When a Contractor Is Worth the Cost
Complex layouts with intersecting beams, vaulted ceilings, or multi-level installations often justify professional labor. Contractors bring laser levels, scaffold systems, and experience handling unexpected conditions like hidden ductwork or asbestos in old textured ceilings. They also carry insurance for ladder-related injuries, which protects the homeowner from liability.
Cost Considerations and Budgeting
Wrap-around beams typically cost between $35 and $120 per linear foot depending on profile, finish, and order quantity. Compare this to real reclaimed timber, which routinely exceeds $80 per linear foot for material alone, plus installation labor and finishing time.
Hidden Costs to Plan For
Touch-up kits, adhesive, color-matched caulk, and shipping fees add up. Expect an additional 10 to 15 percent above the beam subtotal for these line items. Professional installers typically charge between $8 and $20 per linear foot for labor on simple installs, which can exceed the material cost on smaller projects.
Long-Term Value
Polyurethane beams last decades with minimal maintenance. The cost amortizes over the lifetime of the home, which makes the upgrade one of the better interior investments per dollar spent. Real estate listings frequently cite exposed beams as a desirable feature, and appraisals often credit the upgrade when calculating finished square footage value.
Caring for Beams After Installation
Wrap-around beams require very little maintenance, but a small routine keeps them looking fresh.
Routine Cleaning
Dust with a microfiber cloth or a soft brush attachment. Avoid wet wiping unless the manufacturer specifies that the finish is water-cleanable. Most factory finishes are, but custom finishes vary.
Spot Repairs
Keep the touch-up kit in a labeled bag taped to the garage wall. Future scuffs, dings, and small seam separations are easy to address when the touch-up materials are within reach.
Periodic Inspection
Once a year, walk the room with a flashlight and look along each seam. Any separation wider than a credit card thickness suggests movement that should be addressed. Usually a small bead of flexible caulk resolves the issue.
Final Thoughts on Wrap-Around Beam Renovations
The wrap-around beam category exists because homeowners wanted the look of timber-frame ceilings without the cost, weight, and complexity of installing real beams. The product category has matured to the point that the best products are nearly indistinguishable from the real thing at conversational distance.
For a fast, dramatic renovation, wrap-around beams deliver an outsized return on investment. The install is forgiving enough for first-timers, the materials hold up for decades, and the visual impact transforms the entire character of a room in a single afternoon. Whether the project is a quick pre-sale refresh or the start of a longer whole-home remodel, wrap-around beams earn their place in the modern renovation toolkit.
Technical References
ASTM standards cited in every specification
Test Data
Lab results from internal testing program
Updated 2026
Reviewed against current product specs


