
Every ceiling beam installation faces the same vulnerability: exposed surfaces that sit at head height or lower in hallways, stairwells, and commercial corridors. Polyurethane faux beams, despite their durability, can show impact damage over time. Protective casings solve this problem by wrapping the most vulnerable edges with a harder material that absorbs impacts and preserves the beam's appearance.
Why Protective Casings Exist
Faux beams in residential living rooms and bedrooms face minimal physical contact. Ceiling height, furniture placement, and typical household behavior keep them safely out of reach. The same cannot be said for beams installed in:
- Hallways and corridors
- Stairwell landings and balustrade edges
- Commercial spaces with high pedestrian traffic
- Event venues with frequent setup and breakdown
- Spaces used for storage or mechanical access
In these environments, beams are subject to bumps from people carrying furniture, equipment, or supplies. Over time, unprotected polyurethane surfaces can show dents, scratches, and finish wear. Protective casings prevent this damage by placing a harder material at the most vulnerable points.
The Mechanics of Impact Damage
Understanding why impact damage occurs helps explain what protective casings must accomplish. Polyurethane is a closed-cell foam that resists moisture and provides good dimensional stability. However, it has a relatively low density compared to solid wood or metal, which means sharp or focused impacts can compress or fracture the surface.
A glancing blow from a piece of furniture being moved, a shoulder bump in a narrow corridor, or an impact from a ladder or access equipment during building maintenance can leave marks. These marks are cosmetic rather than structural but they accumulate over time.
Protective casings address this by covering the most vulnerable edges: the bottom face of the beam, the front lower corners, and sometimes the side faces in especially exposed installations.

Design Options for Protective Casings
Protective casings are available in several configurations that address different exposure profiles.
Full-wrap casings encircle the entire lower section of the beam, protecting all four faces. Used in the highest-traffic areas such as main corridors and commercial spaces.
Front-face casings cover only the bottom and front face of the beam. Used where side access is unlikely but front impacts are possible.
Edge-only casings protect only the bottom edge and front corners. Used in moderate-traffic residential applications.
Corner guards are targeted solutions that protect only the front lower corners where most impacts occur. The least visible option, suitable for installations where appearance is paramount.
Each configuration trades off between protection coverage and visual intrusion. The more surface area covered, the more protection provided, but also the more visible the casing becomes.
Material Choices
Protective casings are made from several materials, each with different characteristics:
| Material | Impact Resistance | Weight | Finish Options | Cost |
|---|---|---|---|---|
| High-density polyurethane | Good | Light | Excellent matching | Moderate |
| Polycarbonate | Excellent | Light | Limited | Higher |
| Aluminum | Excellent | Moderate | Good | Higher |
| Stainless steel | Excellent | Heavy | Good | Highest |
For most faux beam installations, high-density polyurethane casings provide the best balance. They match the beam's appearance, install with the same methods, and offer sufficient impact resistance for typical commercial and residential use.
Polycarbonate casings are used in spaces with exceptional impact risk, such as gymnasiums or warehouse-adjacent corridors. Aluminum and stainless steel are specified for institutional environments where durability is the primary concern and the metal appearance is acceptable.
Installation Approaches
Installing protective casings requires attention to detail to maintain the appearance of the original beam. The installation process generally follows these steps:
- Clean the beam surface and allow it to dry completely
- Measure and cut each casing piece to length with a fine-tooth saw
- Apply polyurethane-compatible adhesive to the back of the casing
- Position the casing against the beam, ensuring alignment with edges
- Secure with pin nails or trim screws through predrilled holes
- Fill fastener holes and touch up any visible gaps
For full-wrap casings, the process is more involved because each piece must be sized to interlock with adjacent pieces without gaps. Professional installers typically dry-fit all pieces before applying adhesive to ensure proper alignment.
Integration with Existing Beam Finishes
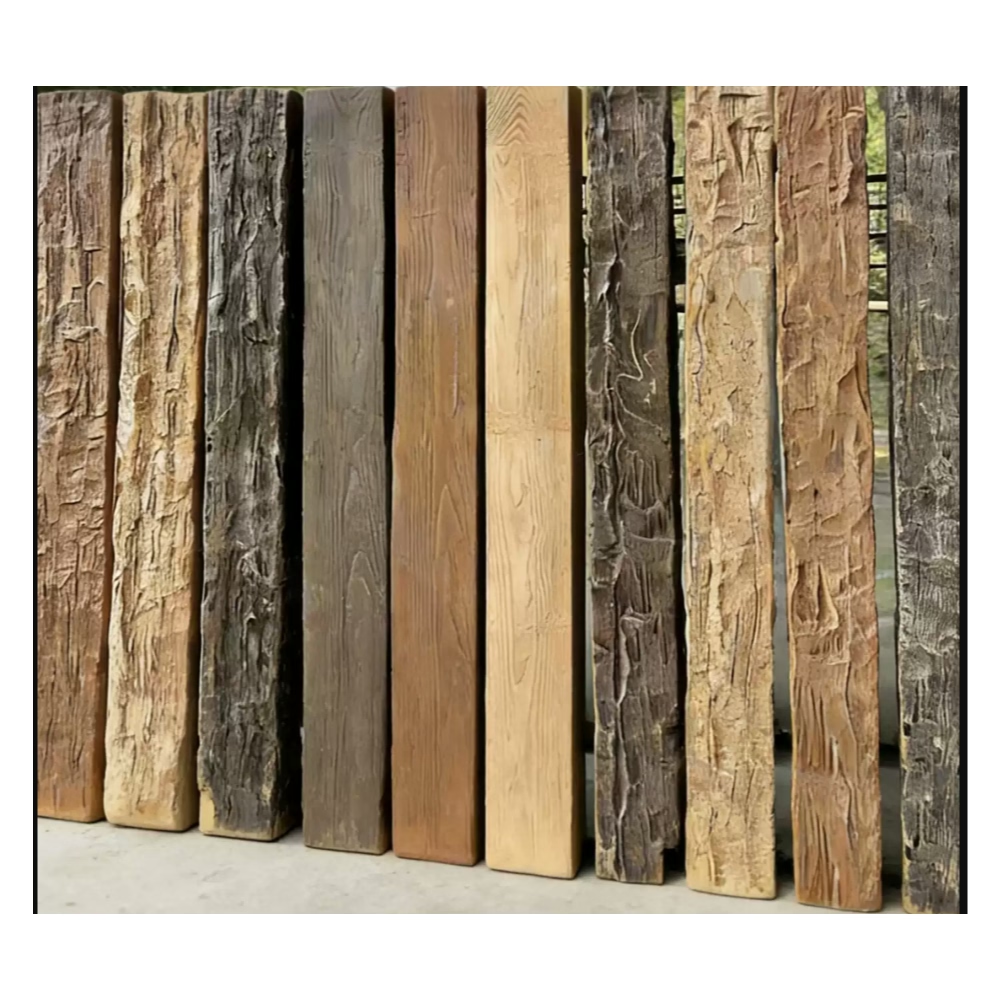
The casing finish must match the beam finish to maintain the continuous appearance of solid timber. Most manufacturers offer casings in the same finishes as their standard beam products. Ordering casings from the same manufacturer as the beams guarantees color and texture matching.
For field touch-ups where a casing meets a cut end or a beam transition, use the manufacturer's recommended filler and touch-up kit. Generic wood fillers may accept stain differently and create visible mismatches.
Applications in Different Project Types
Residential Hallways and Stairwells
Residential hallways and stairwell landings are prime locations for protective casings. These areas see regular foot traffic and occasional furniture movement. The hallways in particular are subject to the repeated bumps from people passing through while carrying objects.
Installing front-face casings on beams in these locations adds minimal cost to the overall project but significantly extends the beam's appearance life. The casings are visually unobtrusive and most visitors never notice them.
Commercial Corridors
Hotels, office buildings, and healthcare facilities have corridors where beams may be installed near the ceiling transition or along the walls. These spaces see continuous traffic from staff, guests, and equipment that can include gurneys, wheelchairs, and maintenance carts.
Full-wrap casings are standard in these environments. Building codes in some jurisdictions also require impact-resistant surfaces at specific heights in certain occupancy types, which casings can satisfy when properly documented.
Event and Hospitality Venues
Barns, event halls, and hospitality venues frequently install beams as part of their decorative treatment. These spaces also host frequent events that involve furniture setup, equipment delivery, and high occupant loads.
Protective casings in these environments serve a dual purpose: they protect the beam investment during use and they provide documentation that the installation meets commercial durability standards.
Retail Environments
Retail stores, particularly those in the home goods and furniture categories, use beams as part of their interior design. The beam installations see unusual wear from merchandise being moved, displays being rearranged, and heavy foot traffic during peak periods.
Casings here also serve a practical purpose: they protect the finish from scratches by hangers, racks, and display equipment that may temporarily contact the beam.
Maintenance and Replacement
One advantage of protective casings over direct beam protection is that casings can be replaced without replacing the beam. A damaged casing comes off with careful prying, the adhesive residue is cleaned from the beam surface, and a new casing is installed.
This modularity significantly reduces long-term maintenance cost. Rather than repairing or refinishing the entire beam, only the casing needs attention.
Regular inspection of casings in high-traffic installations is recommended. Look for any lifting at edges, visible cracks, or changes in appearance that indicate impact has occurred. Catching a loose or damaged casing early prevents further damage to the beam underneath.
Cleaning casings follows the same procedures as cleaning the beams themselves: dust with a soft cloth, remove scuffs with a damp cloth and mild detergent, and avoid abrasive cleaners that can scratch the finish.
Specifying Casings in Project Documentation
Project specifications should include protective casings as a standard item whenever beams are specified in locations subject to impact. Rather than treating casings as an optional upgrade, they should be treated as a standard specification for:
- Any beam installed below 8 feet in commercial spaces
- Any beam in a corridor, stairwell, or common area
- Any beam in an assembly occupancy
- Any beam in a hospitality venue or event space
Specifying casings upfront avoids the cost and disruption of adding them after the original installation is complete. It also ensures that the casing finish matches the beam finish, since both are ordered from the same manufacturer at the same time.
For renovation projects, adding casings to existing beam installations is straightforward as long as the beam surface is clean and sound. The additional cost is modest compared to the appearance improvement and damage prevention.
Cost-Benefit Considerations
Adding protective casings increases the material cost of a beam installation by approximately 15 to 30 percent depending on the casing configuration and beam size. The additional labor is minimal because casings install quickly with the same tools used for beam installation.
Against this modest additional cost, project owners receive:
- Extended appearance life of the beam
- Reduced maintenance and repair costs over the building's life
- Documentation supporting commercial durability claims
- Peace of mind in high-traffic environments
For commercial installations where the cost of repairing or replacing a damaged beam is high, casings represent good value. For residential installations in low-traffic areas, they may not be worth the additional cost.
The decision ultimately depends on the installation location, the expected use pattern, and the importance of maintaining appearance over time. For any installation where these factors are uncertain, specifying casings is the conservative choice.
Technical References
ASTM standards cited in every specification
Test Data
Lab results from internal testing program
Updated 2026
Reviewed against current product specs


