
Exposed metal ceiling beams are a legacy of industrial construction and a feature of many converted commercial buildings. While the industrial aesthetic has its appeal, spaces with metal beams often feel cold, stark, or unfinished—particularly in residential contexts or hospitality environments where warmth is desired. Polyurethane faux beams offer a practical solution: wood-appearance elements that install over existing metal structure to add warmth without removing the underlying beams.
Why Metal Beams End Up Exposed
Metal beams appear in several contexts:
Industrial buildings: Warehouses, factories, and commercial buildings built with steel moment frames or joist systems often expose the structure as a design feature or as a cost-saving measure.
Post-war construction: Buildings constructed from the 1950s through the 1970s frequently used exposed steel beams as a practical solution that eliminated the need for finished ceilings.
Modern industrial design: Contemporary construction sometimes exposes steel intentionally, embracing the industrial aesthetic for its clean, honest expression of structure.
Renovation reveals: Renovation projects that remove dropped ceilings or expose structure reveal metal beams that were previously concealed.
In each case, the metal beam is a given. The design question is how to work with it.
The Overlay Approach
Installing faux beams over existing metal beams involves creating a wood-appearance layer that sits on top of or around the metal structure.
This approach preserves the metal beam while transforming its appearance. The metal remains structurally active. The overlay is purely cosmetic.
Key considerations for the overlay approach:
Weight: The overlay adds weight to the ceiling structure. In most cases, the additional load is negligible, but very large overlays should be reviewed by a structural engineer.
Clearance: The overlay reduces ceiling height by the beam depth. The reduction must stay within acceptable limits for the occupancy type and intended use.
Attachment: The overlay must be securely attached to the structure. Methods include clip systems, adhesive, and mechanical fasteners into the metal beam flanges.
Integration: The overlay should integrate visually with any adjacent ceiling treatment. Consistent profile, finish, and spacing across all beams creates a cohesive appearance.
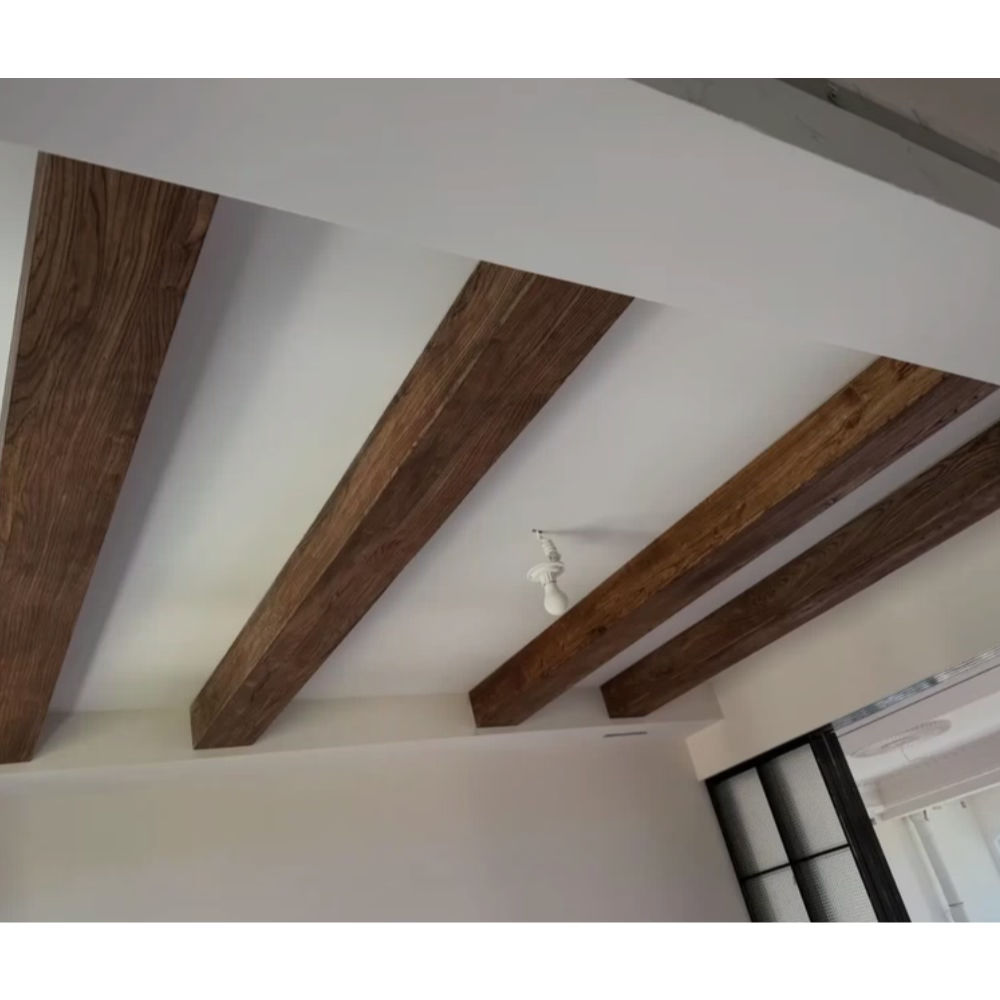
Profile and Size Matching
Matching the faux beam overlay to the underlying metal beam requires careful dimensioning.
The overlay width should exceed the metal beam width by at least 3 to 4 inches on each visible side. This ensures complete coverage from floor-level viewing angles.
| Metal Beam Size | Suggested Overlay Size |
|---|---|
| 4 in web | 10–12 in wide |
| 6 in web | 12–14 in wide |
| 8 in web | 14–16 in wide |
| 10 in web | 16–18 in wide |
| 12 in web | 18–20 in wide |
The overlay depth should be substantial enough to provide visual weight. Depths of 8 to 14 inches are typical, depending on ceiling height and room proportions.
For beams visible from multiple angles, a full-wrap overlay that covers all four sides of the metal beam may be appropriate. For beams against walls, a three-sided overlay is usually sufficient.
Installation Methods
Installing faux beams over metal beams requires techniques adapted to the substrate.
Clip attachment: Steel clips are welded or bolted to the metal beam flanges. The faux beam engages these clips with mechanical fasteners. This method is secure and allows for thermal movement.
Adhesive bonding: High-quality construction adhesive bonds the faux beam to the metal surface. Mechanical fasteners through the beam into the metal provide additional security during cure.
Strap systems: Metal straps wrap around the metal beam and are fastened to the faux beam. The straps are hidden by the beam finish.
Combination systems: The most reliable installations combine adhesive with mechanical fasteners, providing both initial hold and long-term security.
The specific method depends on the beam size, the installation access, and the manufacturer's recommendations.
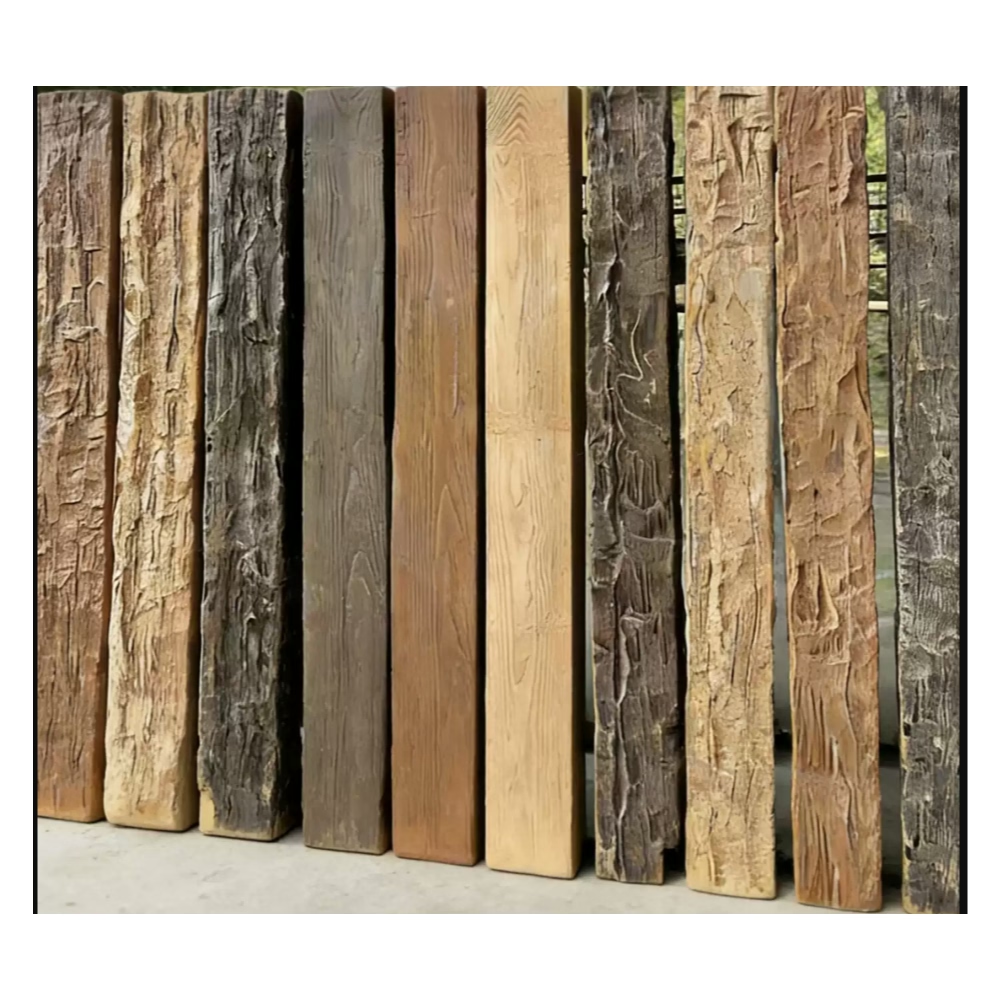
Finish Coordination
The finish of the overlay should create the desired visual effect.
Full wood appearance: A wood-tone finish on the overlay creates the appearance of a solid timber beam. The metal beam is completely concealed. This is the most common approach.
Painted to match ceiling: A painted overlay that matches the ceiling color creates a substantial beam form without introducing wood tone. This works in contemporary spaces where texture is less important than form.
Contrast finish: A dark finish—black, charcoal, or deep brown—contrasts with a light ceiling while maintaining a wood-like texture. This approach adds drama without the warmth of a traditional wood tone.
Partially exposed metal: In some designs, the overlay covers the sides of the metal beam but leaves the bottom flange exposed, creating a hybrid metal-wood appearance. This can work in spaces that want some industrial character without the full starkness of exposed metal.
Combining with Other Treatments
Metal beam overlays can be combined with other ceiling treatments for more comprehensive solutions.
Beam grid overlays: Multiple parallel overlays arranged in a grid create a coffered ceiling effect. The metal structure is completely transformed into a designed ceiling.
Overlay with integrated lighting: Recessed fixtures, linear LED strips, or pendant lights are integrated into the overlay installation. The beam becomes part of the lighting infrastructure.
Overlay with acoustic treatment: Acoustic panels or insulation are installed in the ceiling cavity between beams. The overlay conceals the acoustic treatment while adding visual interest.
Design Scenarios
Warehouse Loft Conversion
A warehouse with exposed steel joists is converted to residential loft units. The steel is substantial and visible. Faux beam overlays in warm oak completely transform the ceiling, creating the warmth that residential living requires. The steel structure remains present but softened by the wood overlay.
Restaurant Renovation
A former industrial building becomes a restaurant. The exposed steel columns and beams are wrapped with faux beams that complement the reclaimed wood furniture, Edison bulb lighting, and brick walls. The result feels warm and authentic rather than cold and institutional.
Modern Office
A new construction office building with exposed steel structure decides that the raw industrial look is too stark for their brand. Faux beam overlays in matte black coordinate with the brand color palette while adding substantial form to the ceiling plane.
Historic Mill
A historic textile mill with original cast iron columns and steel beams is renovated. The beams are wrapped with faux beams in a finish that matches the original timber members that were removed decades ago. The renovation restores the architectural character while meeting modern structural and fire codes.
Technical Considerations
Several technical issues should be addressed in metal beam overlay projects.
Fire rating: If the metal beam's fireproofing is compromised by the overlay installation, the building's fire rating may be affected. Review with a fire protection engineer.
Thermal movement: Metal beams expand and contract with temperature changes. The overlay attachment must accommodate this movement without damage.
Corrosion protection: The metal beam should be inspected for corrosion before overlay installation. Any corrosion should be treated before the overlay is installed.
Electrical coordination: Conduit, junction boxes, and lighting fixtures mounted to the metal beam should be relocated or incorporated into the overlay design.
The Warmth Solution
Metal beam ceilings need not remain stark or cold. Polyurethane faux beams provide a practical path to warmth that preserves the structural integrity of the underlying metal while adding the visual character that many spaces require.
For architects, designers, and property owners facing exposed metal beam ceilings, the overlay approach offers a solution that balances aesthetic goals with practical constraints. The result is a ceiling that looks intentional and designed rather than leftover from a previous construction era.
Structural Assessment Before Overlay
Before installing any overlay, assess the existing metal beam structure:
Load capacity: Verify that the existing structure can support any additional loads from the overlay system.
Beam condition: Inspect beams for corrosion, damage, or structural compromise. Address any issues before overlay installation.
Connection integrity: Verify that beam-to-structure connections are sound. Overlay installation should not stress compromised connections.
Fire protection: If the metal beam has fireproofing, verify that the overlay does not compromise the fire rating.
A structural assessment ensures that the overlay installation does not create problems with the existing structure.
Attachment Hardware Options
Several attachment systems work for metal beam overlays:
Welded clips: Steel clips welded to the beam flanges provide secure attachment points. Requires welding equipment and access to the beam surfaces.
Bolted clips: Steel clips bolted to the beam flanges through pre-drilled holes. Easier to install than welded clips but requires drilling.
Adhesive systems: High-strength structural adhesive bonds the overlay directly to the metal beam. Requires clean, dry metal surfaces and proper cure time.
Hybrid systems: Combinations of mechanical fasteners and adhesive provide the most secure attachment.
The appropriate system depends on beam accessibility, beam size, and project requirements.
Finish Selection for Durability
Metal beam overlays require finishes that maintain appearance:
Factory finishes: Factory-applied finishes are consistent and durable. Most manufacturers offer finishes rated for interior use.
Field finishing: Field-applied finishes allow customization but require more skill and time. Ensure compatibility between finish and overlay material.
Touch-up requirements: Plan for touch-up of any damage during installation. Have matching finish materials available.
Good finish selection ensures that the overlay looks good for years.
Coordinating with HVAC and Electrical
Metal beam ceilings often have mechanical and electrical systems attached:
Ductwork: HVAC ducts may be suspended from or attached to metal beams. Plan beam overlay positions around ductwork or relocate ducts.
Conduit: Electrical conduit may run along beam flanges. Relocate conduit or incorporate it into the overlay design.
Sprinklers: Fire sprinkler heads may be mounted to beams. Ensure sprinkler coverage is maintained after overlay installation.
Coordinate these systems before ordering overlay materials.
Commercial Conversion Projects
Commercial buildings frequently undergo conversion from industrial to other uses:
Warehouse to residential: Metal beam overlays transform industrial spaces into warm residential lofts.
Factory to office: Overlays soften the industrial aesthetic for professional office environments.
Warehouse to retail: Overlays create attractive retail spaces from raw warehouse shells.
Commercial conversions benefit from the speed and simplicity of overlay installation, which minimizes downtime.
Historical Preservation Considerations
Some metal beam buildings have historical significance:
Documentation: Document the existing metal beam condition before overlay installation.
Reversibility: Consider overlay systems that can be removed without damaging the original structure.
Historical accuracy: In some cases, overlay beams that replicate the original timber appearance restore historical character.
Historical preservation projects benefit from collaboration with preservation specialists.
Cost-Benefit Analysis
Metal beam overlay projects offer compelling economics:
| Factor | Remove and Replace | Overlay with Faux |
|---|---|---|
| Structural work | Extensive | Minimal |
| Installation time | Weeks | Days |
| Disruption | Significant | Minimal |
| Material cost | Higher | Lower |
| Total project cost | Much higher | Moderate |
Overlay projects are typically 40-60% less expensive than beam replacement.
Professional vs. DIY Installation
Metal beam overlay installation can be complex:
Professional installation recommended for: Large commercial projects, buildings with complex mechanical systems, historical preservation projects.
DIY feasible for: Residential projects with straightforward beam configurations, accessible beam positions, simple overlay systems.
Assess the complexity of your project before deciding on installation approach.
Technical References
ASTM standards cited in every specification
Test Data
Lab results from internal testing program
Updated 2026
Reviewed against current product specs


