
Beam cladding panels extend the aesthetic of faux wood beams beyond ceiling installations to vertical surfaces. These panels cover existing walls and architectural features with the same timber textures and finishes that make beam ceilings attractive. The result is a unified material environment that feels intentional and designed rather than patched together.
Understanding Beam Cladding Panels
Beam cladding panels are flat or shaped panels made from polyurethane that replicate the appearance of timber beams or timber planking. They install over existing surfaces—drywall, plaster, concrete, or existing millwork—to create the appearance of solid timber construction.
Unlike beams, which are three-dimensional elements that project from the surface, cladding panels are essentially skin-deep. They add texture and color without significant depth. This makes them appropriate for applications where the bulk of a beam would be excessive but the timber aesthetic is desired.
Applications for Cladding Panels
Accent Walls
The most common application for cladding panels is the accent wall: a single wall covered in timber-look panels that becomes the focal point of the room.
Accent walls work in nearly any room:
- Behind beds in primary bedrooms
- Behind sofas in living rooms
- Behind bars in home entertainment areas
- Behind reception desks in commercial spaces
The paneled wall adds warmth and visual interest without overwhelming the room. Unlike a full-beam installation, cladding panels do not reduce ceiling height or alter the room's proportions.
Ceiling-to-Wall Transitions
Cladding panels can extend from the ceiling onto the upper portion of a wall, creating a unified ceiling-wall treatment. This approach is common in:
- Dining rooms with wall paneling
- Entry halls with coffered ceilings
- Great rooms with architectural detailing
The transition from beam ceiling to clad wall creates a sense of enclosure and architectural completeness.
Column Wrapping
Columns and posts that interrupt open floor plans can be wrapped with cladding panels to integrate them into the overall design. A column wrapped in timber-look panels becomes a designed element rather than an obstruction.
Column wrapping works particularly well when the columns align with beam or purlin positions, creating a consistent material vocabulary throughout the space.
Architectural Niche and Alcove Finishing
Recessed niches, alcoves, and built-in shelving units benefit from cladding panel finishes that coordinate with beam ceilings. The panels create visual interest in recessed spaces and help these architectural features register as intentional design elements.
Commercial Feature Installations
Commercial spaces use cladding panels for:
- Restaurant feature walls behind dining seating
- Hotel lobby accent walls
- Retail display backdrops
- Office reception areas
The panels add warmth and character to commercial environments without the maintenance requirements of real timber.
Panel Types and Styles
Shiplap Panels
Shiplap panels replicate the appearance of overlapping horizontal planks with rabbeted edges. This traditional siding profile is popular for both exterior and interior applications.
Shiplap cladding creates:
- A sense of horizontal expansion
- Clean, contemporary lines
- Texture that reads well in photographs
- A background that works with many furniture styles
Tongue and Groove Panels
Tongue and groove panels have interlocking edges that create a seamless surface when installed. This classic profile is used in traditional wainscoting and ceiling applications.
Tongue and groove cladding creates:
- A continuous, seamless surface
- Visual unity that works with formal interiors
- Sound-deadening benefits due to the mass of interlocking panels
- Versatility for both wall and ceiling applications
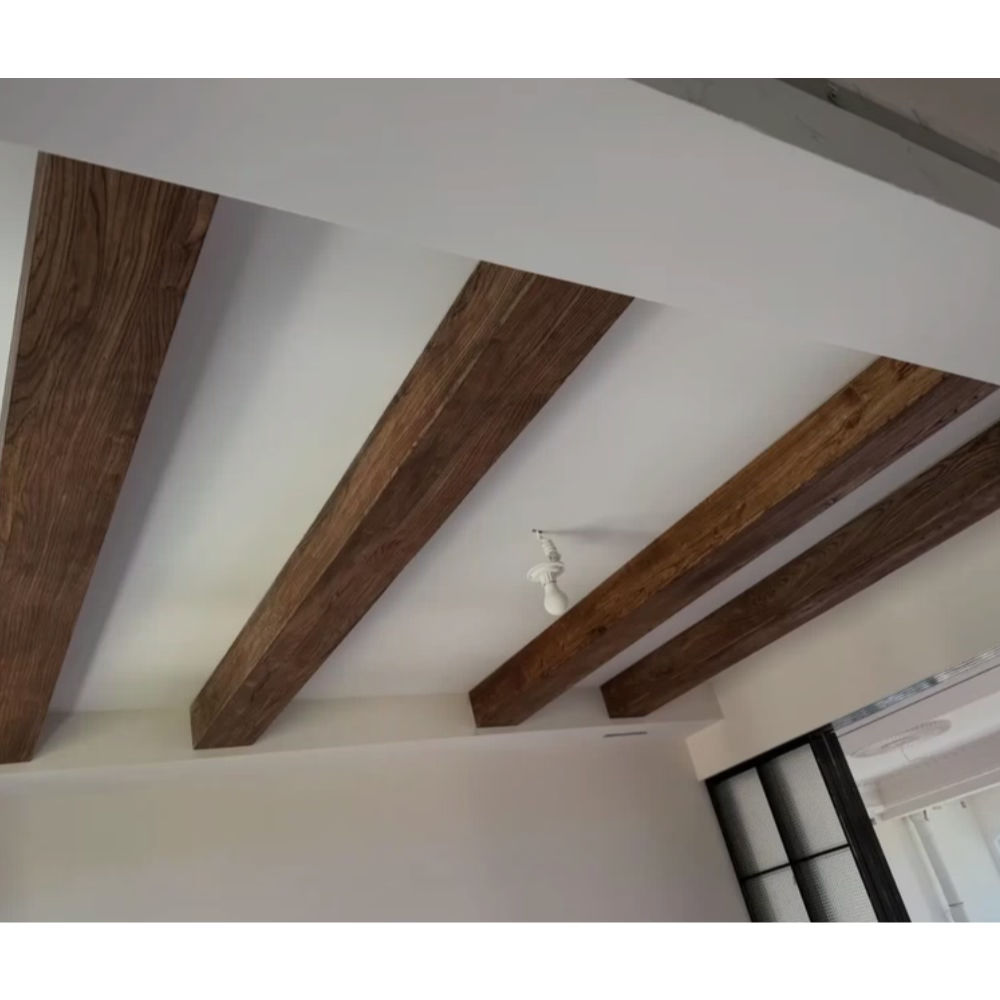
Beam Strip Panels
Beam strip panels are narrow, rectangular pieces that are installed individually to create the appearance of multiple parallel beams. The strips are typically 3 to 8 inches wide and run the full height or length of the installation.
Beam strip cladding creates:
- The appearance of a beam wall without actual beam depth
- Dynamic visual rhythm from the repetition of strips
- A contemporary industrial aesthetic
- Easy installation with consistent results
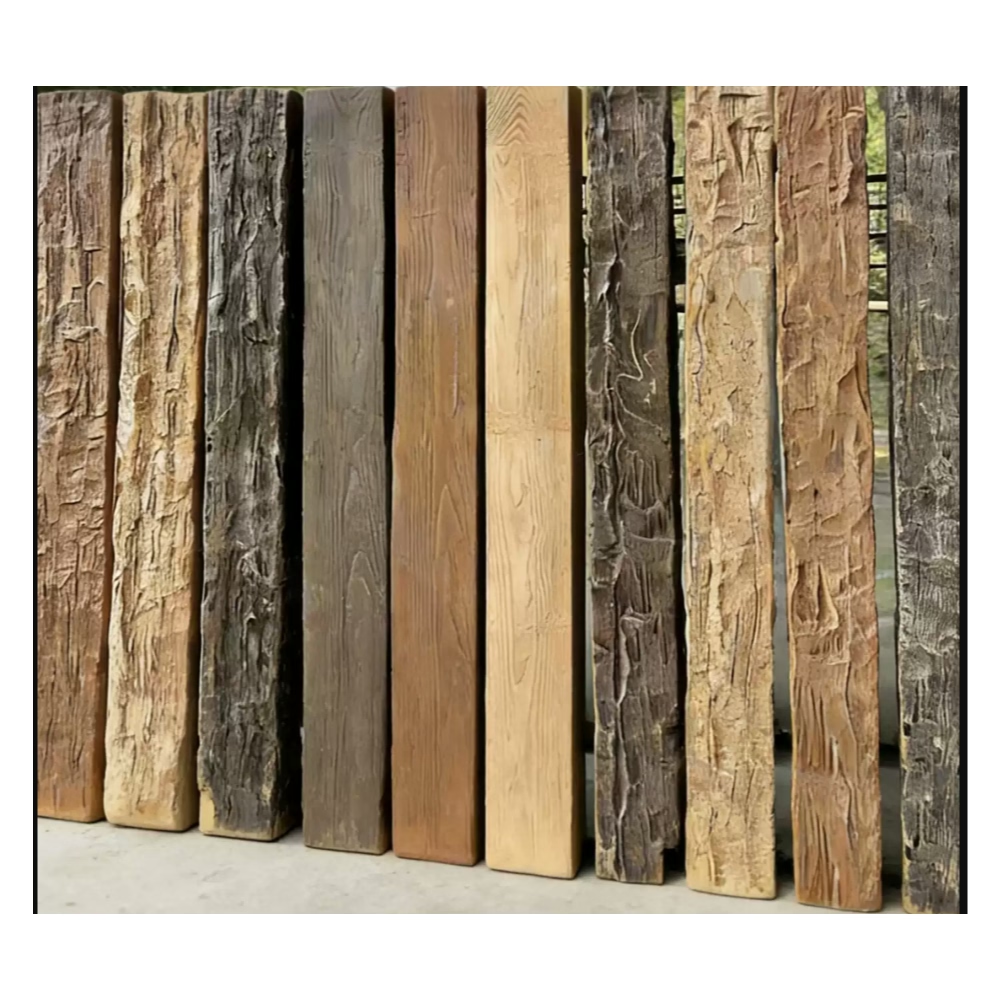
Reclaimed Wood Panels
Reclaimed wood panels replicate the appearance of weathered, reclaimed timber with irregular textures, varying tones, and authentic patina. These panels are popular in spaces seeking rustic or industrial character.
Reclaimed wood cladding creates:
- Immediate sense of age and authenticity
- Visual complexity from texture and tone variation
- A focal point that draws attention
- Coordination with other reclaimed and industrial elements
Installation Methods
Cladding panel installation follows standard finish carpentry methods:
Adhesive installation: Panels are adhered directly to the substrate with construction adhesive. This is the fastest method and works on flat, clean surfaces.
Mechanical fastening: Panels are nailed or screwed through the face into framing or backing. Fastener holes are filled and touched up. This method provides secure attachment but requires more finishing work.
Clip systems: Hidden clip systems allow panels to be installed and removed without visible fasteners. This method is popular for commercial installations where future access may be needed.
Combination installation: Adhesive provides initial hold and gap-filling, while mechanical fasteners provide secure long-term attachment.
The substrate must be flat, clean, and capable of supporting the panel weight. Uneven substrates should be furred or corrected before panel installation.
Coordination with Beam Ceilings
Cladding panels are most effective when coordinated with beam ceiling installations:
Matching finish: Panels and beams should have identical finishes. Any variation will be obvious where they meet.
Compatible textures: Panel texture should relate to beam texture. If beams are smooth, panels should be smooth. If beams are rough-sawn, panels should have comparable texture.
Continuous vocabulary: The panel and beam system should feel like a unified material rather than two separate finishes.
Transition details: The junction between panels and beams should be detailed thoughtfully. Caulk lines, trim pieces, or seamless integration all work depending on the desired effect.
Purchasing panels and beams from the same manufacturer ensures coordination.
Finish Considerations
Panel finishes should be selected based on the installation location and expected conditions.
Interior standard finishes: Most panel installations use factory-finished panels that resist scuffing and cleaning. These finishes are appropriate for residential and commercial interior applications.
High-traffic finishes: Commercial installations may benefit from enhanced durability finishes that withstand frequent cleaning and occasional impact.
Exterior-rated finishes: Covered outdoor installations require UV-resistant finishes that do not chalk or fade rapidly.
Custom finishes: Panels can be custom-finished for brand colors or unique design requirements. Extended lead times and minimum orders typically apply.
Sizing and Scale
Panel sizing should relate to the installation surface and the room proportions.
Wall height coverage: Full-height panels create the strongest impact. Panels that stop at wainscot height create a different effect.
Width proportion: The panel width should relate to the wall width. Very narrow panels on a wide wall can look busy. Very wide panels on a narrow wall can look overwhelming.
Room scale: Large rooms support larger panels and bolder textures. Small rooms benefit from finer textures and lighter tones.
Consider the panel scale in relation to other elements in the room: furniture, windows, doors, and lighting fixtures.
Budget-Friendly Approaches
Full-wall cladding can be expensive. Several approaches reduce cost while maintaining impact:
Partial-height installation: Cladding panels installed from floor to a moderate height—perhaps 4 to 6 feet—create impact without full-wall material costs.
Accent zone treatment: Install panels only in a specific zone—a section of wall behind a sofa, for example—rather than covering an entire wall.
Combine with lower-cost materials: Use cladding panels as an accent element combined with painted drywall for the remainder of the wall.
Select lighter profiles: Simpler panel profiles cost less than complex textures. A clean shiplap look is less expensive than reclaimed wood.
These approaches allow projects with limited budgets to achieve meaningful material impact.
Making the Statement
Beam cladding panels are a powerful tool for creating wood-tone environments. They extend the beam aesthetic from ceilings to walls, creating spaces that feel unified and designed.
For designers and homeowners seeking to add warmth and character to interiors, cladding panels offer a practical path. The installation is manageable, the maintenance is minimal, and the impact is substantial.
A single accent wall of cladding panels can transform a room, adding the timber warmth that makes spaces feel inhabited and authentic.
Technical References
ASTM standards cited in every specification
Test Data
Lab results from internal testing program
Updated 2026
Reviewed against current product specs


