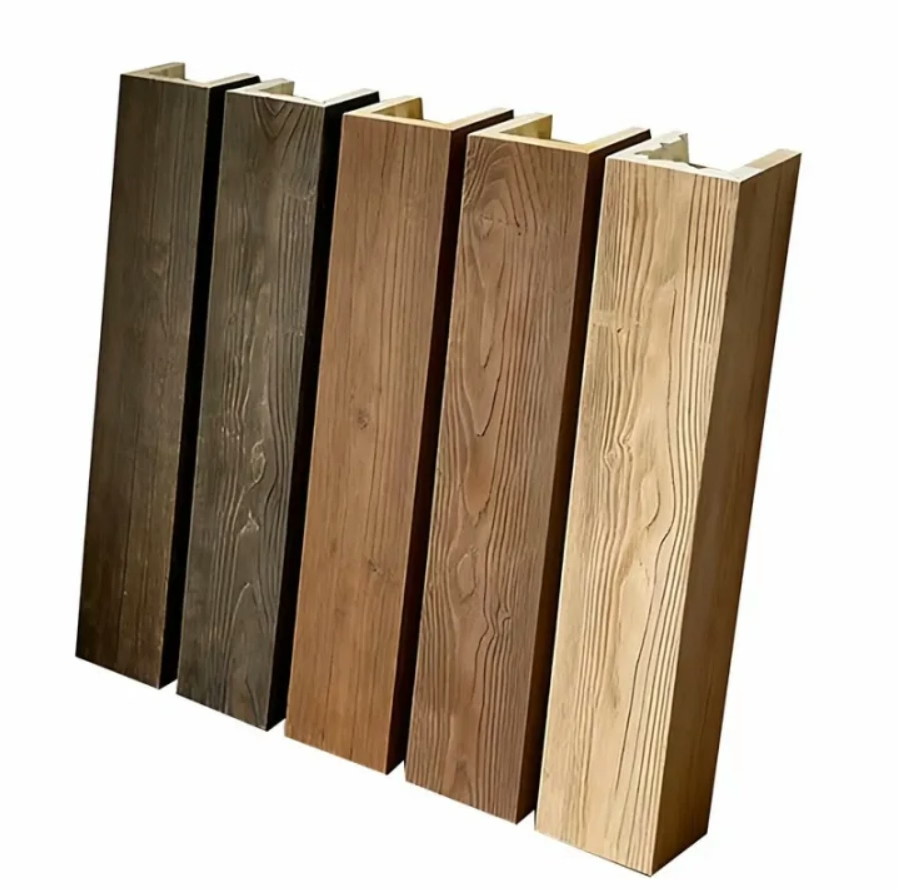
A PU faux wood beam installation is rarely complete with just the beams themselves. To achieve a fully realized architectural detail, a range of matching accessories works alongside the beams to terminate ends, support visual weight, transition to adjacent surfaces, and address the small but important details that distinguish professional work. The availability of well-matched accessories is one of the most significant advantages of working with established PU beam product lines, and understanding what accessories are available and how they are used helps installers and designers achieve results that exceed client expectations.
Corbels, Brackets, and Decorative Supports
Corbels are among the most visually prominent accessories available for faux wood beam installations. These decorative supports are mounted beneath beam ends, typically where a beam meets a wall, post, or column. Functionally, corbels suggest structural load transfer—a beam appearing to be supported by the corbel—but in faux beam applications, they are decorative elements that reinforce the architectural illusion while providing visual weight and richness to the installation.
Corbels are manufactured in the same polyurethane material as the beams and finished in matching colors and textures. Common corbel styles range from simple L-shaped knee braces through classical scrolled designs to rustic hand-hewn styles that complement rough-sawn beam profiles. The selection of corbel style should be coordinated with the beam profile—a smooth, contemporary beam pairs with simpler bracket-style corbels, while rustic distressed beams pair with more elaborately carved decorative corbels.
Installation of corbels requires both adhesive and mechanical fastening to ensure security. Construction adhesive applied to the back and top contact surfaces creates the primary bond, while small screws driven through pre-drilled pilot holes in the corbel into the beam and wall structure provide the mechanical backup. Finish plugs or color-matched filler cover the screw heads, leaving a clean appearance. In many installations, the corbels are installed during the same work session as the beams, allowing the installer to position everything together and verify alignment before final fastening.
End Caps and Beam Terminations
End caps address the visual issue of where a beam terminates against a wall, ceiling plane, or other surface. Without an end cap, the cut end of a hollow beam would be visible, exposing the cross-sectional profile that reveals the beam's interior construction. End caps finish these terminations with a shaped profile that mimics the end of a solid timber beam.
End caps are typically designed to slip over the cut end of the beam and are secured with adhesive and small finishing nails. They are available in matching finishes for all standard beam profiles, and they can be mitered at corners for installations where beams meet walls at 45-degree angles rather than 90 degrees. Some manufacturers offer adjustable end caps that can be trimmed to match the exact wall angle, accommodating the slight variations found in older or non-square buildings.
For installations where beams terminate at the ceiling rather than at a wall, ceiling-mounted end caps provide a horizontal surface for the beam end to meet. These accessories create the appearance that the beam tucks neatly into the ceiling plane, hiding any gap between the beam's top surface and the ceiling structure.
In some design styles, exposed beam ends are desirable, with the cut beam end treated as a visible design feature. In these cases, end caps may not be needed, but the cut edge should be sealed with a matching paint or stain to maintain the finished appearance. Distressed beam installations often leave the beam end slightly rough or weathered-looking, which is consistent with the overall design language and does not require additional finishing.

Trim, Molding, and Transition Pieces
The intersection between a beam and the surrounding wall or ceiling plane is a junction that benefits from careful trim and molding treatment. This is the area where small gaps, uneven alignment, or surface irregularities are most likely to be visible, and properly selected trim pieces can address these issues while contributing to the finished aesthetic.
Beam-to-wall trim is a small molding piece that runs along the joint where a wall-mounted beam meets the wall surface. It covers any gaps caused by minor wall irregularities and creates a clean shadow line that emphasizes the beam's edge. The trim is typically a simple cove or quarter-round profile in matching material, and it is installed with adhesive and finishing nails.
Beam-to-ceiling trim addresses the upper edge where a ceiling-mounted beam meets the ceiling plane. In installations where the beam sits flush against the ceiling, this trim may not be necessary, but in installations where the beam is suspended slightly below the ceiling plane or where the ceiling has minor unevenness, the trim provides a clean transition. Some installers prefer to leave the ceiling side of the beam ungasketed, allowing any small gaps to be filled with caulk rather than a separate trim piece, depending on the desired aesthetic.
Corner blocks and intersection pieces address locations where multiple beams meet at a single point. These occur in coffered ceilings, intersecting beam patterns, and complex ceiling geometries where two or three beams converge. Corner blocks are pre-formed pieces that fill the resulting void at the intersection and provide a continuous finished surface across all beams. Without these pieces, the intersections would need to be hand-finished on site, which is time-consuming and difficult to execute well.
Concealed Mounting Components
While not visible in the finished installation, concealed mounting components are essential accessories that ensure the installation is structurally sound and that the visible elements align correctly. These components include internal mounting brackets, splice plates for joining beams end-to-end, and corner connectors for mitered beam joints.
Internal mounting brackets are the structural interface between the beam and the ceiling or wall structure. They are typically made from galvanized steel and are designed to engage with the pre-formed channels inside the beam. Once the beam is positioned, the bracket is fastened to the ceiling joist or wall stud through the beam's interior, providing a robust and invisible connection.
Splice plates are used when beams must be joined end-to-end to span distances longer than the available beam length. These thin metal or composite plates fit inside the beam channels at the joint, bridging across the junction to maintain alignment and provide additional rigidity. Splice plates are particularly important in installations where thermal expansion or building movement might otherwise cause joints to separate over time.
Corner connectors are used at mitered corners where two beams meet at a 90-degree or other angle. These connectors bridge the joint from the inside, providing both mechanical reinforcement and alignment guidance. They are typically used in combination with adhesive and finishing techniques that hide the joint from view, but their structural contribution is what keeps the miter tight and aligned over the life of the installation.
The complete ecosystem of matching accessories for PU faux wood beam installations reflects the maturity of the product category. From the largest corbels and trims to the smallest finishing plugs, each component plays a role in creating installations that are structurally sound, visually cohesive, and professionally executed.
Technical References
ASTM standards cited in every specification
Test Data
Lab results from internal testing program
Updated 2026
Reviewed against current product specs


