
A coffered ceiling is one of the most demanding beam applications because every component is exposed and every component is visible at the same time. The main beams, the cross-members, the perimeter trim, and the optional accent moldings all sit in the same field of view under the same lighting. If the color shifts even slightly between two pieces — a main beam slightly warmer than a cross-member, a perimeter trim slightly cooler than a corner block — the eye picks it up immediately. The grid that was supposed to look like one solid piece of crafted timber ends up looking like a kit of mismatched parts.
For designers, architects, and contractors, the answer is batch-controlled factory finishing. Every component for a coffered ceiling is finished together, from the same formula, in the same production session, on the same finishing line. The result is a coffered ceiling that reads as one unified architectural element.
Understanding the components of a coffered grid
A typical coffered ceiling has three to five distinct component types. Each needs to match the others in color, sheen, and texture, but each is also shaped differently and requires different finishing handling.
The main beams run in one direction, typically perpendicular to the long axis of the room. They're the thickest and most prominent component.
The cross-members run perpendicular to the main beams and form the grid. They can be the same size as the main beams (for a bold, equal-weight grid) or smaller (for a hierarchical grid where the main beams dominate).
The perimeter trim runs along the ceiling-to-wall junction and frames the entire grid. It often has a different profile from the beams and may have a different visual weight.
Accent moldings — small reveal trims, dentil blocks, lamb's tongue details, or corbel profiles — sit inside each coffer and add a secondary level of detail. These small pieces are easy to overlook in the finishing specification but they're highly visible once in place.
Optional recessed panel inserts fill the coffer space between the beams. These can be flat panels, fabric panels, or a secondary level of flat decorative panels in a contrasting finish.
In a standard 3x3 grid in a dining room, you might have 4 main beams, 3 cross-members per bay (9 bays total = 27 cross-members), 12 perimeter trim pieces, and 36 corner blocks. That's 79 components. A 4x4 grid in a larger room could have 5 main beams, 4 cross-members per bay (16 bays = 64 cross-members), 16 perimeter trim pieces, and 64 corner blocks — 149 components that all need to match.
Why on-site finishing fails at this scale
Field finishing a coffered ceiling is technically possible but practically a nightmare. The problems compound across scale.
The components arrive in different batches from the production line, each batch finished on a different day or even in a different week. The stain mixed on Monday morning and applied on Monday afternoon will have shifted slightly by Friday — the pigments settle, the temperature changes the viscosity, and the cure rate changes. Multiply that across 149 components finished over two weeks and the ceiling develops visible color banding.
Lighting is inconsistent on site. The finishing crew works under the ceiling's natural light during the day and under work lights at night. The same stain looks different under each. By the time the ceiling is done, the main beams were finished on a cloudy Tuesday afternoon and the corner blocks were finished on a sunny Wednesday morning — and they don't match.
Temperature and humidity during cure are uncontrolled on site. The stain tack time varies, the topcoat cure rate varies, and the final sheen varies. A satin finish applied at 15°C reads differently from the same finish applied at 25°C.
Factory finishing eliminates all of this. Every component is finished in the same session, from the same freshly mixed formula, in the same controlled environment, under the same lighting, at the same temperature and humidity. The variation between pieces is held under 1% on a spectrophotometer — invisible to the eye.
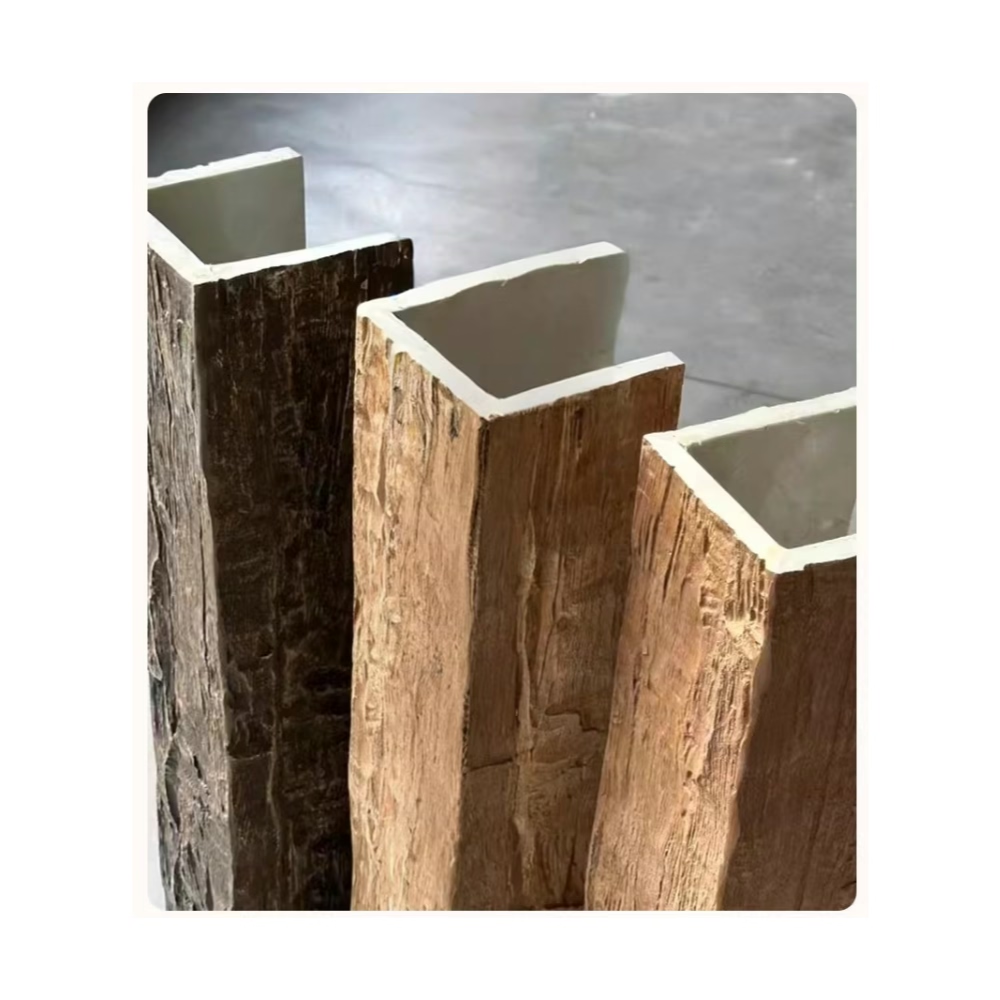
The batch-controlled finishing process
When we receive a coffered ceiling order, we assign a single finishing technician to the entire project. That technician mixes the color formula once at the start of the run and uses it for every component. They apply the base stain, the grain wash, and the glaze in sequence across all components. The sequence and timing matter because the layering builds depth, and the depth depends on consistent application technique.
We document the finishing with photographs of each component type under D65 standardized lighting at three stages: after the base stain, after the grain wash, and after the topcoat. The photographs are archived with the project file. If a replacement component is needed years later, we can reference the original photographs and re-mix the formula.
Within each component type, we finish all the pieces in a single session. For very large projects (more than 150 components), we split the finishing into manageable batches, but each batch uses a freshly mixed formula from the same documented recipe. We never let a batch sit overnight and resume the next day — the formula is discarded and a fresh batch mixed for continuity.
After finishing, the components are separated by type, packed in sequence-numbered crates, and shipped with a layout drawing that matches each crate number to its position in the grid. This makes on-site sorting and installation much faster.
Sample approval workflow for coffered ceilings
For any coffered ceiling project, we strongly recommend a three-step approval process. Skipping steps to save time almost always results in approval delays later, because the designer sees the real ceiling before approving and realizes the color isn't quite what they expected.
Step one is color reference submission. The designer sends a Pantone, a RAL number, a manufacturer's color code, or a physical sample. We create a first-pass formula and apply it to 200 x 200 mm sample chips on the actual beam substrate.
Step two is the full sample chip set. We send chips for all component types — main beam, cross-member, perimeter trim, and accent molding — finished with the same formula. The designer evaluates them under the project's actual lighting and approves or requests adjustments.
Step three is the pre-production sample. We send a 300 x 300 mm section of cross-member and a short piece of main beam (200 mm long) for on-site evaluation. The designer places these on the actual ceiling plane in the actual room and confirms the color reads correctly. If adjustments are needed, they happen before the full production run begins. Once approved, the formula is locked and no further changes are accepted.

Joint treatment at the grid intersections
One of the most critical details on a coffered ceiling is the joint where a main beam meets a cross-member. The intersection needs to look like one continuous piece of timber, not two pieces joined together. There are three standard approaches, each with different visual results and cost implications.
The butt joint with a hidden cleat is the simplest. The cross-member butts into the side of the main beam and is held by a small aluminum cleat hidden inside the main beam. The joint is filled and finished. This approach works well for painted beams where the joint is essentially invisible.
The mitered joint with a spline is better for stained beams. Both pieces are cut at 45 degrees at the intersection, and a small spline block bridges the joint inside the beam. The result is a clean, tight joint that holds its shape over time.
The continuous main beam with cross-members butting into the side is the most expensive approach but produces the best result for premium projects. The main beam runs continuously through the grid, and the cross-members are fitted into the sides. The main beam has pre-molded sockets that receive the cross-member ends.
Lead times and project management
A 9-bay coffered ceiling with 149 components typically runs 30 to 40 days from approved shop drawing to ship-ready. The longest step is the finishing, which takes about 12 days for a multi-tone stain on all component types.
For projects with tight schedules, we offer a fast-track finishing option that adds 18% to the finishing cost but cuts the finishing time in half. Fast track uses a dedicated small team working in parallel on multiple finishing stations.
Send the ceiling plan (in AutoCAD, PDF, or a clear photograph with dimensions), the color reference, the component list if available, and the project timeline, and we'll return a complete finish specification, sample chips for all component types, a production schedule, and a quotation within five business days.

Technical References
ASTM standards cited in every specification
Test Data
Lab results from internal testing program
Updated 2026
Reviewed against current product specs


