
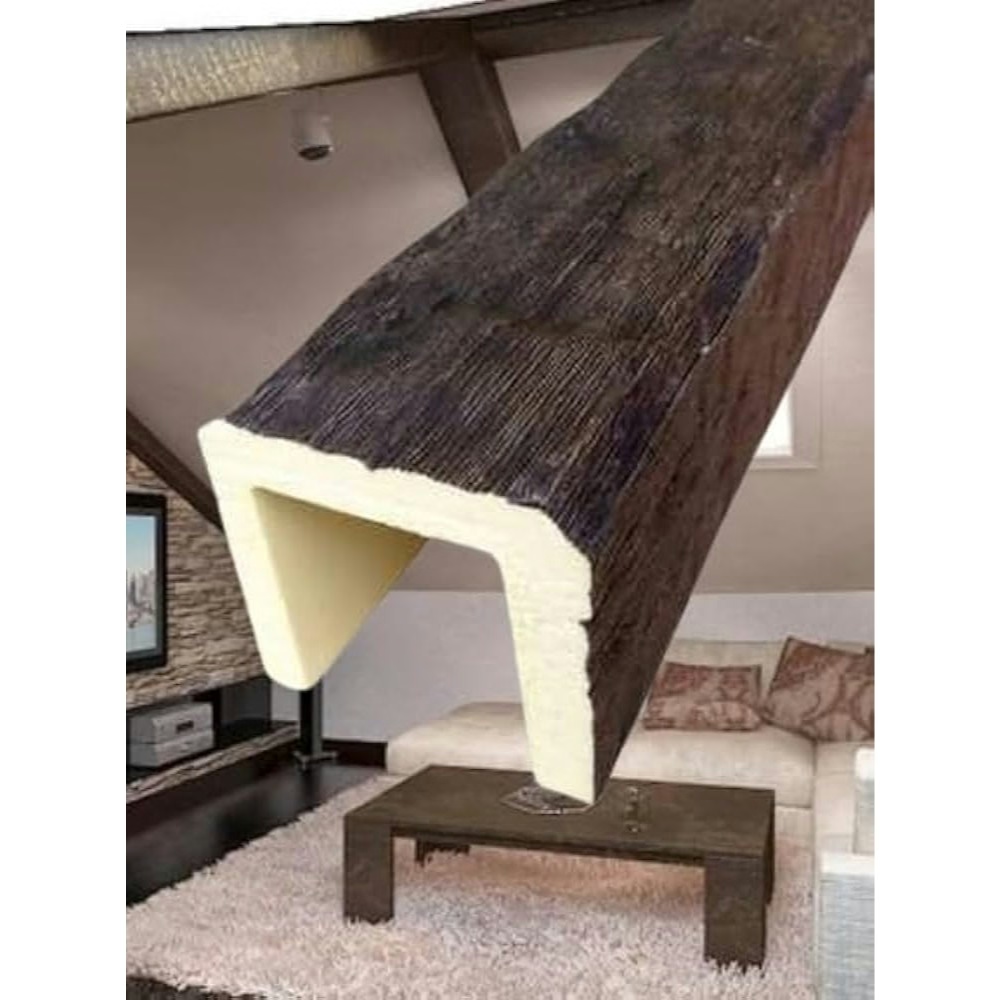
A U-channel beam looks like a beam from one side and an empty channel from the other. The open side faces down or toward a wall, and the channel itself becomes the place to hide LED strips, sprinkler lines, speakers, or the mechanical bits that the ceiling would rather not advertise. Custom curved U-channel polyurethane resin faux timber beams combine that functional profile with the geometry of a curved ceiling, factory-finished and ready to install.
What a U-Channel Profile Solves
Traditional solid beams present a flat face to the room. They are decorative on the bottom and structural-looking on the sides, but they offer no place to put anything else. In modern interiors, the ceiling is asked to do more than hang a chandelier. Lighting is often integrated. Speakers are often in-ceiling. Sprinkler heads need to be somewhere. The result is a clutter of small fixtures that compete with the architectural lines.
A U-channel beam solves this by providing a continuous, integrated raceway along its length. The channel can be sized to accept a specific LED strip profile, a specific speaker depth, or a specific sprinkler line diameter. The beam looks like a solid decorative element from the room side, but it is actually a housing for the building systems.
For curved ceilings — barrel vaults, arched hallways, sculptural features — the channel has to follow the same curve. That is where custom work earns its keep. The mold captures both the curve and the channel profile in a single piece. No field fabrication, no compromise on the geometry.
Common Channel Configurations
U-channel beams come in a few standard configurations, each suited to a different use case.
Down-facing channel for LED. The most common configuration. The channel faces the floor, with the LED strip mounted on a small aluminum track inside the channel. The light washes down onto the wall or the floor below. For a curved beam following a barrel vault, the down-facing channel produces a continuous line of light that traces the curve of the ceiling.
Side-facing channel for accent lighting. The channel faces a wall, with the LED strip illuminating the wall surface. Useful for highlighting textured plaster, stone, or wallpaper along a feature wall.
Outward-facing channel for cove lighting. The channel faces away from the room, with the LED strip hidden behind the beam's lip. The light reflects off the ceiling above the beam, producing a soft indirect glow.
Multi-channel configurations. Some designs call for two channels — one down-facing for primary lighting, one side-facing for accent. Custom PU molds can capture multiple channels in a single beam.
Hollow channel for mechanical runs. In commercial applications, the U-channel can house low-voltage wiring, speaker cables, or even small-diameter sprinkler lines. The beam becomes a decorative cover for systems that have to run along the ceiling anyway.
Sizing the Channel
The channel width and depth need to be specified alongside the beam profile. The factory cannot guess at the channel size because the LED strip, the speaker, or the sprinkler line has a specific physical dimension.
For LED integration, the most common channel dimensions are 12 millimeters wide by 8 millimeters deep (for standard LED strip), 20 millimeters wide by 12 millimeters deep (for higher-output strip), or 30 millimeters wide by 15 millimeters deep (for linear LED fixtures with built-in drivers). The beam channel needs to accommodate these dimensions plus a small clearance for installation.
For speaker integration, the channel depth usually needs to be at least 80 millimeters, with a width of 100 to 150 millimeters to accept a typical in-ceiling speaker. The beam profile around the channel may need to be deeper to maintain the visual proportion of the beam.
For mechanical runs, the channel dimensions are dictated by the systems running through it. The factory should be given the systems' outer diameters plus a 20 to 30 percent clearance for installation and future service.
Curving the Channel
The curved channel is the technical challenge that makes custom U-channel work different from a straight run. The LED strip, the speaker, and the sprinkler line all want to follow the curve, and the channel has to accommodate that without binding or kinking.
For LED strips, this is straightforward. Modern LED strip is flexible enough to follow a 2-meter radius without issue. The channel provides the physical track, but the LED strip itself does the curving.
For speakers, the curve is more demanding. A 2-meter radius channel can accept a standard in-ceiling speaker, but the speaker's mounting flange has to be adapted to the curved surface. Most U-channel beam factories offer a flat speaker adapter ring that mounts to the curved channel and provides a flat surface for the speaker. The adapter is part of the factory order, not a field improvisation.
For sprinkler lines, the curve has to accommodate the pipe's minimum bend radius. A 25-millimeter diameter sprinkler line, for example, has a minimum bend radius of about 75 millimeters. A U-channel beam following a 1-meter radius curve has no problem with this, but a tighter curve could conflict with the pipe's bending requirements.
Finish and Aesthetic
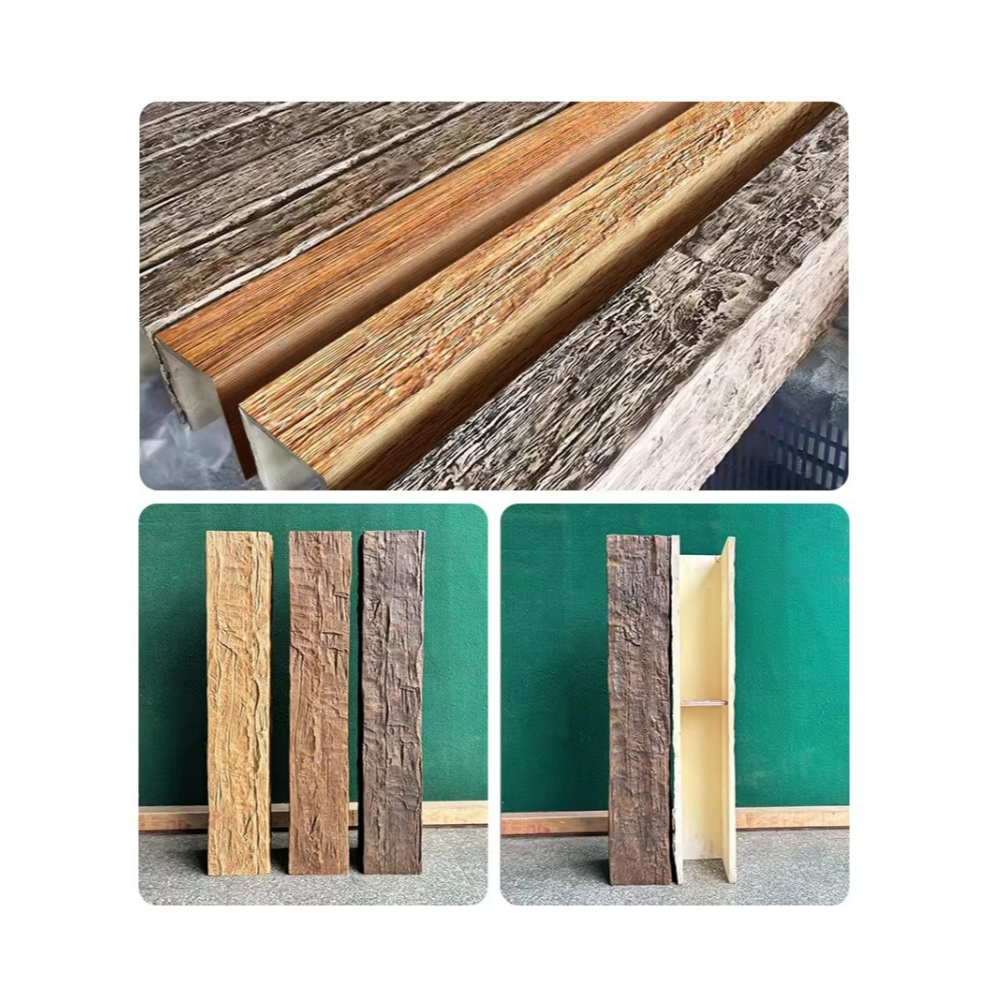
The finish on a U-channel beam follows the same principles as a solid beam, with one additional consideration: the channel itself may need to be finished or left natural, depending on the application.
For LED channels, the inside of the channel is usually painted matte black or white to control light reflection. A glossy interior finish can produce unwanted hot spots or color shifts in the LED output. The factory applies the channel finish separately from the beam finish, using a paint that is compatible with the PU resin substrate.
For mechanical channels, the interior is often left natural or painted in a neutral tone that does not show through any gaps in the trim. The beam finish on the visible faces matches the surrounding millwork.
For decorative channels that are meant to be seen — a channel filled with decorative glass, a channel displaying small objects, a channel used as a shadow gap — the finish can be specified to match or contrast with the beam face.
Installation Specifics
A U-channel beam installs in two phases. The first phase is the mechanical rough-in. The LED strips, the speakers, or the sprinkler lines are mounted to the ceiling or to a backing track, with their wiring or piping run to the appropriate termination points. The second phase is the beam installation. The U-channel beam is then mounted over the rough-in, with the channel capturing everything in place.
For LED integration, the second phase includes connecting the LED strip to its driver, which is usually located in a remote location. The wiring passes through the channel and out the end of the beam into the ceiling cavity.
For speaker integration, the speaker wires pass through the channel to the speaker location. The speaker itself mounts to the adapter ring after the beam is in place. The grille then covers the speaker and the adapter, leaving only a small visible disc on the beam face.
For mechanical runs, the pipe or conduit enters the channel at one end and exits at the other. The beam is essentially a decorative cover for the mechanical system, with the system doing its work behind the visible face.
Where U-Channel Beams Make Sense
U-channel beams are not the right answer for every ceiling. For a traditional library or a formal dining room, a solid beam profile is more appropriate. But for modern interiors, hospitality spaces, retail environments, and any project where the ceiling is asked to integrate lighting and technology, the U-channel profile is the cleanest path.
For curved U-channel work, the combination of geometry and integration is what custom PU resin delivers best. The beam follows the curve. The channel follows the curve. The lighting, the speakers, or the mechanical systems follow the channel. The result is a ceiling that looks like architecture and works like infrastructure.
Technical References
ASTM standards cited in every specification
Test Data
Lab results from internal testing program
Updated 2026
Reviewed against current product specs


