
The beam looks perfect. The finish is right, the grain runs correctly along the inner curve, the dimensional tolerance is within spec. And then the installer opens the crate and realizes there's a problem: the standard L-brackets don't fit the curved mounting surface. The beam's inner face meets the ceiling at an angle, not a flat plane, and a flat bracket creates a gap.
This is the installation problem that no one talks about until it happens. Curved beams present mounting challenges that straight beams don't. The solutions exist, but they have to be designed and fabricated before the beams arrive on site.
Why curved beams need custom brackets
A straight beam has a flat mounting surface — the inner face of the beam is a plane, and any flat mounting bracket seats against it cleanly. A curved beam has a compound mounting surface — the inner face is a section of a cylinder, cone, or sphere, and a flat bracket can only contact it at one point or along one line.
The gap between a flat bracket and a curved mounting surface isn't just cosmetic. It's a structural problem. PU faux beams are lightweight — typically 3 to 8 kg per linear meter, depending on the cross-section — but they're not structural members. They're decorative. They rely on the building structure for support, and the support has to be continuous along the length of the beam.
If the bracket doesn't seat fully, the beam's weight isn't transferred to the building structure correctly. The beam can shift, crack, or fall. In a commercial installation — a hotel lobby, a restaurant dining room — that's a liability issue.
Custom mounting bracket kits solve this by matching the bracket geometry to the beam's mounting surface. The bracket is bent, formed, or machined to the exact curvature of the beam's inner face, so it seats fully and transfers the load correctly.
What a custom bracket kit includes
A complete custom mounting bracket kit for a curved PU beam project typically includes three to five component types:
Structural mounting plates
The primary load-bearing component. Mounting plates are attached to the building structure — either to ceiling joists, roof trusses, or supplementary blocking — with structural screws or lag bolts. The plate surface that receives the beam is cut or formed to match the beam's mounting curvature.
For a barrel vault beam with a constant radius, the plate surface is a constant-radius curve. For a parabolic vault with a changing radius, the plate surface has to follow the parabola precisely. This is where the geometry gets complex and where custom fabrication is essential.
Mounting plates are typically made from structural steel (3 to 6 mm thickness) or aluminum (5 to 10 mm thickness), hot-dip galvanized or powder-coated for corrosion resistance. The thickness and size of the plate depend on the beam weight and the spacing between attachment points.
Beam clips or cleats
The component that attaches the beam to the mounting plate. Beam clips are typically L-shaped or Z-shaped steel pieces that wrap around the beam's top edge and hook onto the mounting plate. The clip is concealed behind the beam's top face when the beam is installed.
For curved beams, beam clips are usually fabricated as short curved sections that match the beam's curvature at each mounting point. A 6-meter barrel vault beam might have 8 to 12 mounting points, each with its own curved clip.
Beam clips are designed for removal — the beam can be lifted off the clips if it needs to be removed for maintenance or replacement. The clips are not welded or permanently fastened to the beam.
Joining brackets for multi-piece beams
Long curved beams that ship in multiple pieces require joining brackets to connect the sections. A joining bracket is a concealed steel plate that spans the joint between two beam sections, screwed to the back of each section, and hidden by the beam's interior surface when installed.
Joining brackets are designed for on-site assembly. The two beam sections are brought together, the joining bracket is slipped over the joint from above, and the bracket is screwed to each section. The joint is covered by the wood grain texture and is invisible when the beam is finished.
Supplementary support for heavy beams
For beams with large cross-sections (over 250 mm in any dimension) or for beams installed in seismic-rated structures, supplementary support components are required. These can include:
- Through-bolts: Long bolts that pass through the beam and the mounting plate, secured with nuts on the visible face (concealed under a wood plug or decorative cap)
- Steel armatures: Internal steel structural members that extend through the length of the beam and bolt to the building structure at each end
- Gusset plates: Triangular steel plates that reinforce the beam at points of high stress, such as the springing points of a vault
Supplementary support adds cost and complexity but is essential for heavy-beam installations and for projects where building code requires seismic or wind load certification.
Installation hardware
The fasteners and washers that complete the kit. Typically included:
- Structural screws or lag bolts for mounting plate attachment to building structure
- Machine screws for beam clip attachment to mounting plate
- Washers and lock washers for all bolted connections
- Wood screws for beam-to-clip attachment (used in some clip designs)
- Threaded inserts for applications where beams need to be removable
The installation hardware should be specified by a structural engineer or calculated based on the beam weight, the spacing, and the applicable building code requirements.
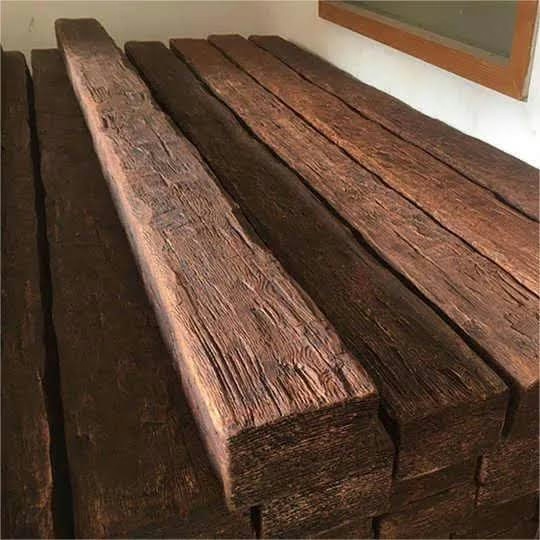
How bracket kits are designed and fabricated
Custom bracket kit design starts with the beam geometry. The factory or a specialist hardware supplier needs:
- Beam cross-section dimensions: Width and height of the beam profile
- Beam length or arc length: For a curved beam, the actual curved length, not the chord length
- Inner curve radius: The radius of the beam's inner mounting surface
- Mounting point locations: Where along the beam the brackets will be placed
- Ceiling structure specification: The type and spacing of ceiling joists or roof trusses that the brackets will attach to
With this information, the bracket supplier designs each component to match the beam geometry. The design is reviewed against the building structure and any applicable load requirements, and then the components are fabricated.
Fabrication methods depend on the component:
- Bending and forming: For simple curved plates, the steel or aluminum is bent on a press brake with a custom curved die. This is the fastest and cheapest method for constant-radius curves.
- CNC cutting and welding: For complex geometry or compound curves, the plates are CNC-cut from flat stock and welded to the correct shape. This is slower and more expensive but produces precise geometry.
- Investment casting: For high-volume orders, brackets can be investment-cast in steel or stainless steel for a clean surface finish and consistent geometry. The tooling cost is high but the per-unit cost is low.
Specifying a bracket kit: what to tell the supplier
A complete bracket kit specification should include:
Beam geometry details
Provide the beam's cross-section drawing, the radius (or radii for a compound curve), and the beam length. If the beam has any special features — a flat mounting face despite a curved outer profile, a stepped cross-section, an unusual material — note those.
Load requirements
What's the weight of the beam per linear meter? What spacing between mounting points is planned? Is the installation in a seismic zone or a high-wind area? What is the applicable building code?
Ceiling structure details
What is the ceiling structure made of — wood joists, steel trusses, concrete slab, or something else? How are the joists or trusses spaced? Is there existing blocking, or does the bracket kit need to include blocking material?
Finish requirements
Standard bracket kits are hot-dip galvanized for corrosion resistance. If the brackets will be visible — which is rare, but happens in some industrial-style installations — they can be powder-coated to match the beam finish. Specify any visible-finish requirements.
Quantity
How many beams, and how many mounting points per beam? A standard spacing is every 600 to 900 mm along the beam's arc length, but the spacing may be tighter at the ends or at points of high stress.

Common bracket kit configurations
| Beam type | Typical mounting points | Bracket configuration | Notes |
|---|---|---|---|
| Barrel vault, constant radius | 6-12 points | Constant-radius curved plates and clips | Simplest curved bracket design |
| Parabolic vault, varying radius | 8-16 points | Per-point custom curved plates | Each mounting point has unique radius |
| Gothic arch | 4-8 points per rib | Angled plates at springing, flat at apex | Most complex bracket geometry |
| Multi-rib intersection | 4-8 points per rib + center | Radial plates at center boss | Requires precision engineering |
| Suspended curved beam | 2-4 points, aircraft cable | Straight plates with rod hanger | Beam hangs below structural support |
Installation considerations
Custom bracket kits arrive on site pre-fabricated to the beam geometry, but the installation still requires careful execution.
The ceiling structure must be prepared before the beams arrive. Blocking must be installed at each mounting point. The mounting plates must be positioned accurately — any error in plate placement shows up as a gap between the plate and the beam.
A laser level or string line is essential for curved beam installation. The beam's curve has to be established and followed throughout the installation. Bracket kits are typically installed one section at a time, working from one end of the beam to the other.
For multi-piece beams, the joining brackets are installed before the beam sections are lowered onto the mounting plates. The joint is checked for alignment and corrected before the clips are fastened.
Professional installers with curved beam experience can complete a typical barrel vault installation — 8 to 12 beams, each 4 to 6 meters long — in one to two days. First-time installers should plan for three to four days and budget for at least one day of on-site adjustment.
Custom mounting bracket kits add cost to a curved beam project. The kits themselves typically run $15 to $50 per mounting point, depending on complexity and material. For a 10-beam barrel vault installation with 10 mounting points per beam, that's $1,500 to $5,000 in hardware. It's a real cost, and it should be included in the project budget from the start. Skipping it — or substituting standard flat brackets — is a false economy that leads to callbacks, repairs, and liability.
Technical References
ASTM standards cited in every specification
Test Data
Lab results from internal testing program
Updated 2026
Reviewed against current product specs


