
One of the key advantages of polyurethane as a faux timber substrate is its ability to accept stain. Unlike some composite materials that require factory-applied finishes, polyurethane takes wood stain reliably and predictably. Custom stainable polyurethane faux beams let designers and their clients choose the exact color they want, from a precise match to an existing timber to a color that exists only in their imagination. This article explains how the staining process works, what affects the final color, and how to specify and maintain a stained finish.
Why Polyurethane Takes Stain Well
Wood stain works by penetrating the surface of the substrate and coloring the material below. Natural wood has open pores and cell walls that absorb stain unevenly, creating the grain pattern. Polyurethane foam has a similar ability to absorb stain: the pigment carriers in the stain soak into the foam surface and bond with the resin.
The surface preparation is critical. A properly sanded polyurethane surface (grit 120-180) has microscopic pores and a slightly rough texture that allows the stain to grip. Our factory finishing process always includes a de-glossing step and a pre-stain sealer for stainable beams.
Types of Stain That Work on Polyurethane Beams
Not all wood stains are formulated the same way. The following stain types work well on polyurethane.
Gel stain. The most forgiving stain type for polyurethane. Gel stains are thick, pigment-suspended formulations that sit on the surface rather than soaking in deeply. Recommended for on-site touch-up and for projects where the installer applies the final stain.
Standard liquid stain (oil-based). Penetrating oil-based stains work well on polyurethane and produce a more natural, wood-like result than gel stains. They require more careful application technique because they soak in quickly and can produce lap marks if not applied consistently.
Standard liquid stain (water-based). Water-based stains are lower odor and faster drying than oil-based, but they raise the grain of the polyurethane surface slightly. A light sanding after the first coat helps.
Spray stain. Airless or conventional spray application produces the most even result, particularly on textured surfaces where brush or wipe application can leave inconsistent coverage in the grain valleys. Spray stain is the factory method for our standard stained finishes.
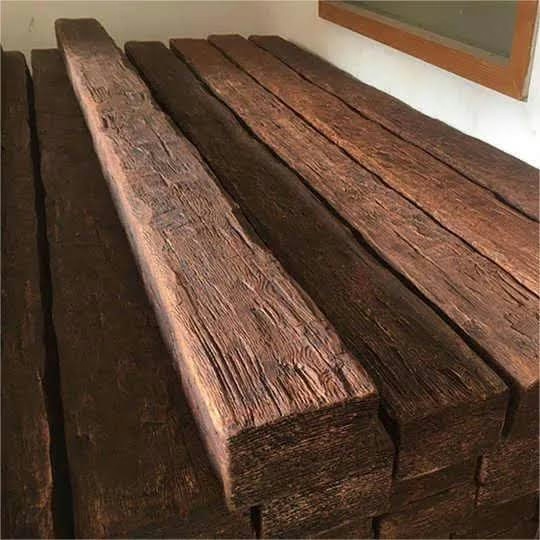
The Factory Staining Process
Our factory staining process follows these steps. Surface prep: the beam is sanded with 120-grit, then 180-grit. Pre-stain sealer: a thin sealer coat is applied to equalize surface absorption and prevent blotchiness. First stain coat: applied by spray gun for even coverage. Wipe or second coat: depending on the target color depth, a second coat may be applied or the first coat may be wiped. Drying: stain is allowed to cure for a minimum of 24 hours before topcoat is applied. Topcoat: a clear satin or semi-gloss topcoat seals the stained surface.
Color Matching for Custom Stainable Beams
Custom color matching is one of the most valuable features of stainable beams. We match to physical samples (the most reliable method), Pantone or RAL numbers for paint-like colors, NCS or Japanese Color Standard for Asian markets, and photographs (the least reliable method, used only as a starting point confirmed with physical samples).

Durability and Maintenance
A properly applied stain finish on polyurethane beams is durable for interior use. The clear topcoat provides abrasion resistance, UV fade resistance, water and stain resistance, and easy cleaning with mild detergent. Periodic maintenance involves cleaning with a soft cloth and mild detergent. Do not use abrasive cleaners or solvents on stained beams.
Technical References
ASTM standards cited in every specification
Test Data
Lab results from internal testing program
Updated 2026
Reviewed against current product specs


