
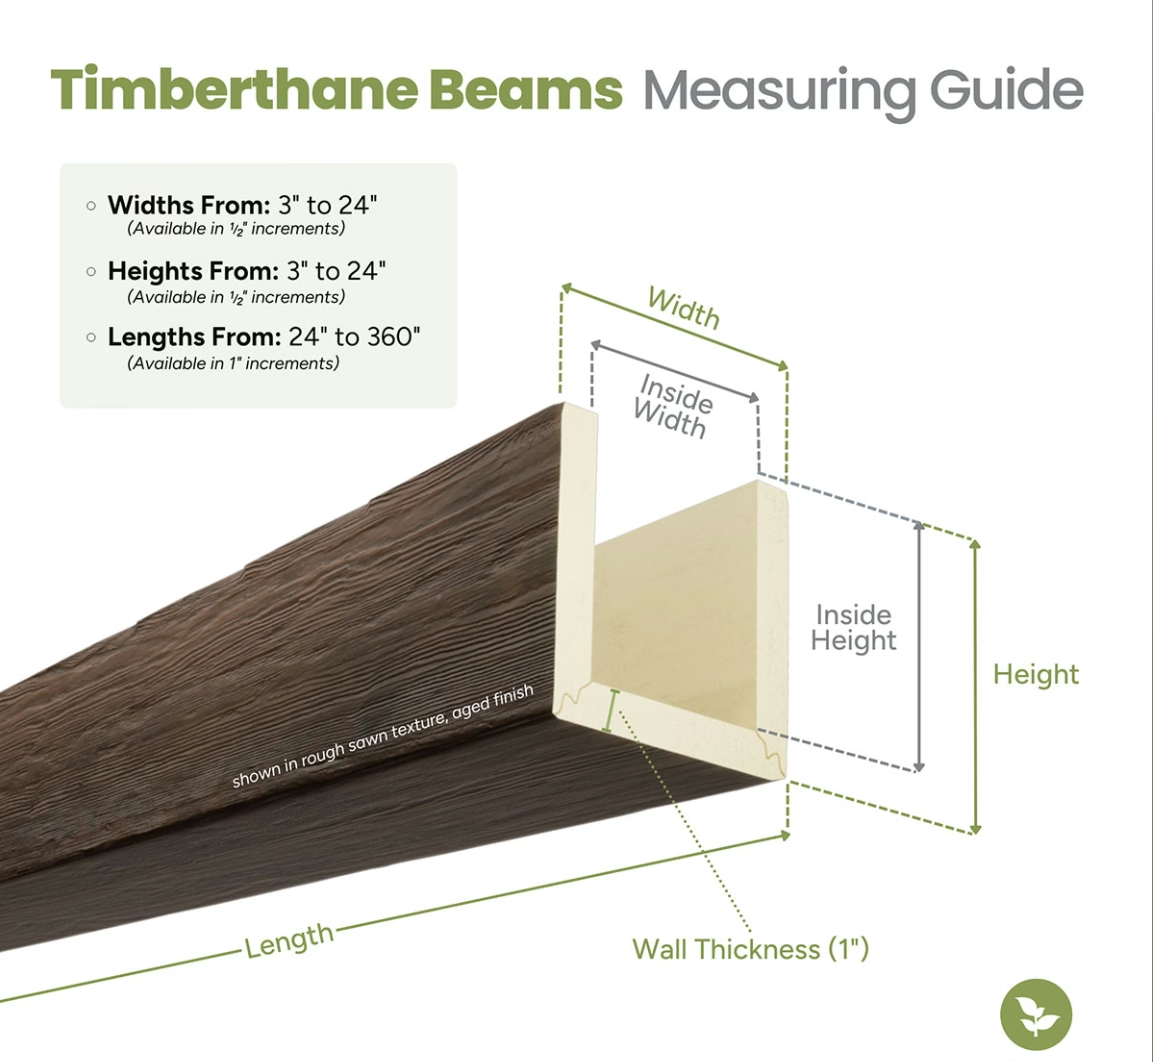
A hollow-shell faux wood beam is exactly what it sounds like: a beam with an empty interior, cast in one piece, with walls typically 5mm to 8mm thick depending on the profile size. The shell is rigid enough to span standard ceiling distances without internal support, but cutting one to a custom length on-site raises a practical question that matters for installation quality: what happens to the shell's structural integrity when you cut through it?
The answer is: it depends on how and where you cut, and whether you reinforce the cut end. Done properly, a field-cut hollow shell beam performs identically to a factory-cut one. Done carelessly, it can crack, compress, or fail under load. Here's what the field-cutting process looks like and how to get it right.
Understanding the hollow shell structure
Most polyurethane faux beams are hollow shells with internal structural ribs at regular intervals. The ribs are part of the original cast — they're not added after the fact. When the foam is poured into the mold, the rib geometry is built into the mold itself.
The rib spacing varies by beam size and by our specific production specifications, but it's typically every 24 to 36 inches along the beam length. The ribs serve two purposes: they prevent the long hollow shell from collapsing under its own weight during demolding and handling, and they provide screw-holding capacity at the mounting points.
When you cut a hollow-shell beam, you're cutting through the outer shell and potentially through one of these internal ribs. The cut face, after the cut, has no structural integrity at the end grain — the foam is compressible and doesn't hold fasteners well across the end grain. The structural strength comes from the shell walls and the internal ribs ahead of the cut line.
Where to cut
The best place to cut a hollow-shell beam is at a point that falls between the internal ribs, not through one. When you cut through a rib, you remove the screw-holding structure at the very point where you need it most — the end of the beam.
If you must cut through a rib (because the beam length falls in an awkward spot), the solution is to add a supplementary mounting block — a solid piece of polyurethane or wood that is adhered and screwed inside the beam at the cut end, replacing the structural capacity of the removed rib.
For beams longer than the needed length, the standard recommendation is to order the beam a few inches longer than needed, then cut it to exact length in the field. This gives you the flexibility to place the cut at a point between ribs.
Our production team can mark rib locations on request for beams ordered with anticipated field cutting in mind. We include a rib location card that shows where each internal rib falls relative to the beam ends. This takes the guesswork out of field measurement.
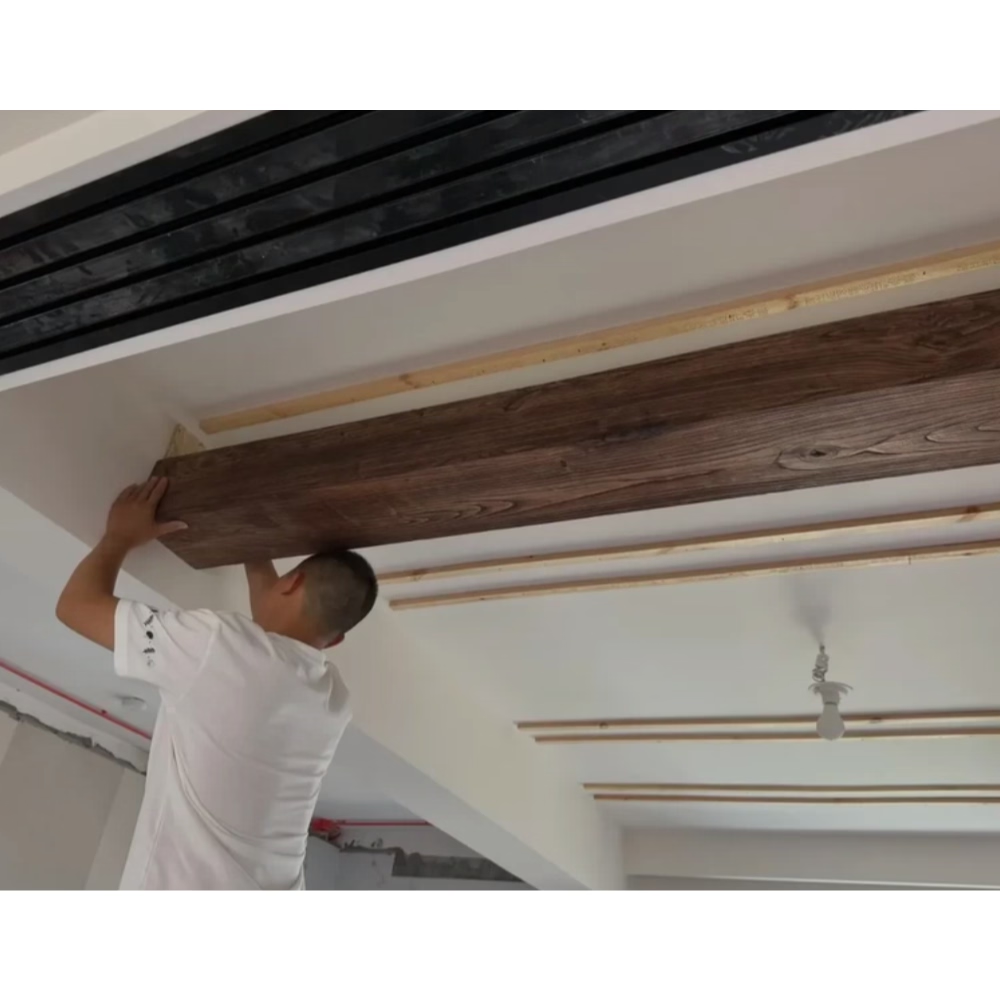
How to cut without damaging the shell
Use a fine-tooth blade — 10 to 12 TPI for a hand saw, 80+ teeth for a miter saw. A coarse blade tears material and compresses the foam ahead of the cut line, weakening the shell near the cut.
Support the beam so that the cut line is directly over a support surface or free-floating, not resting on the floor where the blade will hit the ground partway through. Ideally, clamp the beam to a saw table or workbench with the cut line extending beyond the support edge.
Cut in a single continuous motion if possible. Stopping and restarting a cut can leave step marks on the cut face.
For the cleanest cut on a hollow-shell beam, use a circular saw or miter saw with a blade designed for plastics or non-ferrous metals. These blades have a high tooth count and are designed to prevent material from welding to the blade teeth, which can happen with a standard wood blade when cutting at high speeds.
Reinforcing the cut end
After cutting, the cut end of a hollow-shell beam needs to be sealed and reinforced. The exposed foam at the end grain is the weakest part of the beam.
Seal the end grain with a thin coat of PVA wood glue or polyurethane construction adhesive. This consolidates the foam surface and prevents moisture intrusion. Let it dry for 30 minutes before handling.
For mounting the beam, the screws go into the shell walls on either side of the beam face, not into the end grain. The shell walls are the structural elements; the end grain provides no meaningful holding power. A screw driven into the end grain of polyurethane foam will strip out under torque.
At the cut end, add two screws through the shell walls near the bottom corners, angled slightly inward, into a wood block or solid polyurethane block that you've adhered inside the beam. This replaces the rib that was removed by the cut.
Installing field-cut beams
The installation process for field-cut beams is the same as for factory-cut beams, with one additional step: confirm the beam is level before fully tightening the mounting screws. A beam that's cut slightly off-square will appear crooked once installed, and the error is more visible on a cut end than on a factory-finished end.
If the beam terminates at a wall, use a construction adhesive on the back of the beam as well as mechanical fasteners. The adhesive creates a continuous bond along the full length; the screws provide the initial hold while the adhesive cures.
For beams that meet at corners or intersect, the field-cut ends need mitered or square cuts depending on the joint design. Mitered cuts on hollow-shell beams require careful sealing of the interior at the miter — otherwise the joint looks open from certain angles. A bead of caulk or adhesive run along the interior of the miter before assembly solves this.
Custom sizing for non-standard ceiling dimensions
The reason field cutting matters is that non-standard ceiling dimensions are common. Ceilings are rarely exactly 10, 12, or 16 feet. A room might be 13 feet 6 inches across, or have a beam run that needs to account for a light fixture or a vent register in the way.
Custom sizing — ordering the beam to the exact measured dimension — is always preferable to field cutting. When you order from our factory, we cut to your exact dimension with the ends finished to the same quality as the rest of the beam. But when field cutting is unavoidable — because the measurement wasn't available at order time or because site conditions changed — the process above gives you a result that performs.
For importers stocking beams for retail distribution, we recommend keeping a small inventory of standard-length beams (8, 10, 12 feet) and offering a cut-to-length service. This serves the majority of customers who need non-standard lengths without requiring the importer to maintain inventory at every conceivable length.
The cut-to-length service can be done at the distributor's warehouse using the same tools and techniques described above. The cost is minimal — just labor and a small material loss from the cut kerf — and it dramatically improves the product's fit in the market.
Hollow shell integrity and structural performance
The hollow-shell construction of polyurethane faux beams is not just a manufacturing convenience — it is a structural design that is optimized for the beam's intended use as a decorative element.
The internal ribbing provides torsional rigidity — resistance to twisting — that a smooth-walled hollow tube would lack. The ribbing also provides screw-holding capacity at the mounting points, where the fasteners engage the foam directly. Without ribbing, a screw driven into the hollow shell wall would have poor holding power because the thin wall would flex under torque.
The wall thickness of a hollow-shell beam is calibrated to balance weight against structural performance. A thicker wall is stronger but heavier and uses more material. A thinner wall is lighter and cheaper but may not provide adequate screw-holding capacity. Our production specifications represent the optimized balance for standard residential and commercial applications.
For applications with exceptional loads — beams supporting a heavy chandelier, beams used as a mantel shelf, beams in a seismic zone — our engineering team can evaluate the specific requirements and recommend an appropriate reinforcement specification.
Measuring for custom-cut hollow beams
The key to a successful field-cut installation is accurate measurement. For hollow-shell beams, the measurement process has a few specific requirements beyond the standard measuring best practices.
Measure the ceiling, not the beam. The beam length must match the ceiling dimension minus any terminations. If the beam will terminate at a wall with an end cap, subtract the end cap thickness (typically 1/2 to 3/4 inch per end) from the measured wall-to-wall dimension.
Measure at the beam height, not at eye level. Ceiling dimensions can vary slightly between the floor and the ceiling due to wall irregularities. The measurement at beam height — reached with a ladder — is the most accurate.
Measure both ends of the span. If the span is more than 10 feet, measure at both ends. If the two measurements differ, use the shorter one and plan to pack the gap at one end with a shim or trim piece.
Account for the mounting hardware. The mounting brackets or clips add height to the beam installation. The beam must clear any obstructions (light fixtures, HVAC grilles) by the mounting hardware height plus a small clearance.
For beams that must navigate a tight corner on the way to the install location, the measurement process is more complex. In addition to the straight-line span length, you may need to measure the access route: the width of the corridor or stairwell, the angle of any turns, and the clearance at each corner. A 14-foot beam may not fit in a room accessible only by an 8-foot-wide hallway with a 90-degree corner.
Field reinforcement of cut hollow beams
When a hollow-shell beam is cut to length, the internal rib at the cut end is removed. This creates a structural weakness at the beam's most vulnerable point: the end.
The field reinforcement process for a cut hollow beam:
- Cut a block of solid polyurethane or hardwood to fit inside the beam cavity at the cut end. The block should be 4 to 6 inches long and fit snugly.
- Apply construction adhesive to the block and insert it into the beam cavity, positioning it flush with the cut end.
- Allow the adhesive to cure fully (24 hours).
- Drill two pilot holes through the shell wall on each side of the beam face, near the bottom corners, angled slightly inward toward the block.
- Drive two screws through each side wall into the block.
- Seal the screw heads and the joint between the block and the shell wall with adhesive or spackling compound.
- Sand smooth and apply finish touch-up.
The reinforced end has adequate structural capacity for standard mounting applications. For beams that will support significant weight at the end, a steel gusset plate or angle bracket is a more robust solution.
The economics of cut-to-length service
For distributors and retailers, offering a cut-to-length service alongside stocked standard-length beams is economically attractive for several reasons.
The service allows a smaller inventory — one length (say, 12 feet) can be cut to produce 8, 9, 10, or 11-foot pieces, covering the most common lengths without stocking each length separately. The inventory savings are significant when measured in warehouse cost per linear foot.
The service adds value to the customer. A customer who needs a 9-foot beam but can only find 8-foot and 12-foot stock will pay a premium for the cut-to-length service rather than searching for a different supplier. The margin on a cut-to-length service is higher than the margin on a stocked item.
The equipment required for a cut-to-length service is minimal: a power miter saw or circular saw, a sharp blade, a measuring tape, and a workbench or saw table. The labor time is approximately 5 to 10 minutes per cut. With a reasonable hourly labor rate, the cost of the service is well below what customers are willing to pay.
We provide a cut guide and finishing reference to distributors who want to offer this service, including recommendations for blade selection, cut speed, and edge finishing.
Technical References
ASTM standards cited in every specification
Test Data
Lab results from internal testing program
Updated 2026
Reviewed against current product specs


