
A ceiling cladding renovation is one of the most satisfying projects a contractor can take on. Stripping away old drywall or plaster reveals the structural bones of the room, and those bones can be reshaped with faux wood beam elements into something far more interesting than a flat painted surface.
The key to a successful ceiling cladding renovation is treating the beam elements as an integral part of the cladding system rather than an afterthought. When beams are specified early in the design phase, the cladding material, the beam profile, and the finish can all be coordinated to create a cohesive visual result. When beams are added at the end of a project, they tend to look like they were bolted on after the fact.
The Renovation Window
A ceiling cladding renovation typically happens when the space is gutted for other reasons: a kitchen remodel, a basement development, an attic conversion, or a whole-home renovation. At that stage, the joists are exposed and accessible, which is the ideal moment to install blocking and plan the beam layout.
If the joists are already covered with drywall or plaster, adding beams requires either opening the ceiling to attach blocking or using surface-mount systems that do not require joist access. Surface-mount systems are viable but less clean, which is why most designers prefer to spec beams during the renovation window when the ceiling is open.
Types of Faux Beam Elements for Cladding
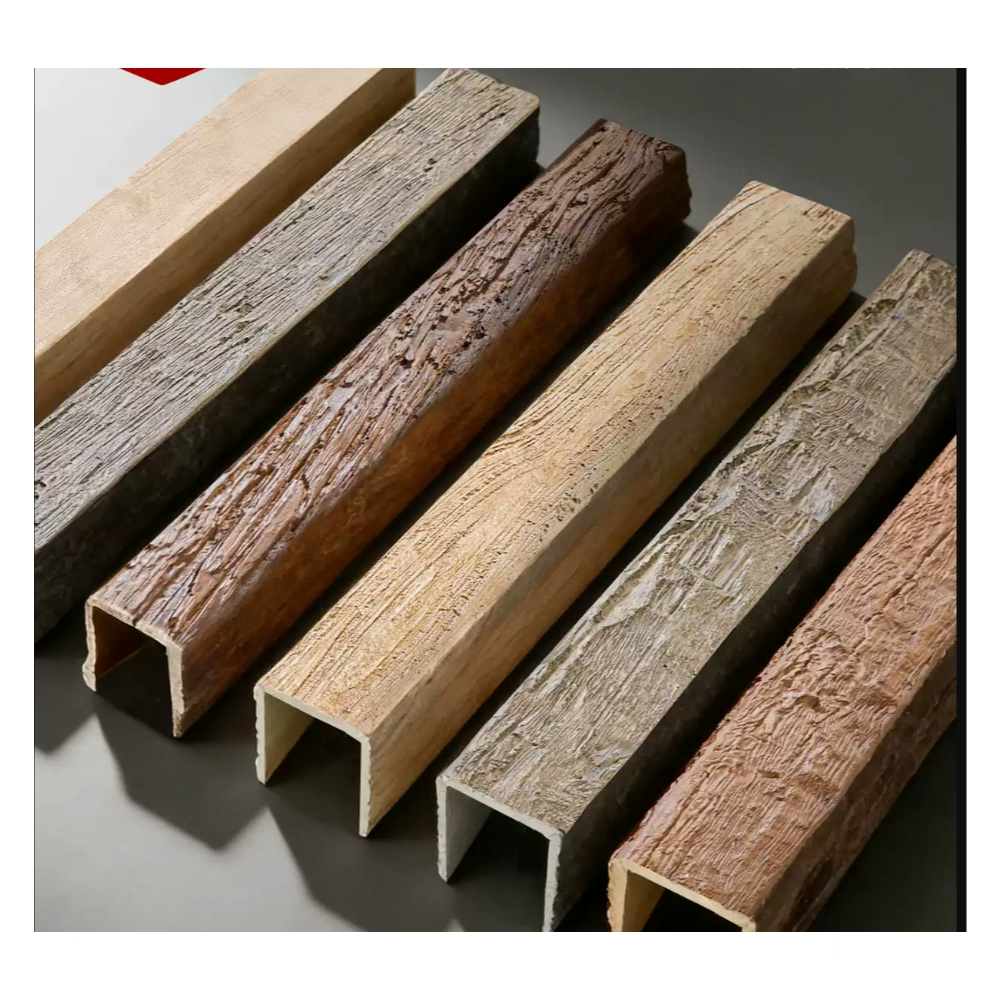
There are four main types of faux beam elements used in ceiling cladding, and each serves a different visual function.
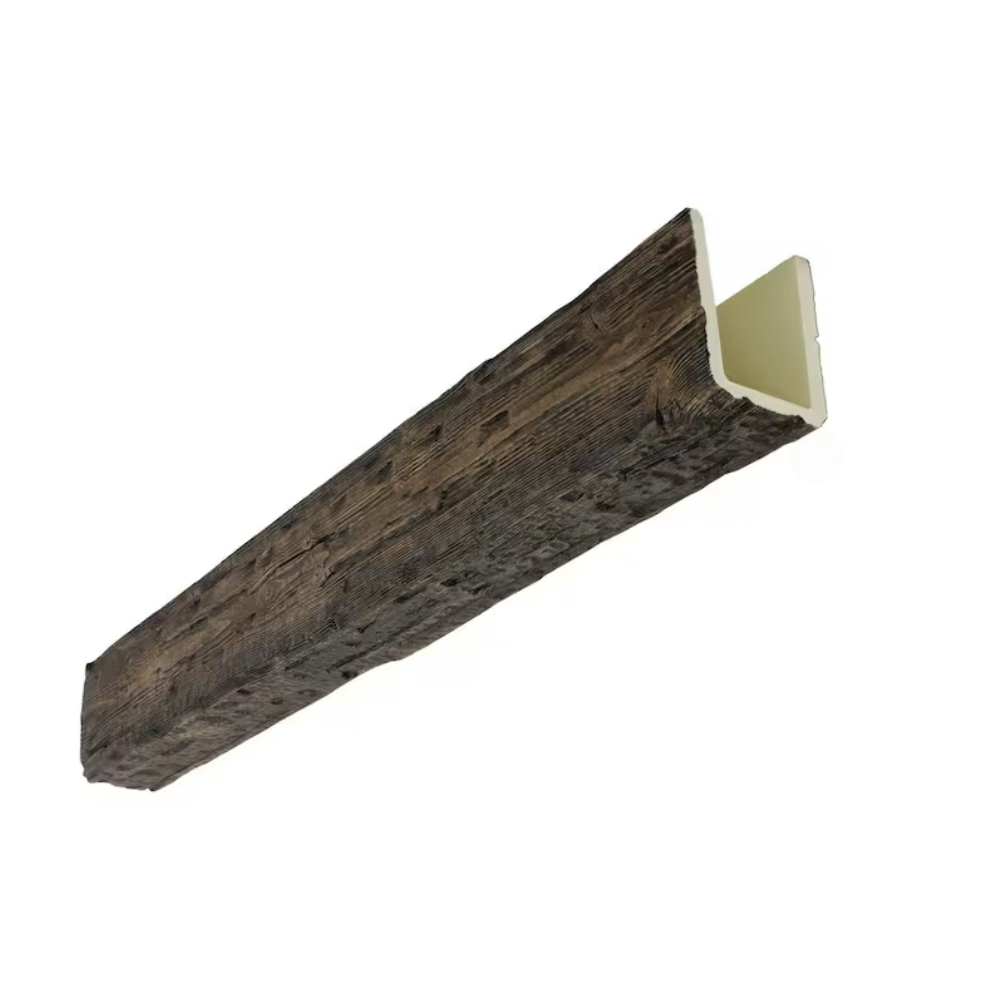
Full-depth beams are the primary structural-looking elements that run across the ceiling. They are deep enough to carry the visual weight of the design and are usually placed at the main structural spans.
Shallow fill beams are thinner elements that run between the full-depth beams to create a coffered or t-beam look. They do not need to be as deep as the primary beams because they are not meant to carry visual weight independently.
Rafter elements run at an angle to follow the pitch of the roof in vaulted or cathedral ceiling renovations. They are distinct from horizontal beams because the end cuts are exposed and should match the pitch of the roof.
Decorative trim pieces include beam caps, edge moldings, and transition strips that close the joints between beams and cladding. These small pieces are often overlooked but they are the details that separate a professional installation from an amateur one.
Coordinating Cladding Material with Beams
The cladding material between the beams is just as important as the beams themselves. Common cladding choices include drywall, wood shiplap, tongue-and-groove boards, and acoustic panels.
For a contemporary look, smooth painted drywall between the beams creates a clean, high-contrast surface that emphasizes the beams. The contrast between the smooth painted ceiling plane and the textured wood-grain beam surface gives each element its own identity.
For a warmer, more traditional look, wood shiplap or tongue-and-groove installed between the beams creates a fully wood-clad ceiling that reads as a unified system rather than beams added to a drywall ceiling. The grain pattern on the cladding should complement the grain on the beams, which means the two products need to be sourced from the same supplier or carefully matched by the finish carpenter.
Structural Considerations for Older Homes
Many ceiling cladding renovations happen in older homes where the joists are smaller than modern code requires and may not be perfectly level. In these situations, the beam layout needs to account for the irregular surface.
One approach is to install furring strips or shims to create a level reference plane for the beams, then cover the remaining ceiling with cladding that follows the beam alignment. The cladding hides the shims and furring, and the beams sit on a consistent plane that looks intentional.
For homes with significant structural settling, a level laser line is the most important tool on the job. The installer sets the laser at the desired beam height and uses it as a reference for every shim and mounting block.
Fire Ratings and Cladding Systems
If the renovation involves a commercial space or a multifamily residential building, the ceiling cladding system will need to meet fire code requirements. The beam elements and the cladding material between them may need to carry independent fire ratings, and the two ratings must be compatible.
In most jurisdictions, a standard drywall ceiling between beams achieves a fire rating that is acceptable for residential construction. For commercial projects, the specifier should verify the rating requirements for both the beam and the cladding material before placing the order.
Acoustic Implications of Beam Cladding
Adding beams and cladding to a ceiling changes the acoustic properties of the room. The new surfaces break up sound reflections and can reduce flutter echo, which is a positive outcome in most residential settings.
For home theater rooms and media rooms, the acoustic improvement from a beam-and-cladding ceiling can be significant. The varied surface of beams and cladding absorbs and diffuses sound in a way that a flat drywall ceiling cannot match.
For music practice rooms and recording studios, the acoustic treatment should be more deliberate. In these cases, acoustic panels can be installed in the ceiling bays between beams, providing the necessary sound control while maintaining the visual appearance of a beam ceiling.
Lighting Integration During Renovation
The renovation window is the ideal time to plan the lighting layout for the beam ceiling. Recessed cans, pendants, and cove lighting can all be roughed in before the beams and cladding are installed, which means the electrical contractor works in a clean, open ceiling rather than trying to work around installed trim.
For recessed lighting, the fixture housing should be rated for insulation contact if it will be covered by the cladding material. The beam positions should be marked on the plans before the lighting layout is finalized, and the spacing between fixtures and beams should be coordinated to avoid interference.
Finish Coordination Between Beams and Cladding
The most common finish failure in a beam-and-cladding ceiling is a mismatch between the beam stain and the cladding finish. Even when both products are stained with the same color, the different substrate materials absorb stain differently, which can result in a noticeable color shift.
The safest approach is to apply the same finish system to both the beams and the cladding. If the beams are factory-finished with a water-based stain and topcoat, the cladding should be finished with the same products by the same applicator to ensure a consistent result.
If the cladding is natural wood and the beams are polyurethane, the stain absorption will be different even with identical application. In this case, a sample board should be produced showing both materials side by side with the planned finish before the full renovation begins.
Budget Planning for Cladding Renovations
A complete beam-and-cladding ceiling for a medium-sized room typically runs between eighty and one hundred fifty dollars per square foot of ceiling area, depending on the complexity of the layout and the quality of the finishes. For a two-hundred-square-foot living room, this translates to a budget of sixteen thousand to thirty thousand dollars.
This budget includes the beams, the cladding material, the finish, the blocking and mounting hardware, and the labor for installation and finishing. The budget does not typically include lighting fixtures or electrical work unless those are part of the same contract.
For contractors pricing these projects, the beam supply is usually a fixed cost that can be quoted from a supplier catalog, while the cladding material, finishing, and labor are variable based on the specific conditions of the site.
Keeping the Client Happy Through the Process
A ceiling cladding renovation is disruptive because the room is not usable while the work is underway. The contractor should communicate clearly about the timeline, the sequence of work, and the expected completion date.
Dust containment is a major concern in occupied homes. The contractor should use plastic sheeting to seal off the work area, provide negative air filtration if possible, and clean up at the end of every workday. A job that leaves a fine layer of dust on every surface in the house will generate complaints even if the final result is beautiful.
Long-Term Value of a Beam Cladding Ceiling
A well-designed beam cladding ceiling adds genuine value to a home. It transforms a featureless room into an architectural statement that buyers notice and remember. In markets where ceiling upgrades are rare, a beam-and-cladding ceiling can be a meaningful differentiator during a resale.
For commercial spaces, the ceiling becomes a design element that communicates the brand identity and creates a memorable environment for customers and employees alike.
Technical References
ASTM standards cited in every specification
Test Data
Lab results from internal testing program
Updated 2026
Reviewed against current product specs


