
A rosette at a beam intersection does something purely functional elements cannot—it announces intention. The beam was placed there deliberately, not just because the structure required it. The rosette marks a joint, celebrates a crossing, and provides visual punctuation to an architectural line. In traditional building traditions from Georgian England to the American Southwest, these ornamented details served both aesthetic and practical purposes, covering gaps where beams met and hiding the mechanical fasteners that held them in place.
Modern faux beam installations lack those structural joints by design—they are continuous lengths or modular sections that snap together. Without ornamentation, the intersections can read as abrupt terminations rather than considered compositions. PU resin rosettes solve this visual problem while leveraging a material that performs far better than carved wood in the humidity-fluctuating conditions that plague many ceiling installations.
Understanding Rosette Styles and Period Influences
Rosette design traces back through centuries of architectural ornament, and understanding the historical lineages helps designers specify pieces that reinforce rather than contradict a project's aesthetic direction.
Classical Greek and Roman rosettes feature radial symmetry with repeated petal or anthemion motifs radiating from a central boss. These designs work well in homes drawing on Mediterranean or neoclassical influences. The ornament tends to be relatively shallow in relief, which suits PU production methods and produces a refined, not cluttered, appearance.
Victorian and Edwardian rosettes introduced more elaborate acanthus and foliate combinations, often with deeper carving and more pronounced three-dimensionality. These rosettes suit period restoration projects and homes with traditional millwork programs. The heavier visual weight requires proportionally larger beams—at least 6 inches in width—to avoid the rosette overwhelming the supporting element.
Arts and Crafts rosettes strip away the botanical complexity in favor of geometric arrangements—squares, diamonds, and simple radial patterns. These suit the clean-lined aesthetics of Craftsman bungalows and modernist reinterpretations of vernacular forms.
Transitional and contemporary rosettes borrow from multiple traditions or abandon historical reference entirely in favor of pure geometric play. These work in spaces that mix periods or embrace eclecticism.

Sizing Rosettes to Beam Dimensions
The cardinal rule of rosette sizing: a rosette should read as an ornament on the beam, not as a separate object competing with it. This translates practically into width and depth proportions.
For beams up to 6 inches wide, rosette widths of 10 to 12 inches provide balanced ornamentation. The 1.5-to-1 ratio between rosette width and beam width maintains visual hierarchy while ensuring the rosette clearly marks the intersection point.
For beams between 6 and 10 inches wide, rosette widths of 14 to 18 inches work well. At these sizes, the rosette dominates the beam visually, which is appropriate when the rosette is the primary decorative element in the space.
Beams wider than 10 inches can accommodate rosettes of 18 to 24 inches, but installers should verify that the mounting surface accommodates the rosette's full depth without awkward reveals or gaps at the beam corners.
Depth or relief is a separate consideration. Low-relief rosettes—those projecting less than half an inch from the beam surface—read as applied trim and suit contemporary or minimalist installations. Deep-relief rosettes—projecting 1 inch or more—create dramatic shadows and suit traditional installations with directional lighting that emphasizes the ornament.
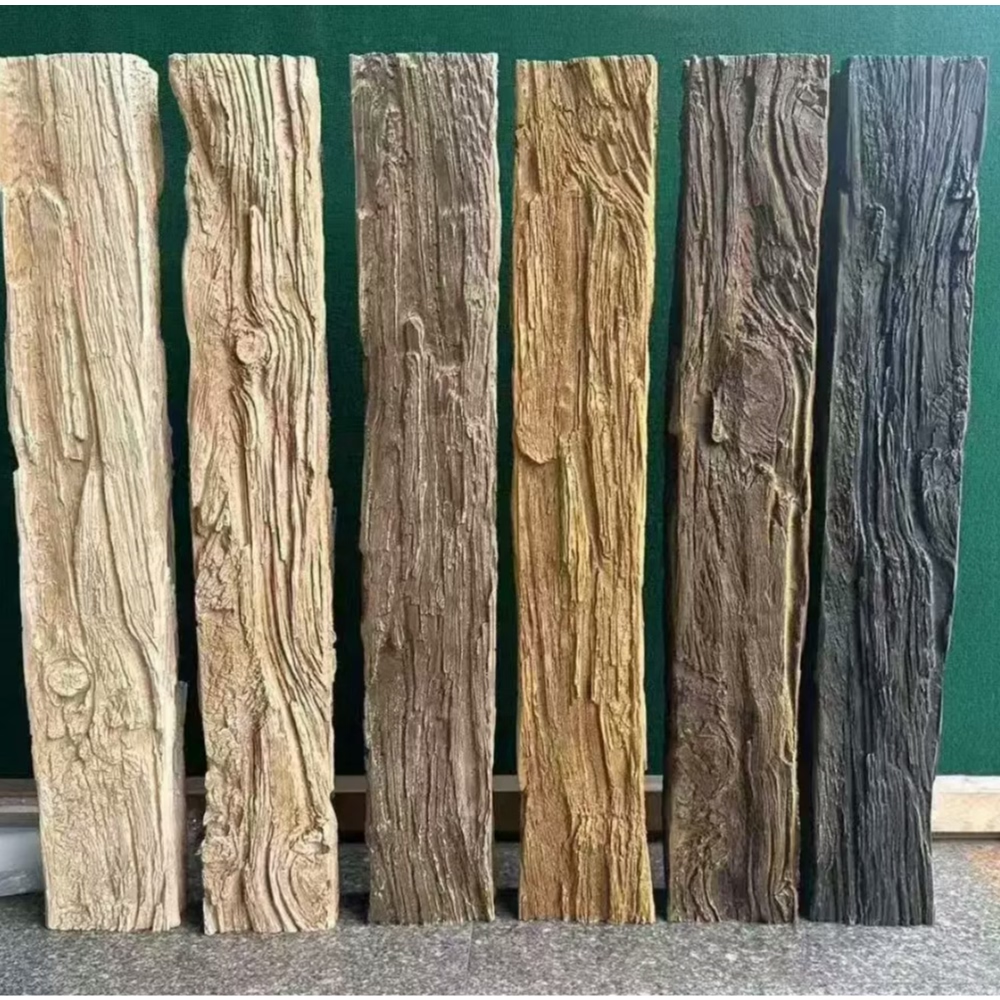
Material Advantages of PU Resin for Rosette Production
Polyurethane resin rosettes offer several practical advantages over the carved wood, plaster, or composite alternatives that dominated the market before PU production methods matured.
Dimensional stability ranks first among these advantages. Wood rosettes expand and contract with humidity changes, and in ceiling installations—particularly above kitchens, bathrooms, or poorly insulated attics—this movement can crack paint films, open caulk joints, and eventually split the ornament itself. PU resin has a near-zero moisture movement coefficient, which means the rosette maintains its dimensions and surface finish year after year regardless of seasonal humidity swings.
Impact resistance matters in spaces where rosettes sit within reach—hallways, stair wells, or rooms with high activity levels. Polyurethane absorbs impact without cracking in the way that wood or plaster does. The material flexes slightly under load and returns to shape, which reduces call-backs for repair work.
Production consistency benefits large projects where multiple rosettes must match precisely. PU molding produces identical units from a single tool, eliminating the variation that occurs between hand-carved pieces. This consistency matters when projects specify dozens of rosettes across multiple beam intersections in a single space.
Lightweight handling reduces installation labor and shipping costs. A PU rosette weighing 2 to 4 pounds installs with simple adhesive and screw attachment, whereas a comparable carved wood rosette might weigh 15 to 25 pounds and require mechanical anchoring to the structural ceiling.
Installation Methods and Best Practices
Rosette installation on faux beams follows a predictable sequence regardless of the specific product or mounting surface. The critical steps are preparation, dry-fit, adhesive application, mechanical fastening, and finishing.
Begin by ensuring both the rosette and the beam surfaces are clean, dry, and free from dust, oil, or loose material. Light sanding with 220-grit paper on both surfaces improves adhesive bond, particularly on the slightly glossy skin that forms on many PU molding processes.
Dry-fit the rosette against the beam intersection before applying any adhesive. Verify that the rosette sits flush against the beam faces without gaps at the corners. If the beam has textured surfaces, minor gaps at the texture valleys are normal and will accept caulking; significant gaps at the flat surfaces indicate a sizing mismatch.
Apply construction adhesive to the back of the rosette in a serpentine bead pattern, keeping the adhesive at least half an inch from the edges to prevent squeeze-out. Press the rosette firmly into position and hold it for 30 to 60 seconds until the adhesive begins to grab.
For rosettes larger than 12 inches or heavier than 3 pounds, supplement the adhesive with mechanical fasteners. Use finish nails driven through the rosette's surface, countersinking the heads and filling with wood filler. Alternatively, use screws through concealed holes that will be covered by the final paint finish.
Seal the perimeter joints between the rosette and the beam faces with paintable caulk. This step is essential on textured beam surfaces where the rosette cannot sit completely flush. A skilled installer's caulking work makes the rosette appear to emerge directly from the beam rather than sitting atop it.

Coordinating Rosettes with Other Beam Ornamentation
Many faux beam installations incorporate additional decorative elements—corbels at beam ends, decorative chains between parallel beams, or crown molding where beams meet walls. Rosettes occupy the center of this ornamental vocabulary, which means their style, scale, and finish must coordinate with every other element in the system.
The finish matching challenge deserves particular attention. If the beams carry a stain-and-seal finish intended to replicate oak or walnut, the rosettes should receive the same stain treatment on-site to ensure color continuity. If the beams are painted solid white or a contrasting color, the rosettes should be ordered in a primed or pre-finished condition that accepts the same topcoat as the beams.
The complexity arises when different ornamental elements use different production materials—wood corbels alongside PU rosettes, for instance. These mixed-material installations can work beautifully when the design deliberately contrasts the materials, but they require careful finish coordination. The goal is that the viewer perceives the design's intentional material palette rather than noticing inconsistencies in finish application.
For projects where precise finish matching is critical, source all ornamental elements from a single manufacturer or at minimum obtain physical samples of each element before committing to a finish schedule.
Applications Beyond Traditional Beam Intersections
While rosettes traditionally mark beam intersections, creative installations extend their application to unconventional contexts that leverage the ornament's formal qualities.
Single-beam terminations in spaces with exposed beams running from wall to ridge or wall to wall can benefit from a rosette at the midpoint, creating a visual break that reduces the beam's apparent length and adds visual interest to otherwise monotonous runs.
Medallion-style ceiling rosettes borrowed from chandelier mounting traditions can serve as oversized ceiling decorations in spaces without beams, mounted directly to flat or coffered ceilings to introduce three-dimensional ornament without structural commitment.
Built-in cabinet and shelving applications use miniature rosettes at shelf ends or cabinet corner joints where a traditional detail element adds perceived craftsmanship to custom millwork.
Exterior covered structures—pergolas, covered patios, pool enclosures—can incorporate rosettes at beam crossings in covered exterior environments. UV-stabilized PU formulations are essential in these applications, and the rosettes should be mounted to structural members rather than decorative elements to ensure mechanical integrity.
Sourcing and Quality Considerations
The PU rosette market includes products ranging from mass-produced budget imports to precision-molded architectural elements. The difference typically manifests in surface detail reproduction, density of the polyurethane formulation, and dimensional consistency.
Budget rosettes often show visible seam lines from the mold, shallow or inconsistent relief in carved details, and surface imperfections that require significant filling and priming before painting. Architectural-grade rosettes feature clean mold lines, crisp detail reproduction, and uniform densities that accept stain and paint evenly.
When evaluating samples, examine the rosette under raking light to reveal surface imperfections that might be invisible under direct illumination. Test the adhesive compatibility by applying a small amount of the planned adhesive to an inconspicuous area and checking for any chemical reaction or surface degradation after 24 hours.
Wholesale buyers should discuss tooling customization options with manufacturers. Custom rosette designs—company logos, project-specific motifs, unique proportions—typically require new tooling with 6- to 10-week lead times and minimum order quantities ranging from 100 to 500 units depending on complexity.
Technical References
ASTM standards cited in every specification
Test Data
Lab results from internal testing program
Updated 2026
Reviewed against current product specs


