
Corbels have carried the weight of architectural overhangs since the Egyptians stacked stone corbels to create the first corbelled arches. The visual language of the corbel—wider at the top, tapering downward, suggesting the transfer of load from above to below—has survived millennia of architectural fashion because it communicates structural logic in a visually satisfying form.
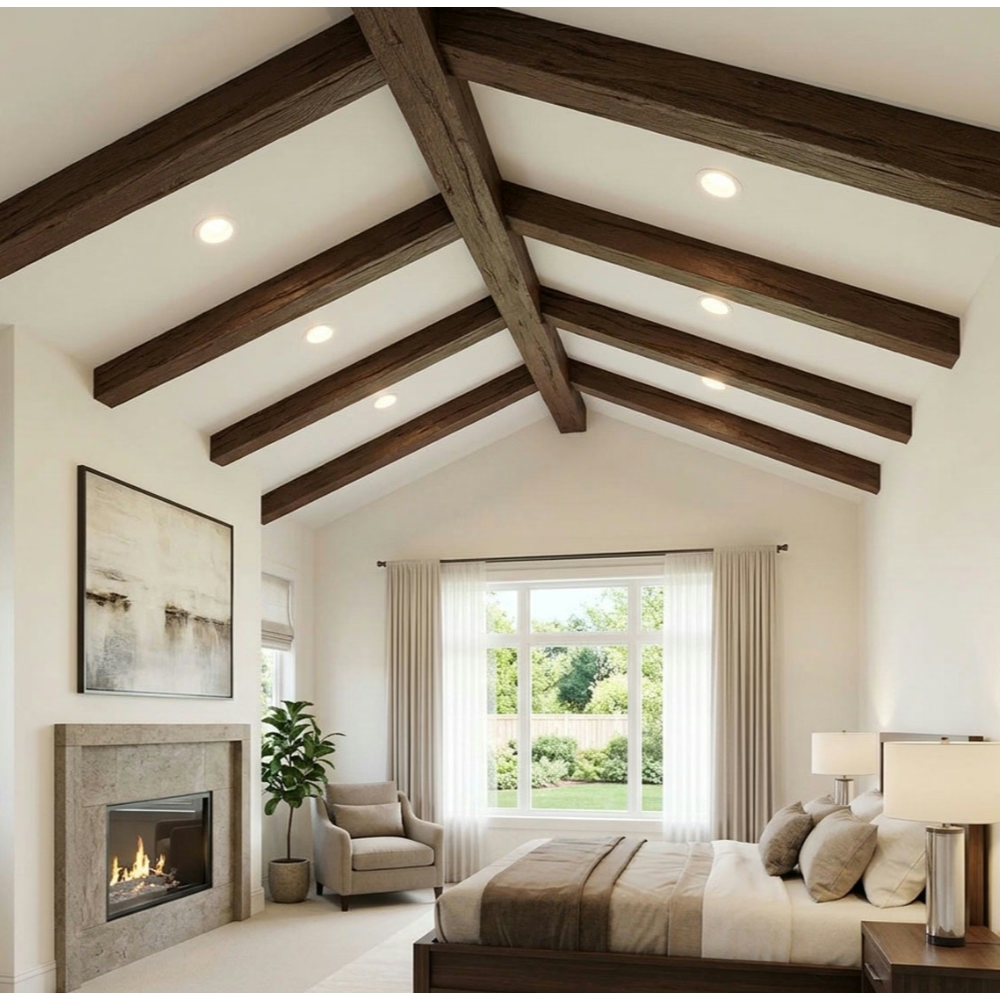
In modern interior construction, corbel brackets serve the same symbolic function while increasingly supporting elements that do not require structural support at all. A faux ceiling beam needs no corbel to hold it up—the beam weighs so little and attaches so directly to the ceiling substrate that the corbel exists purely for aesthetic reasons. This creates an interesting design tension: the corbel must read as functional while actually being decorative.
PU resin corbel brackets resolve this tension cleanly. They provide the visual weight, the tapering form, and the ornamental detail of traditional corbels while being light enough for truly non-structural installation and durable enough for long-term ceiling service without the maintenance demands of carved wood.
Corbel Styles and Their Historical Lineages
The range of corbel styles available in PU resin reflects centuries of architectural development, and matching corbel style to the surrounding design vocabulary prevents the jarring effect of mismatched periods.
Classical corbels draw from Greek and Roman precedents with acanthus leaves, volutes, and egg-and-dart moldings. These corbels suit formal interiors—foyers with high ceilings, dining rooms with traditional millwork, libraries with built-in shelving. The ornament is relatively dense and benefits from directional lighting that casts shadows into the carved details.
Gothic and Gothic Revival corbels feature pointed arches, trefoils, and stylized foliage that conveys a different kind of structural aspiration—upward rather than outward. These corbels appear in church renovation projects, in homes with Tudor or Gothic Revival exterior styling, and in contemporary projects that appropriate Gothic ornament for dramatic effect.
Renaissance and Baroque corbels introduce more muscular forms—deep bracketing, bold scrolls, and sculptural figures in ecclesiastical contexts. These heavy corbels require substantial beams to support them visually, and they work best in rooms with tall wall heights where the corbel's vertical dimension can fully express itself.
Arts and Crafts corbels strip the ornament back to geometric simplicity—right angles, shallow curves, and exposed joinery forms that honor the material and the making. These corbels suit the horizontal emphasis of Craftsman bungalows and modernist interpretations of vernacular form.
Contemporary corbels may borrow selectively from any tradition or define entirely new geometric vocabularies. They work in eclectic spaces where period authenticity is less important than formal coherence.

Understanding Load Capacity and Structural Claims
This section requires an important clarification that responsible manufacturers and distributors should communicate clearly: decorative PU corbel brackets are not structural load-bearing elements. They cannot replace engineered brackets in applications where genuine structural support is required.
That said, corbels must support the visual appearance of load-bearing function. ThePU formulations used for quality corbel brackets achieve densities between 15 and 25 pounds per cubic foot, which provides sufficient rigidity to support the corbel's own weight and resist minor incidental loads without deformation. The corbel attaches to the wall or beam interface with mechanical fasteners that transfer loads to the structural substrate.
When specifying corbels for projects where engineers or building officials might question the installation, provide documentation from the manufacturer clarifying the product's decorative status and the engineered nature of the actual structural support system. This documentation prevents costly project delays during inspection.
The load that corbels actually support in a typical faux beam installation is minimal—the weight of the beam itself, which may be 2 to 8 pounds per linear foot, and the corbel's own weight, typically 3 to 8 pounds per unit. The mounting system handles these loads comfortably when properly installed.
Sizing Corbel Brackets to Beam Dimensions
Corbel sizing follows proportional relationships that have been refined through centuries of architectural practice. A corbel that is too small for its beam reads as an afterthought; a corbel that is too large overwhelms the supporting structure.
The primary sizing dimension is the corbel's height. A useful rule of thumb establishes corbel height at roughly one-quarter to one-third of the beam's depth. A beam that is 8 inches deep accommodates a corbel of 2 to 3 inches in height at the minimum, with 4 to 6 inches providing more substantial visual weight.
The corbel's projection—how far it extends from the wall or beam surface—should relate to the beam's width. Corbels typically project 4 to 8 inches from the mounting surface, which provides sufficient depth to suggest load transfer while maintaining proportional elegance.
Width at the top of the corbel should match or slightly exceed the beam's width when the corbel mounts against a wall and the beam passes over it. When corbels appear in pairs flanking a beam end or supporting a beam from below, the combined top width of both corbels should approximately equal the beam's width, with each corbel contributing roughly half.
For beam widths of 6 to 10 inches, single corbels of 6 to 8 inches in width work well. Beams wider than 10 inches may require paired corbels or oversized single corbels of 10 to 12 inches in width.
Installation Methods and Mounting Surfaces
Corbel installation on interior ceiling beam projects varies by mounting configuration—wall-mounted corbels supporting beam ends, ceiling-mounted corbels supporting beams from below, and integrated corbels that attach to both wall and beam simultaneously.
Wall-mounted corbels receive the beam end and mount to the wall behind and beneath the beam. Installers should locate wall studs or solid backing in the mounting location and mark fastener positions before attaching the corbel. Apply construction adhesive to the back of the corbel, position it precisely, and drive screws through pre-drilled holes into the backing. Counter-sink fasteners and fill holes with wood filler.
Ceiling-mounted corbels attach to the structural ceiling at the beam's location. This configuration supports beams that run from wall to wall without wall-mounted corbels. The corbel mounts directly to the ceiling using the same adhesive-and-screw method, with fasteners driven into ceiling joists or solid backing.
Integrated corbels mount to both the wall and the beam simultaneously. These installations require the beam to be positioned before the corbel attachment. The corbel's upper surface receives adhesive and mechanical fasteners driven upward into the beam's bottom surface, while the rear surface simultaneously adheres to the wall.
For all mounting configurations, verify that the mounting surfaces are clean, dry, and structurally sound. Repair any damaged drywall or plaster before corbel installation—the corbel will accentuate rather than conceal substrate problems.
Finishing and Painting PU Corbels
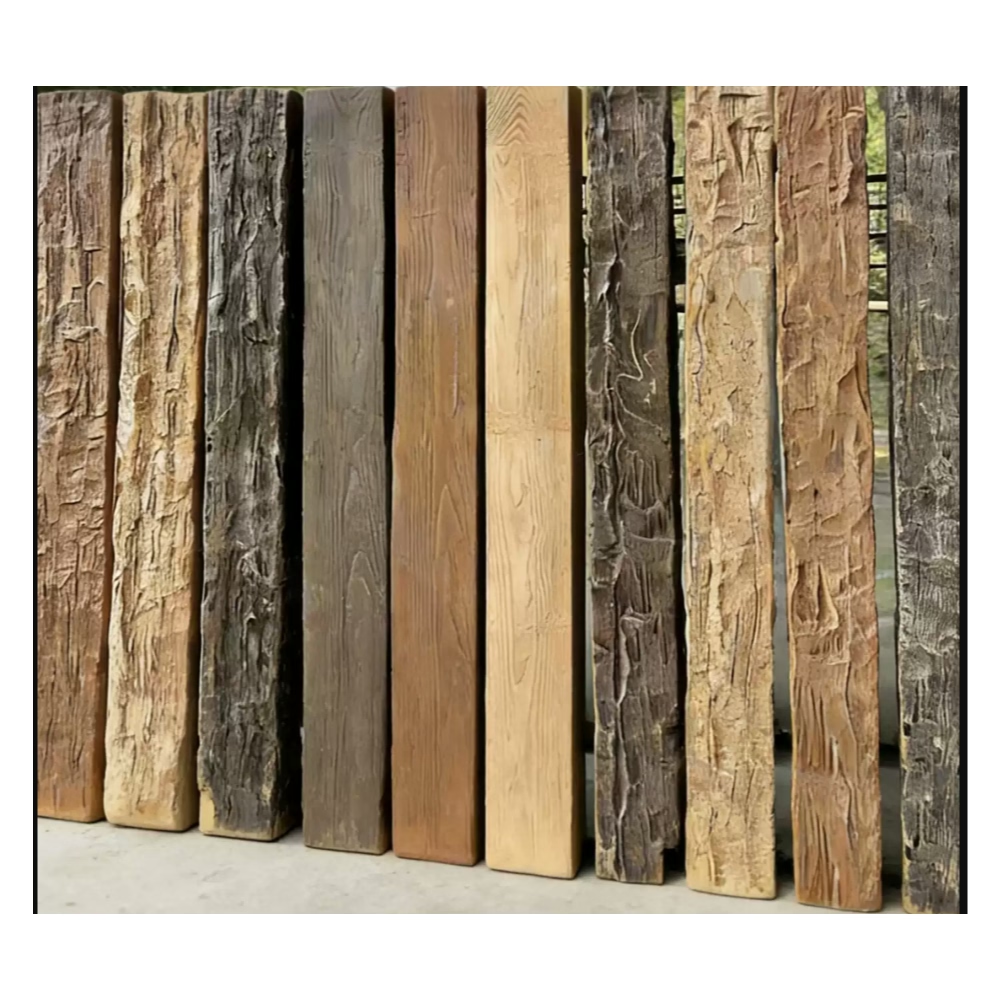
PU resin corbels accept both paint and stain finishes, which expands the design possibilities significantly compared to pre-finished alternatives.
For painted installations, the standard approach involves priming the corbel with a quality stain-blocking primer, then applying two coats of the selected topcoat. The primer ensures even paint absorption and prevents any bleed-through from the PU formulation's slight color variations.
For stained installations, the process requires more care. PU does not absorb stain in the same way wood does, so the stain sits on the surface rather than penetrating it. This can produce results that differ visibly from adjacent wood trim. To achieve the most convincing wood-grain appearance on PU corbels, use gel stains, which are thicker and can be manipulated to simulate grain patterns.
A scuff-sand with 220-grit paper before staining improves adhesion. Apply the gel stain in the direction of the desired grain, then immediately wipe with a clean cloth to remove excess and create grain-like variation. A second coat may be necessary for deeper color. Seal the stain with a clear topcoat to prevent wear.
Some projects pair stained PU corbels with stained wood beams and the visual match can be quite convincing when executed carefully. Others contrast painted corbels against stained beams for a deliberately layered effect. Both approaches are valid; consistency of execution matters more than the specific finish choice.
Coordinating Corbels with Other Ornamental Elements
Faux beam installations often include multiple ornamental elements—rosettes at beam intersections, crown molding where beams meet walls, decorative chains between parallel beams. Corbels participate in this ornamental vocabulary and should be selected to harmonize with the other elements in the system.
Style coordination is the most obvious consideration. Classical rosettes pair naturally with classical corbels, Arts and Crafts corbels complement simple geometric rosettes. The challenge arises in eclectic spaces or projects that borrow from multiple traditions.
When coordinating styles proves difficult, a useful strategy involves selecting corbels and rosettes from the same manufacturer and product family. This ensures consistent design language and proportional relationships between elements.
Scale coordination matters equally. A large corbel paired with small rosettes creates visual imbalance; the corbel dominates and the rosettes disappear. Conversely, delicate rosettes paired with heavy corbels make the corbels appear clumsy. When in doubt, maintain proportional consistency across all ornamental elements.
Applications Beyond Traditional Ceiling Beams
While corbel brackets for ceiling beams represent the primary application, PU corbel brackets serve other mounting scenarios that leverage their combination of ornamental detail and lightweight handling.
Kitchen island support applications use corbels beneath granite or quartz countertops where the homeowner desires the traditional appearance of solid wood support without the maintenance concerns of real timber near moisture sources.
Shelf and mantel support applications use smaller corbels to support floating shelves or fireplace mantels where the corbel provides both structural assistance and visual interest.
Cabinet end support applications in built-in library or display installations use corbels to suggest load-bearing support for cantilevered shelving or display cases.
Architectural feature framing uses corbels at the corners of openings, mirrors, or artwork installations to introduce traditional ornament into otherwise contemporary wall compositions.
For these alternative applications, verify that the corbel's load capacity is appropriate to the supported element. Standard decorative corbels handle their own weight and incidental loads comfortably; they are not designed to support heavy stone countertops or extended cantilevered shelving without additional structural engineering.
Technical References
ASTM standards cited in every specification
Test Data
Lab results from internal testing program
Updated 2026
Reviewed against current product specs


