
A homeowner in suburban Atlanta installed honey-toned oak polyurethane beams across her kitchen ceiling in 2018. Six years later, the rest of the renovation had drifted toward driftwood grey, limewashed walls, and matte black hardware. The beams were suddenly the warmest element in the room. She asked if she could grey-wash them to match. The answer was yes, with the right product and the right expectations.
Polyurethane faux beams are not wood. They do not absorb stain. They do not react to washes the way timber does. The grey-wash effect that takes 20 minutes on a pine board takes a different approach on PU. This guide walks through what works, what does not, and how to get a finish that holds up over years.
Why Traditional Grey-Wash Stains Fail on Polyurethane
Grey-wash stains are designed to penetrate wood fibers. The stain carries pigment into the wood, and the wood holds it through the depth of the grain. A second coat darkens the effect. Sanding removes some pigment. The interaction is wood-stain-fiber.
Polyurethane has no fibers. It has a closed-cell foam structure with a hard surface skin. Stain sits on the surface and either adheres or wipes off. There is no penetration. Multiple coats do not build color the way they would on wood.
A traditional grey-wash stain applied to a PU beam will:
- Bead up on the surface
- Wipe off unevenly
- Show every fingerprint and brush mark
- Not match the grey-wash effect on real wood nearby
DIYers who try traditional stain first usually end up frustrated, sometimes with a beam that has visible streaks where the stain did not wipe off evenly. The fix is to use a different product designed for the surface.
Products That Actually Work on Polyurethane
Three product categories work on PU faux beams. Each creates a different look.
1. Acrylic Craft Paint Diluted with Water
A 1:3 or 1:4 dilution of grey acrylic craft paint with water creates a wash that adheres to the PU surface. The dilution lets the original beam color show through, creating a tinted, not opaque, effect.
For a driftwood grey, use a warm grey (with brown undertones) rather than a cool grey (with blue undertones). Cool greys on warm-toned beams look like primer, not a finish.
This is the most accessible option for DIYers. Craft paint is available at any art supply or big box store. The technique is forgiving. Mistakes wipe off with water within the first few minutes.
2. Chalk Paint
Chalk paint adheres to polyurethane without primer and creates a matte, soft finish. For a grey-wash effect, dilute the chalk paint with water (roughly 1:2 paint to water) and apply in long strokes along the beam length.
Chalk paint is more expensive than craft paint but requires less effort per coat. The matte finish looks more natural on a faux beam than the slight sheen of diluted acrylic.
Brands like Annie Sloan, Rust-Oleum Chalked, and Magnolia Home all make grey chalk paints suitable for this application.
3. Tinted Polyurethane or Polycrylic
For the most durable finish, a tinted water-based polycrylic adds color and a protective topcoat in one step. The tint is mixed into the polycrylic at the paint store or in the DIY work area.
This approach is more advanced. Mixing ratios need to be consistent, and the working time is shorter than with paint. The upside is a finish that holds up to cleaning and does not wear off in spots where hands touch the beam during installation.
Comparison of Working Products
| Product | Cost | Skill Level | Durability | Finish |
|---|---|---|---|---|
| Diluted acrylic craft paint | Low | Beginner | Medium | Soft wash |
| Chalk paint | Medium | Beginner | Medium-High | Matte wash |
| Tinted polycrylic | Medium | Intermediate | High | Satin tinted finish |
For a first grey-wash attempt on a single beam, diluted craft paint is the right starting point. For a multi-beam project where the finish needs to last, chalk paint is the better choice.

Step-by-Step Grey-Wash Process
Step 1: Clean the Beams
Polyurethane beams collect dust during installation. Wipe each beam with a microfiber cloth dampened with water and a drop of dish soap. Let the beam dry for at least an hour before applying any finish.
Any dust left on the beam will show through the wash as a rough patch. The cleaning step is the most skipped and most regretted part of the process.
Step 2: Test the Wash on an Offcut
Most factories ship a small offcut with each order. Use the offcut to test the wash ratio, color, and technique before touching the installed beams.
Apply three test patches with three different dilutions:
- 1:3 paint to water (most transparent)
- 1:2 paint to water (mid-tone)
- 1:1 paint to water (most opaque)
Let the patches dry for 30 minutes. The color will look different wet versus dry. Pick the ratio that gives the closest match to the driftwood reference the homeowner is targeting.
Step 3: Apply the Wash in Sections
Work on one beam at a time. Apply the wash with a wide, soft brush in long strokes along the beam length. Do not try to cover the entire beam in one pass. Work in 3 to 4-foot sections.
The goal is unevenness. Real grey-wash effects are not uniform. They have variation across the surface. Working in sections lets the DIYer vary the application thickness and create natural variation.
Step 4: Wipe or Blend While Wet
Within 2 to 3 minutes of application, wipe or blend the wash with a clean, lint-free cloth. Wipe with the grain direction. The wipe removes excess wash and creates the soft, varied finish that grey-wash is known for.
A common DIY mistake is leaving the wash too thick. The beam ends up looking painted rather than washed. Wipe more than feels right. The cloth should come away with visible pigment on it.
Step 5: Let Dry and Re-Evaluate
The wash will look different dry. Let it dry for at least 4 hours before deciding whether a second coat is needed. Most beams need only one coat for a driftwood effect. Two coats pushes the beam toward a deeper weathered grey that starts to lose the underlying wood tone.
If a second coat is needed, apply it the same way. The second coat always looks slightly different from the first because of the variation in application thickness.
Step 6: Seal (Optional)
For beams in high-touch areas (near light switches, around doorways, in kids' rooms), seal the wash with a clear matte water-based polycrylic. Apply with a soft brush in light coats. Two thin coats are better than one thick coat.
Sealing is not required for beams out of reach. The wash itself is reasonably durable on a non-touched surface.
Colors That Work for a Grey-Wash on Honey Beams
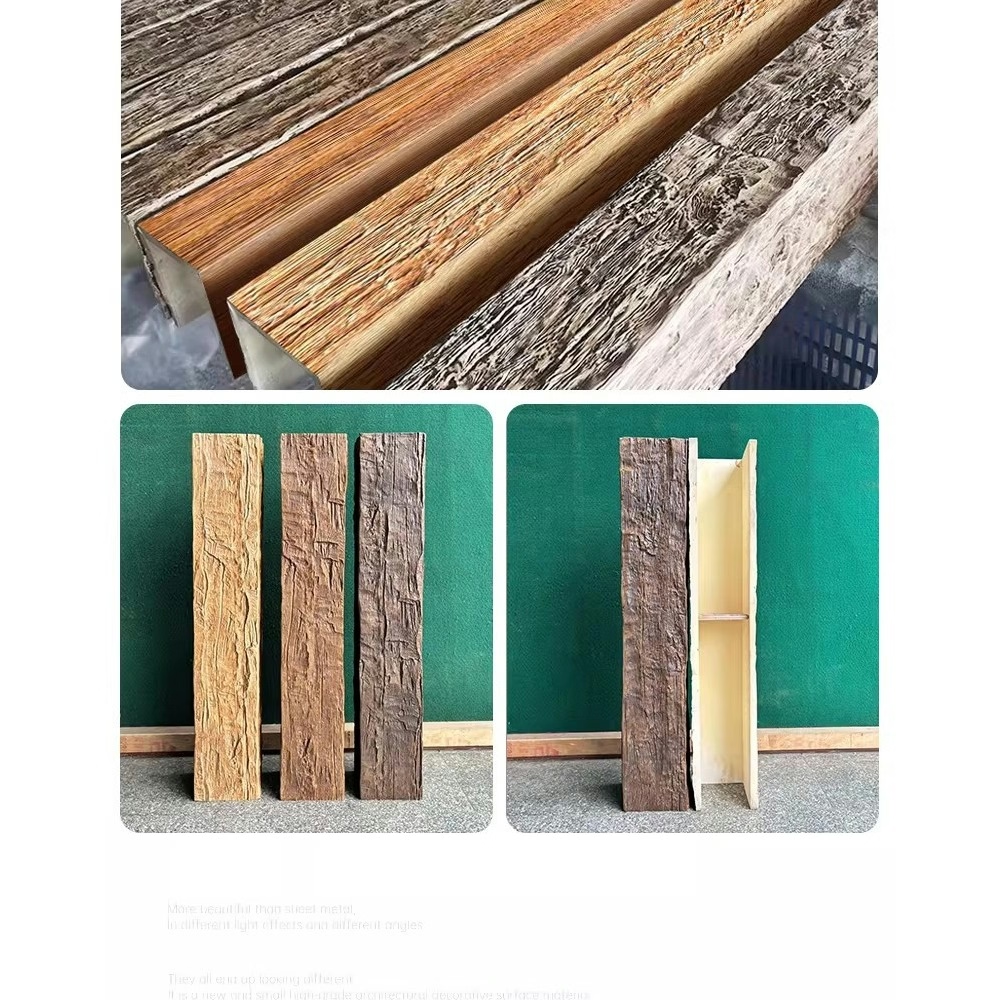
Honey oak and warm-toned beams respond better to some grey tones than others. The goal is a driftwood or weathered look, not a cool painted look.
Grey-Wash Color Recommendations
| Starting Beam Tone | Recommended Grey | Effect |
|---|---|---|
| Honey oak | Warm driftwood grey with brown undertone | Soft driftwood |
| Golden oak | Weathered taupe grey | Aged barnwood |
| Walnut | Deep driftwood grey | Beach-weathered timber |
| Light oak | Pale ash grey | Scandinavian driftwood |
| Whitewashed pine | Light dove grey | Softened existing finish |
The common thread is warmth. Pure grey (with no warm undertone) on a warm beam reads as artificial. A grey with a hint of brown or taupe integrates with the existing beam tone and creates a believable weathered look.
Common Mistakes in Grey-Washing Faux Beams
Mistake 1: Skipping the Test Patch
A wash that looks perfect on a test patch looks different on the full beam under the room's actual lighting. Always test on an offcut, then test on an installed beam in an inconspicuous area (the very end of a beam, near a corner) before doing the whole job.
Mistake 2: Using Oil-Based Products
Oil-based stains and polyurethanes can react with the polyurethane foam and cause surface damage. The skin of the beam can soften, crack, or discolor. Stick to water-based products.
Mistake 3: Applying in Direct Sunlight
Direct sun dries the wash too fast, leaving brush marks and lap lines. Work in the shade or in the evening when the room is not getting direct sun through the windows.
Mistake 4: Trying to Match a Reference Photo Exactly
Reference photos are styled, lit, and color-corrected. The grey-wash in the photo will not match exactly in a real room with real lighting. Aim for the tone family, not the exact color.
Mistake 5: Sealing Too Soon
If sealing the wash, let the wash cure for 24 hours before applying the topcoat. A wash that has not fully cured will smear under the brush and create a streaky finish.
When Not to Grey-Wash
Some beams are not good candidates for a DIY grey-wash:
- Heavily distressed beams. The existing distressing creates shadows that a wash will fill in, reducing the depth of the texture. The beam ends up looking flatter than it did originally.
- Beams with a dark factory glaze. Some finishes use a dark glaze in the recesses to enhance the grain. A grey wash on top of these finishes muddies the effect.
- Beams in direct sunlight. UV degrades both the original finish and any added wash faster than indoor-only beams. Grey-wash a sunlit beam and expect to redo it every 2 to 3 years.
- Beams that already have the desired tone. If the existing finish is already driftwood grey, adding another grey layer pushes it toward muddy. Stop at the existing finish.
For these situations, replacing the beam with a new factory-finished driftwood grey beam is often the better choice.
Long-Term Maintenance of a Grey-Wash Finish
A water-based grey-wash on a PU beam holds up well indoors for 5 to 10 years before needing a refresh. The maintenance is straightforward:
- Dust with a microfiber cloth monthly
- Wipe with a damp cloth (water only, no cleaners) annually
- Refresh the wash every 5 to 10 years, or when the finish looks tired
- Avoid harsh cleaners, magic erasers, and abrasive pads
For a sealed beam, the maintenance window extends to 8 to 12 years because the polycrylic topcoat protects the wash from wear.
Final Thoughts on Grey-Washing Faux Beams
Grey-washing polyurethane faux beams is a real option, but it is a different process than grey-washing wood. The product selection, technique, and expectations all need to align with the surface being treated.
For homeowners willing to test, work carefully, and accept that the result will be a believable driftwood rather than a perfect color match, the project is a rewarding weekend of work. For homeowners expecting a one-step stain that transforms the beam, the disappointment is also real.
The honest middle path is to test on an offcut, judge honestly whether the finish meets expectations, and proceed from there. The beams are forgiving when treated with the right products and unforgiving when treated with the wrong ones.
Technical References
ASTM standards cited in every specification
Test Data
Lab results from internal testing program
Updated 2026
Reviewed against current product specs


