
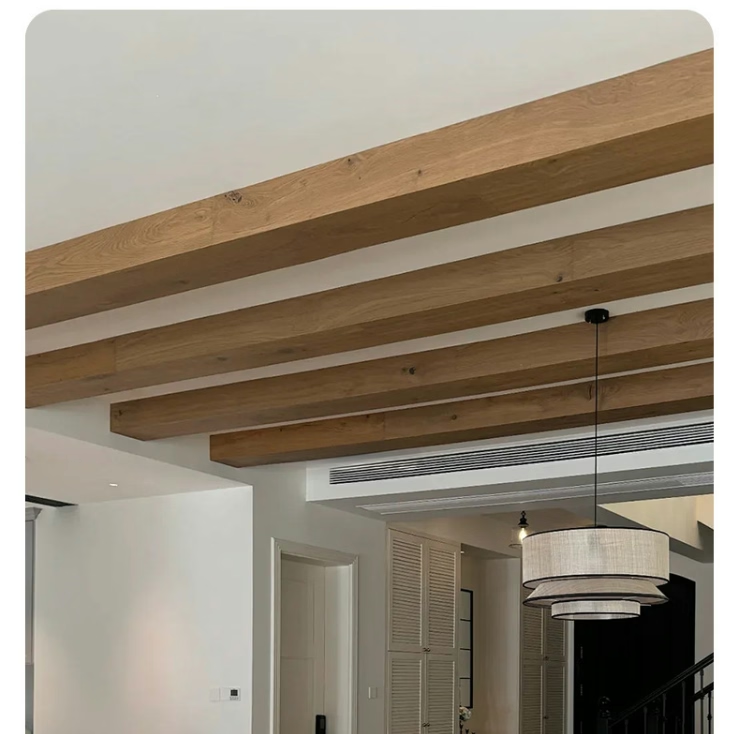
A ceiling beam changes the character of a room the moment it goes up. The room reads as more solid, more considered, more architecturally deliberate. The good news for homeowners is that polyurethane faux timber beams were specifically designed for projects like this. They are light enough for one person to carry, consistent enough that joints almost disappear, and forgiving enough that minor layout errors don't ruin the look. Most homeowners who can run a drill, a level, and a miter saw can install a PU beam themselves over a weekend.
What follows is the same workflow we walk customers through when they call asking how to handle a single-room beam project. It assumes you have a helper for lifting long sections, basic carpentry tools, and a ceiling that is either drywall or plaster over framing. Take it in order. Each step sets up the next.
Pre-Project Planning
The fastest way to get into trouble on a beam install is to skip the planning. Faux timber beams are too light and too rigid to fudge measurements at install time. They either fit where they need to go or they don't. Decide where the beam goes, what it attaches to, and how it will look before you open the first box.
Confirm the Beam Location and Length
Stand in the room and look at the ceiling. Where does the beam need to be for the layout to feel right? Most homeowners choose one of three patterns: a single beam running across the short axis of the room, a series of parallel beams spaced 24 to 36 inches apart, or a perimeter beam framing a tray ceiling. Each pattern changes how the room reads and how the load distributes.
Measure twice. Write the length down. Add at least an inch on each end if you are doing a wrap-around detail where the beam appears to continue over a soffit. Subtract if you are butting into a wall with a return.
Identify Mounting Points
PU beams are light, but the ceiling above them must hold the weight for decades. For most residential installs, that means screwing into wood blocking. That blocking can be the existing ceiling joists (best case), blocking you install between joists, or a structural surface like solid wood planking.
Use a stud finder to map joists across the proposed beam run. Mark their locations with a chalk line. If the beam runs perpendicular to the joists, every joist becomes a mounting point. If the beam runs parallel, you will likely need to install blocking between the joists at every 16 to 24 inches.
Check for Hidden Utilities
Before you drill or cut anything into the ceiling, know what is behind the drywall. Older homes in particular can hide plumbing, electrical, and HVAC lines in the ceiling cavity. If you don't have a clear picture of what's up there, use a non-contact voltage tester and a magnetic stud finder to map wires and metal first. For complex ceilings or recent renovations, a thermal camera rental is worth the cost.
Tools and Materials
A clean install is mostly about having the right tool for each step. None of these are specialty items. Most homeowners already own half of them.
Tools
A good cordless drill with a clutch, a miter saw (or a hand saw with a miter box for small sections), a 4-foot level, a 2-foot level, a tape measure, a pencil, a chalk line, a stud finder, a caulk gun, and a step ladder tall enough to put the beam at chest height when installed. A second step ladder or a piece of scaffolding makes the work safer for any room with ceilings over 9 feet.
Materials
The beams themselves, of course. Mounting blocks or L-brackets sized to the inside of the beam (most manufacturers offer these as accessories). Wood blocking for the ceiling if needed. Trim-head structural screws long enough to bite at least 1.5 inches into solid wood. Painter's tape. Wood filler that matches the beam tone. Color-matched caulk for the joint lines. Construction adhesive rated for foam and the ceiling substrate.
Beam Handling and Cutting
Polyurethane faux beams arrive boxed or crated. The surface is durable enough to survive shipping, but it is not indestructible. Dragging a beam across a concrete floor or dropping one off a ladder can dent or chip a corner.
Unpack Carefully
Open the packaging with a utility knife, sliding the blade rather than sawing, to avoid scoring the beam face. Lift the beam out, not drag it. Set it on padded sawhorses or a clean drop cloth for cutting and dry fitting.
Cut to Length with a Fine-Tooth Blade
PU cuts beautifully with a standard miter saw if you use a fine-tooth blade. A 60-tooth or higher finish blade leaves clean edges that don't need a lot of cleanup. Mark the cut line with a pencil, wrap painter's tape along the line, and cut through the tape. The painter's tape prevents chipping on the molded face and gives you a crisp line.
If you are notching around a column, an obstacle, or another beam, sketch the notch on the beam end, mark it clearly, and cut it with a jigsaw using a fine blade. Sand the cut edge lightly with 220-grit paper to remove fuzz.
Mounting Methods
There are three common ways to mount PU faux timber beams in a residential setting. Each has its place. The right choice depends on what is behind your ceiling and whether you can access it.
Direct Mount with Blocking
This is the cleanest method and the one we recommend for most homeowners. Wood blocking is installed between the ceiling joists at the beam locations. The PU beam is then screwed directly into the blocking through the top or sides of the beam using long trim-head screws. The screws are hidden by the beam's geometry if you come in from the inside corner where the two long sides meet the top, or by a small dab of color-matched filler if you come in from the underside.
This method requires access to the ceiling cavity, either from above (through an attic) or by cutting access panels in the ceiling before drywall is closed up. For finished ceilings, the next two methods are usually easier.
L-Bracket Mount
L-brackets or mounting clips are screwed into the ceiling framing first, then the beam slides over them. The brackets hold the beam in place against the ceiling, and a couple of screws through the top of the beam into the bracket lock it down. This is the most common approach for retrofit installs where the ceiling is already finished.
Most PU beam manufacturers sell brackets sized to their specific beam profiles. Use the manufacturer brackets if you can. Off-brand brackets can work, but the fit inside the beam matters. A loose bracket means a beam that wiggles every time someone walks on the floor above.
Adhesive-Only Mount
For very light beams in low-traffic areas, a heavy-duty construction adhesive rated for foam and the substrate can hold the beam in place. This is rarely the right call as the only fastener, but it pairs well with one of the mechanical methods above for a tight, gap-free fit against the ceiling.
If you go adhesive-only, the ceiling must be flat, clean, and primed or painted. Adhesive does not bond to dusty or chalky surfaces. Be prepared to support the beam with temporary bracing while the adhesive cures, usually 24 to 48 hours.
Joining Beams End to End
Single-piece beams only work up to about 20 feet. Beyond that, you need a joint. The trick to a clean joint is treating it like a real woodworker would treat a long piece of timber: angle the cut, hide it, and reinforce it.
Use a Scarf Joint for Long Runs
A 45-degree scarf joint between two beam sections looks like a single continuous piece because there is no visible end grain line. Cut both pieces at 45 degrees, dry-fit them, and pre-drill before applying adhesive. Slide them together with construction adhesive on the joint faces, then fasten through the top of the beam into blocking.
If the joint lands over a wall or structural element, hide it there. If the joint has to fall in open ceiling, place it directly over a blocking point and add a touch of color-matched filler on the seam after the beam is mounted.
Match the Grain Pattern
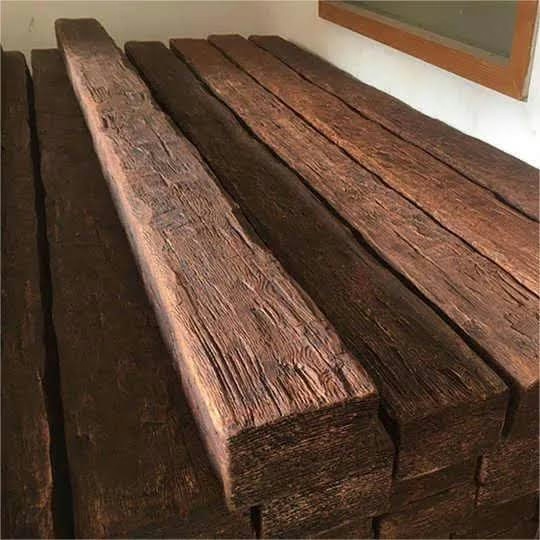
If your beam profile has prominent grain or knot detail, lay the sections out before mounting so the pattern flows continuously across the joint. Most manufacturers mold the grain to repeat or run in a way that lets adjacent sections match up. Take the time to flip sections until you find the best pairing.
Final Details That Separate Pro From DIY
The structural work is mostly mechanical: cut, fit, screw, repeat. The visual result comes down to a handful of small finishing moves that most homeowners skip.
Caulk the Ceiling Line
Run a thin bead of color-matched caulk along the seam where the beam meets the ceiling. Tool it with a wet finger or a damp rag. This hides the slight irregularities of drywall, eliminates the shadow line, and makes the beam look like it was always part of the structure. Use a paintable caulk if you intend to touch up the ceiling paint later.
Fill Screw Holes and Joints
Color-matched filler or wood filler takes care of any visible fastener holes and any minor gaps at joints. Most beam manufacturers sell touch-up kits in the matching wood tones. Apply with a small putty knife, wipe the excess, and let it dry before any final coating.
Step Back and Sight the Line
After the beam is up, walk out of the room and look at it from the doorway. Then walk back in and look at it from the corners. Beams have a way of being slightly out of line and the eye will catch it from specific angles. A 1/8-inch shim under one side of a mounting bracket can correct hours of perceived wonkiness.
Match the Trim
If the room has crown molding or trim in a similar wood tone, plan how the new beam will meet that trim. A return that runs the beam profile down to a wall looks intentional. A beam that butts flat against a crown molding line reads as an afterthought.
When to Call in Help
Most homeowner beam installs go fine, but there are a few situations where a contractor or installer earns their fee.
High Ceilings or Heavy Long Runs
Anything over 12 feet off the floor or any beam longer than 16 feet gets unwieldy for one person. A helper or a small scaffolding setup is not optional. We have seen too many ladders tip because someone tried to muscle a long beam into place alone.
Complex Joists or No Blocking Access
If the ceiling is finished, has blocking access only through a small access panel, or has unusual framing (trusses, steel, concrete), a professional with the right tools can save hours of frustration and prevent damage to the ceiling.
Electrical or Plumbing in the Way
If your layout crosses a ceiling fixture, a junction box, or plumbing vents, an electrician or plumber should move the lines before you mount the beam around them. Building around utilities that should have been moved is a common source of callbacks.
The Day After
Let the beam sit overnight before you trust it fully. Adhesives need 24 hours to reach full strength. Screws should be rechecked after the beam has settled onto the ceiling. Any squeaks or movement at this stage mean a mounting point was missed or a bracket is loose.
After the first week, take another look. Seasonal humidity shifts can cause minor movement in a ceiling. If you see a hairline gap opening at a ceiling line, a quick bead of caulk fixes it. If a joint starts to show, a small filler touch-up solves it. PU beams are stable enough that none of these are likely, but checking beats guessing.

Once the beam is up and finished, the room feels different immediately. That is the payoff for the planning and the careful work. A weekend of effort leaves you with a feature that looks like it has always been part of the house, at a fraction of the cost and labor of a structural timber. Most homeowners who do one beam end up planning the next one within a few months.
Technical References
ASTM standards cited in every specification
Test Data
Lab results from internal testing program
Updated 2026
Reviewed against current product specs


