
There is a moment in every renovation when the homeowner looks up at the ceiling they have been staring at for fifteen years and decides the beams have to go. Sometimes it is a style change — the heavy oak beams that looked right in 2010 now feel oppressive in 2026's lighter aesthetic. Sometimes it is a room function shift — a living room becoming a study, a dining room becoming a playroom. Sometimes it is a layout change — a wall coming down, a ceiling being vaulted, a kitchen opening up to the living area. Whatever the trigger, the beams come down, and the ceiling underneath tells the story of how they were attached.
For polyurethane faux beams, the installation typically involves screwed mounting blocks and either direct screws into the beam face or a cleat-and-saddle mounting system. Removing the beams leaves behind a constellation of screw holes, possibly some rectangular patches where mounting blocks were anchored, occasionally adhesive residue where the installer used construction adhesive as a backup, and sometimes small dings where a pry bar slipped. The ceiling is repairable, and for most homeowners with moderate DIY experience the work is within reach. This article walks through the workflow from the moment the last beam comes down to the final coat of paint.
Step one: inspect the ceiling before you buy any materials
The first instinct after beam removal is to start patching. Resist it. Walk the ceiling with a good light held at a low angle — a work light on the floor, or a flashlight held flat against the ceiling pointing outward — and look at what the beams actually covered. Several things often appear that were hidden behind the beams.
Fastener holes. Most obvious. Polyurethane faux beams are typically attached with either wood screws into a mounting block or screws through the beam face into the ceiling framing or blocking. The holes are usually 3 to 4 mm in diameter and may be countersunk with a conical depression where the installer pre-drilled.
Mounting block shadows. If the installer used a continuous wood mounting strip or discrete mounting blocks behind the beam, there may be a slightly darker or slightly more textured rectangle on the ceiling where the block was attached. The paint on the rest of the ceiling has aged under UV and air exposure; the paint behind the beam has not. The shadow is often visible as soon as the beam comes off and becomes more obvious as your eyes adjust.
Adhesive residue. Construction adhesive (the polyurethane foam adhesive or the solvent-based construction adhesive that some installers prefer) can leave a residue on the ceiling surface. The residue may be a thin film, a thick bead that pulled away from the beam and stayed on the ceiling, or in worst cases a damaged section of drywall paper where the adhesive was so strongly bonded that removing it pulled the paper face with it.
Drywall damage. Pry bars and mounting hardware occasionally dent, scratch, or tear the drywall paper face. Small dents are normal. Larger gouges or torn paper need to be patched differently than screw holes.
Ceiling damage unrelated to the beams. Water stains, old cracks, popped nails from framing movement — sometimes these were hidden behind the beams and now need attention. This is the right moment to find them, because you are about to repaint the ceiling anyway.
Take photographs of everything you find. The photographs will guide your material purchase and will be useful if you decide mid-project that a professional finisher is needed.
Step two: remove fasteners and mounting hardware
Every screw and every mounting block needs to come out before patching begins. Screws are straightforward — back them out with a drill or impact driver rather than trying to pull them through the drywall, which damages the paper face. A screw that spins without backing out has lost its bite in the framing and can be driven flush with the ceiling instead.
Mounting blocks are wood strips, usually pine or plywood, screwed into the ceiling framing through the drywall. Removing them means backing out the screws and prying the block away from the ceiling. This is where additional drywall damage often happens. Work slowly with a flat pry bar and a putty knife between the block and the drywall to spread the force.
Adhesive residue needs to be addressed according to its type. Polyurethane foam adhesive (the same chemistry as the beams themselves) can often be scraped off with a sharp putty knife once it has cured. Solvent-based construction adhesive may need a chemical remover — mineral spirits or a commercial adhesive remover — followed by thorough cleaning. Test the remover on an inconspicuous area first; some removers will soften the paint or drywall paper.

Step three: assess what level of patching is needed
The patching work breaks into three categories based on the damage type, and each has a different repair workflow.
Small screw holes (under 6 mm): Single coat of patch compound, sand flush, prime, paint. This is the lightest repair and the most common.
Countersunk screw holes (6 to 12 mm with a conical depression): Two coats of patch compound to fill the depression, sand flush, prime, paint.
Larger damage (gouges, torn paper, mounting block shadows, popped fastener holes): Cut a small patch of drywall, fit it into the damaged area, tape and mud the joints, sand, prime, paint. This is more involved and may benefit from professional finishing.
If your ceiling has only screw holes and countersinks — which is the most common case after faux beam removal — the project is well within DIY range. If you have multiple larger damaged areas or extensive adhesive damage that pulled the drywall paper, the time investment starts to favor hiring a finisher.
Step four: gather materials
For a typical ceiling with screw holes and a few mounting block shadows from a beam removal across one room, the materials list is short:
- All-purpose joint compound (premixed, in a 1-gallon or 5-gallon pail depending on the scope)
- Setting-type compound (also called "hot mud," in a 20-minute or 45-minute working time) for any patches that need to build up quickly or that go deeper than 3 mm
- Paper drywall tape (for any joints you need to reinforce)
- Self-adhesive fiberglass mesh tape (acceptable alternative for small repairs)
- Drywall sanding sponges in medium, fine, and ultra-fine grits
- A putty knife in 4-inch and either 6-inch or 8-inch width
- A mud pan
- Primer (acrylic, drywall-specific)
- Ceiling paint matched to the existing color
- A roller and tray, plus a brush for edges
If you need to cut a drywall patch, also have a utility knife, a drywall saw, a straight edge, and a piece of drywall that matches the existing thickness (usually 1/2 inch for residential ceilings, 5/8 inch for fire-rated ceilings in multi-family construction).
The total material cost for a typical room runs $40 to $90. The decision to DIY or hire out is mostly about time and skill, not money.
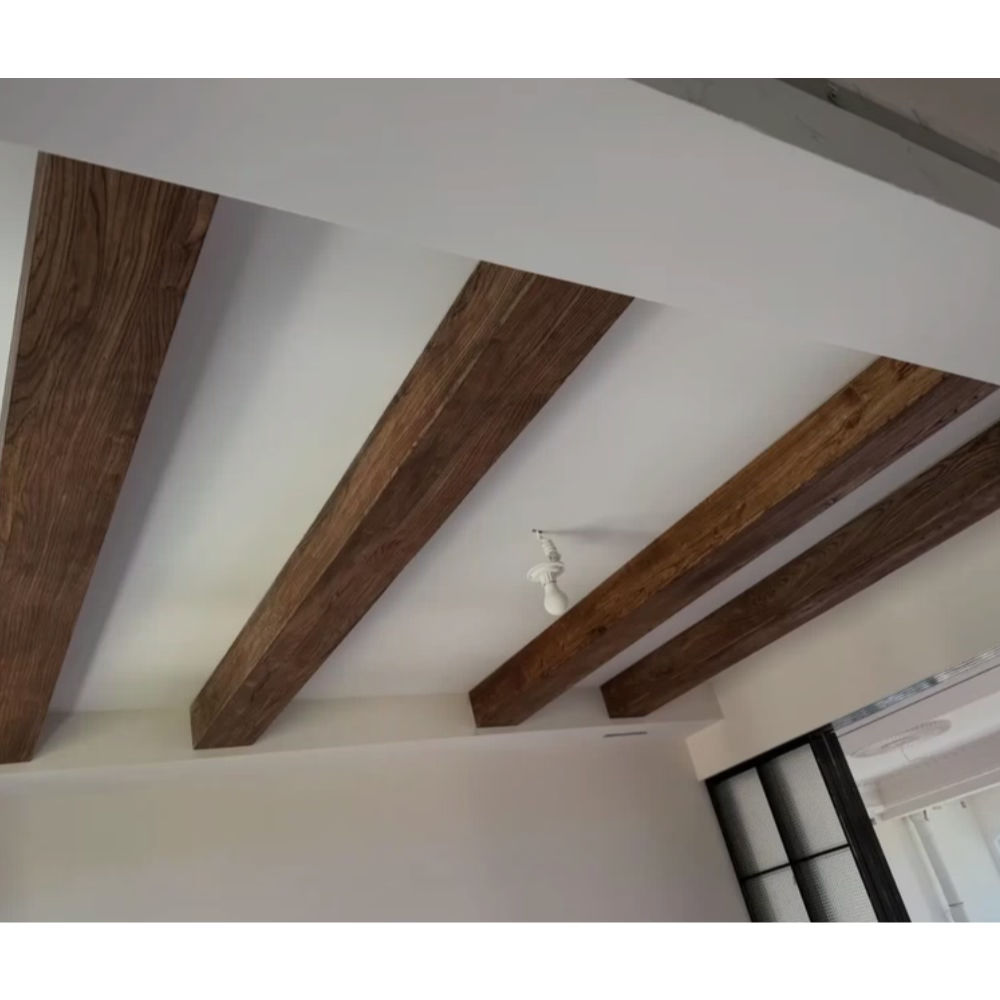
Step five: the patching workflow
Working from smallest repairs to largest is the conventional order, but it is also acceptable to do all repairs of the same type together.
Fill the screw holes. Use the 4-inch putty knife to press a small amount of all-purpose joint compound into each hole, drawing the knife across the hole at a 90-degree angle to force the compound into the cavity and leave a thin coat over the surface. For countersunk holes, apply a second coat after the first dries to fill the depression flush with the surrounding surface.
Address mounting block shadows. If the shadow is just a paint discoloration and not physical damage, you do not need to fill it — primer and paint will cover it. If there is physical damage, fill with compound using the same technique as for screw holes. If the mounting block pulled up some drywall paper, you may need to cut back to clean drywall and install a small patch.
Install any required drywall patches. Cut the damaged area back to clean drywall with a utility knife or drywall saw. Cut a patch piece slightly smaller than the opening. Fit the patch in place — for a small patch without framing access, you can use the California patch method (also called a butterfly patch) where the patch itself has paper flaps on each side that are embedded in joint compound. Tape and mud the joints with paper tape and setting-type compound.
Sand everything smooth. Once the compound is fully dry (typically overnight for all-purpose compound, or per the bag instructions for setting-type), sand with a medium-grit sponge to knock down high spots and a fine-grit sponge to smooth the surface. Run your hand over the patched area with your eyes closed — if you can feel the patch, it will show when painted.
Prime the patched areas. A dedicated drywall primer is worth using rather than just painting over the patches with the ceiling paint. Primer seals the joint compound, evens out the porosity difference between the patch and the surrounding drywall, and provides a uniform base for the paint. Without primer, patched areas often show as dull spots in the finished paint, known as "flashing."
Repaint the entire ceiling. Spot-painting patched areas almost always shows. The original paint has aged; the new paint has not. Rolling the entire ceiling with the matched color produces a uniform appearance. One coat is usually sufficient over primed patches; two coats if the original color has faded significantly.
Step six: matching ceiling texture
If your ceiling has a texture — popcorn, orange peel, knockdown, slap brush — the patched areas need to match the surrounding texture, not just the color. Texture matching is the most common reason homeowners hire a professional finisher, because it requires both the right technique and the right tools.
Smooth ceilings are the easiest. Sand the patch flush and you are done.
Orange peel texture can be approximated with a spray texture product applied from an aerosol can or a hopper spray gun. Practice on cardboard first; the texture builds quickly and is easy to overdo.
Knockdown texture is applied like orange peel and then partially smoothed with a flat knife after a short wait. Difficult to do well without experience.
Popcorn texture is the hardest to match because the original texture is applied as a wet aggregate that ages and discolors over time. The patched area will look like new popcorn among aged popcorn. Many homeowners with popcorn ceilings opt to scrape the entire ceiling smooth and repaint, which solves the matching problem at the cost of a much larger project.
A professional finisher can usually match the existing texture for a reasonable hourly rate, and the savings in frustration are significant. If the texture is anything beyond smooth or a light orange peel, getting a quote is worth the time.
Step seven: clean up and final inspection
Once paint has dried, inspect the ceiling with the same low-angle lighting technique you used in step one. Patches that looked invisible under flat overhead lighting often show under raking light. Touch up any visible imperfections, let them dry, and inspect again.
Clean the work area thoroughly. Drywall dust migrates farther than you expect — it gets into adjacent rooms, onto furniture, into HVAC ducts if the system was running. Replace HVAC filters after a drywall project and wipe down hard surfaces with a damp cloth before the dust settles permanently into flooring.
When to call a professional
The honest line between DIY and professional work depends on three factors: the extent of the damage, the type of texture, and your tolerance for the work.
For a room with a smooth ceiling and twenty to forty screw holes from beam removal, the work takes a competent DIYer one full day plus drying time, and the result is essentially invisible. This is the DIY sweet spot.
For a room with extensive damage, multiple mounting block shadows, or a textured ceiling, the work is better delegated to a drywall finisher who has the spray equipment, the technique, and the speed. A typical room runs $200 to $500 for professional finishing after faux beam removal, which is a modest cost relative to the quality of result and the time saved.
For ceilings with asbestos-containing texture (common in homes built before 1980, particularly popcorn ceiling applications), do not disturb the texture yourself. Asbestos abatement is a regulated activity in most jurisdictions and should be handled by a licensed professional.
A final note on what to do differently next time
After you have patched, primed, and repainted, you have a clean ceiling that is ready for whatever comes next. If the renovation includes new faux beams, the patching work you have just done is irrelevant because the new beams will cover it. If the renovation is moving away from beams entirely, the patched ceiling is the foundation for whatever finish you choose next — paint, wallpaper, a new texture, or a different ceiling treatment altogether.
For homeowners who are on the fence about removing their beams versus keeping them, the cost of the patching work is real but not prohibitive. A smooth-ceiling repair after beam removal on a typical living room runs $50 to $100 in materials for DIY, $300 to $600 if hired out. That cost should be factored into the renovation decision alongside the aesthetic and functional considerations.
Technical References
ASTM standards cited in every specification
Test Data
Lab results from internal testing program
Updated 2026
Reviewed against current product specs


