
A contractor I know was once asked to hang a solid oak beam across a standard residential living room ceiling. The beam itself weighed 240 pounds. The ceiling was framed with 2x6 joists at 16-inch centers supporting a drywall finish. The joists could carry the load — barely — but the installation required two men, a temporary brace, a scissor lift, and a mounting strategy that involved through-bolts and backing plates. The cost of the installation labor was greater than the cost of the beam.
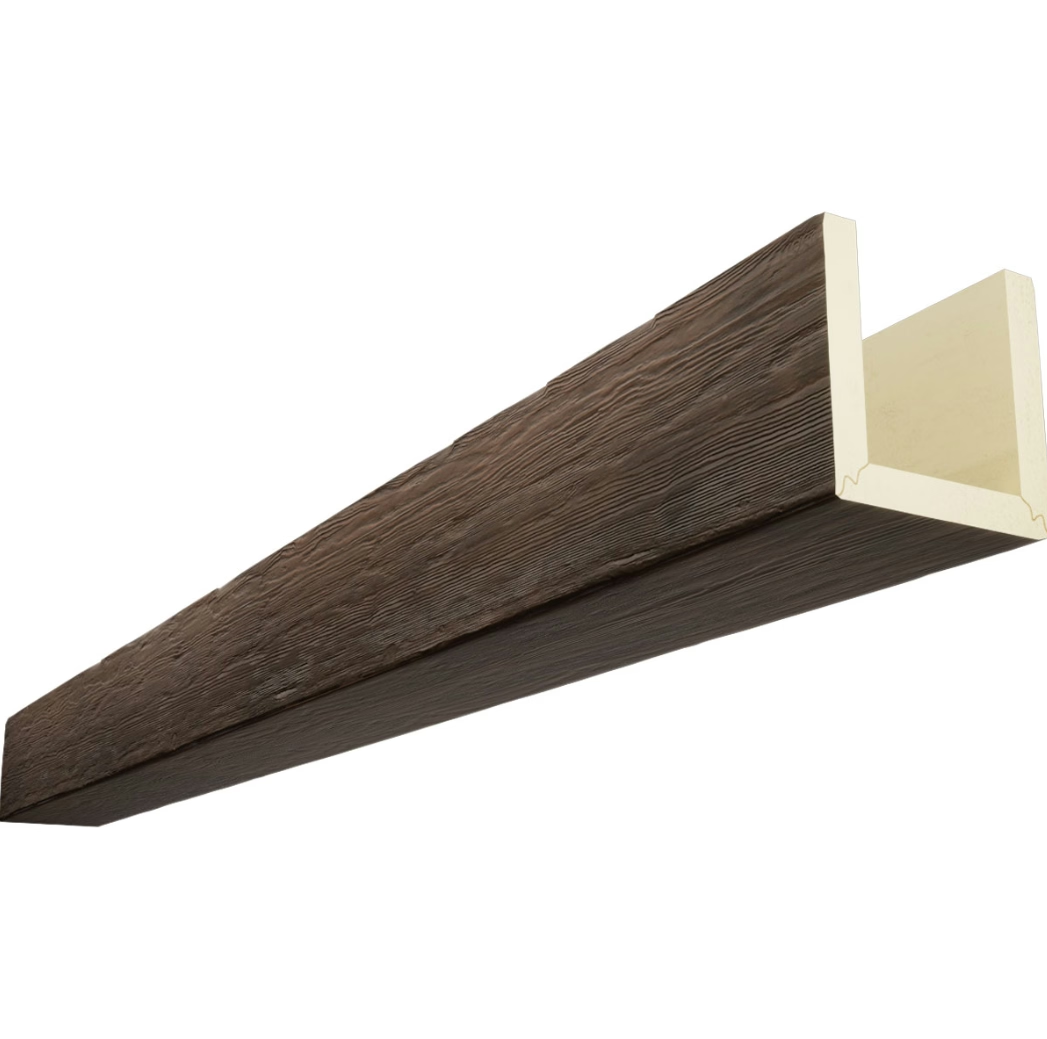
The same conversation with polyurethane faux beams goes very differently. The comparable 10-foot faux beam at 8 inches by 6 inches weighs roughly 15 pounds. The same two men — or one competent DIYer and a helper — can lift it into position on a stepladder. The mounting hardware is a fraction of the size, the install time is a fraction of the duration, and the ceiling does not need to be reinforced to carry the load because the load is not meaningful by residential structural standards.
This is the drywall-safe advantage of polyurethane. It is not a marketing claim; it is a consequence of the material density. A standard drywall ceiling is rated to support light fixtures, smoke detectors, and decorative items weighing up to a few tens of pounds at any single point. A lightweight faux beam falls comfortably within that envelope. This article explains the weight data, the mounting approaches that work on standard drywall, and the limits that still apply.
Weight data for common beam sizes
Polyurethane faux beam weights vary with wall thickness, internal structure (hollow, foam-filled, reinforced), and density of the formulation. The figures below are typical for hollow high-density closed-cell polyurethane beams of the kind used in residential and light commercial applications.
| Beam size (W × H × L) | Approximate weight |
|---|---|
| 6 in × 4 in × 8 ft | 8 to 11 lb |
| 6 in × 4 in × 10 ft | 10 to 14 lb |
| 8 in × 6 in × 8 ft | 11 to 15 lb |
| 8 in × 6 in × 10 ft | 14 to 18 lb |
| 8 in × 8 in × 10 ft | 17 to 22 lb |
| 10 in × 8 in × 12 ft | 22 to 30 lb |
| 12 in × 10 in × 16 ft | 38 to 50 lb |
For comparison, the equivalent solid oak beams weigh roughly five to seven times as much. A 10-foot solid oak 8x6 would be 80 to 100 pounds; a 16-foot solid oak 12x10 would be 250 to 320 pounds.
The weight range within each row of the table reflects variation between manufacturers. Lower-density formulations and thinner walls produce the lighter end of the range; reinforced beams with internal blocking for heavy hardware or for structural-rated applications produce the heavier end. When weight matters for a particular installation — for example, mounting to a ceiling where the joist structure is unknown or compromised — request the actual weight of the specific beam from the manufacturer before ordering.
For most residential applications on standard drywall ceilings, the entire range of beam sizes from 6x4 up to about 10x8 falls well within what a drywall ceiling can handle. The 12x10x16 beams at the upper end of the table are heavier and warrant additional consideration, particularly in long-span installations where multiple beams run parallel and the cumulative load on a section of ceiling needs to be evaluated.
What "drywall-safe" actually means
A drywall-safe installation is one in which the load is transferred through the drywall into the building structure without requiring the drywall itself to carry meaningful load. Standard residential drywall is 1/2 inch gypsum board, occasionally 5/8 inch in fire-rated assemblies. The drywall itself has a low shear strength and is not a structural element. It is a finish material.
When you hang a picture from a drywall ceiling using a plastic anchor, the load is held by the anchor's engagement with the gypsum — but only for light loads (typically under 10 to 15 pounds per anchor in shear). For heavier loads, the anchor must reach through the drywall and engage with the framing behind it. The framing — the wood joists or steel studs — is the structure that carries the load.
A lightweight faux beam installation typically uses one of three approaches.
Approach 1: Direct screw into ceiling joists
The most secure approach. The beam is screwed into the ceiling joists through the drywall, with screws long enough to pass through the drywall, through any blocking or strapping, and into the wood framing. Typical screw length is 3 to 4 inches depending on the build-up. The beam hangs from the joists, not from the drywall.
The catch is that joist locations are not always where you want the beam to run. Joists are typically 16 inches on center, running in one direction across the ceiling. If the desired beam direction crosses the joists, you can mount directly into each joist with separate fasteners, and the beam picks up support every 16 inches. If the desired beam direction runs parallel to the joists, you only get support where the beam crosses a joist, which may be at the ends only. Parallel-to-joist installations require either adding blocking between the joists to give the beam intermediate support, or using a different mounting approach.
Approach 2: Blocking installed before drywall
The cleanest approach where the ceiling is open during renovation or new construction. Wood blocking — typically 2x4 or 2x6 lumber — is installed between the joists at the beam location before the drywall goes up. The drywall is then installed over the blocking. The beam is screwed into the blocking through the drywall, with the blocking carrying the load and the drywall simply providing the finished surface.
This is the standard approach for new construction and major renovations. It is not available in retrofit situations where the drywall is already closed up.
Approach 3: Mounting brackets attached to joists through the drywall
A retrofit-friendly approach when the desired beam location does not align with the joists. Heavy-duty mounting brackets (steel L-brackets or purpose-made beam brackets) are attached to the side of the joists with screws that reach through the drywall and engage the wood framing. The beam then hangs from the brackets.
This approach requires access through the drywall to find the joists and to install the brackets. A small hole is cut for each bracket location, the bracket is screwed into the joist through the hole, and the hole is patched after the beam is installed. Alternatively, the brackets can be installed before the beam is hung and the patching done with the beam in place to hide the holes.
Approach 4: Free-span mounting where blocking is impractical
For installations where the ceiling cavity cannot be accessed — for example, a finished ceiling below a concrete slab — there are specialty mounting systems that use expanding metal anchors in the concrete or steel structure above the drywall. These systems carry higher load ratings than typical drywall anchors and are appropriate for heavier faux beams in commercial construction. For most residential drywall applications, this is overkill; the lighter-weight beams rarely require it.
The hardware that actually works
The hardware aisle at a home improvement store contains dozens of products marketed for "ceiling mounting" and most of them are not appropriate for faux beam installation. The hardware that actually works falls into three categories.
Wood screws into joists or blocking. The simplest and most secure. Use construction-grade wood screws (not drywall screws, which are brittle and not designed for shear loads). Length should be sufficient to pass through the drywall, any build-up, and at least 1.5 inches into the wood framing. For most residential installations this means 3-inch to 3.5-inch screws.
Snaptoggle or toggle bolts. For retrofit installations where joist access is not available at the beam location, these provide the highest load rating of any drywall-only anchor. A snaptoggle consists of a metal channel that drops through a hole in the drywall and snaps flat behind it, with a bolt that threads up to pull the channel tight against the back of the drywall. Load ratings for a single snaptoggle in 1/2-inch drywall are typically 80 to 100 pounds in shear. A faux beam secured with two or three snaptoggles is well within capacity even at the heavier end of the table.
Threaded drywall anchors (self-drilling). For lighter loads and where the beam does not need to support anything beyond its own weight. Plastic or zinc threaded anchors installed with a screwdriver or drill bit, with a holding capacity of 10 to 25 pounds per anchor depending on the product. Suitable for the smaller beam sizes in drywall-only situations.
The most common DIY mistake is using plastic expansion anchors (the kind that come with the shelving unit you bought at the big box store) for ceiling applications. These anchors are designed for light tension loads in wall applications, not for shear loads in ceilings. They will eventually creep downward under sustained load. For ceiling mounting of anything beyond the lightest items, use the snaptoggle or screw into framing approach.
Distributing the load across multiple attachment points
A 10-foot beam should not hang from two screws at the ends only. The intermediate sag over time, even on a beam that is straight at installation, will become visible as the mounting points carry the full weight and the unsupported middle of the beam carries none. Distribute the load.
For a hollow polyurethane beam, the practical approach is to install a continuous wood mounting strip (a 1x4 or 1x6 pine strip, length matching the beam) along the ceiling at the desired beam location, with the strip screwed into the joists at 16-inch centers. The faux beam then slides over the mounting strip and is screwed into the strip through the beam face at 12-inch to 16-inch intervals along its length.
This approach gives the beam intermediate support points that prevent sag, allows the fasteners to be hidden in the finish texture, and makes the installation easier to level during fitting. It is the approach most contractors use for hollow faux beam installation and the one most DIYers adopt once they see the result.
The limits that still apply
Even with lightweight polyurethane, there are installations where the ceiling cannot handle the load.
Water-damaged drywall. Drywall that has been exposed to moisture loses significant strength. A beam mounted to water-damaged drywall will eventually pull the drywall away from the framing. The damaged section needs to be replaced before any beam installation.
Drywall with crumbling or missing paper face. The paper face is what gives drywall its tensile strength at the surface. Damaged paper means the gypsum has nothing to hold it together under load. Patch or replace before mounting.
Popcorn or heavily textured ceilings. Texture adds weight and obscures the drywall surface. Inspect the actual drywall condition before mounting rather than assuming the ceiling is sound because it looks intact from below.
Old plaster ceilings. Plaster ceilings in homes built before 1950 are not drywall. They are wood lath with plaster keys, or in some cases plasterboard. The mounting approaches described above are not appropriate for plaster; plaster ceilings require different anchors and a careful assessment of the plaster condition before any load is applied. For plaster ceilings, the standard approach is to mount into the wood lath or into blocking that has been attached to the joists from above.
Suspended or drop ceilings. Tiles in a drop ceiling are not structural and cannot carry any load. The beam must be mounted to the grid or to the structure above the grid, not to the tiles themselves.
For homeowners and contractors evaluating a specific ceiling, the right starting point is to identify the framing behind the drywall. A stud finder locates joists. A small exploratory hole (which gets patched anyway as part of the installation) confirms the framing type and depth. With that information, the appropriate mounting approach is straightforward.
A practical workflow for the DIY installer
For a single-beam installation on a standard drywall ceiling where the beam direction crosses the joists:
- Locate the joists with a stud finder and mark their positions on the ceiling.
- Determine whether the joists provide enough attachment points along the desired beam length. If the joists run perpendicular to the beam, you get a fastening point every 16 inches. If parallel, you may need to add blocking.
- Install a wood mounting strip against the ceiling at the beam location, screwing through the strip into each joist with 3-inch screws.
- Lift the beam into position over the mounting strip with a helper.
- Level the beam with shims as needed between the strip and the beam.
- Screw through the beam face into the mounting strip at 12-inch intervals using 2.5-inch to 3-inch screws that engage at least 1 inch into the strip.
- Touch up any visible fastener heads with color-matched caulk or filler.
- Caulk the beam-to-ceiling joint if desired for a finished appearance.
The entire workflow is a half-day project for a single beam on a single ceiling, and the materials cost is under $50 in addition to the beam itself. That is the drywall-safe advantage in practice.
Technical References
ASTM standards cited in every specification
Test Data
Lab results from internal testing program
Updated 2026
Reviewed against current product specs


