A bare steel I-beam cutting across your living room is one of those design features that some people love and others simply cannot stand. If you fall into the second camp, you have probably spent years trying to ignore the rust-prone, web-and-flange silhouette hanging over your kitchen island or great room. The good news is that you do not need to demolish walls or reframe your ceiling to make the steel disappear. PU faux beams offer a clean, low-cost, and remarkably convincing way to wrap, cover, and visually integrate exposed metal structural members.

Why Wrapping Steel Beats Other Hiding Methods
Before polyurethane casings became widely available, homeowners and contractors had three options for dealing with exposed structural steel. They could box it in with drywall, panel it with real wood, or simply paint it and call it industrial. Each approach has drawbacks. Drywall boxes add weight, require taping and mudding, and tend to crack along the long seams that run parallel to the steel. Solid wood wraps look beautiful but demand careful acclimation, periodic sealing, and a contractor comfortable with heavy timber joinery. Paint alone leaves the beam as the dominant visual feature.
PU faux beams sidestep these issues by combining the structural performance of a rigid urethane shell with the appearance of aged, hand-hewn, or smooth-sawn timber. They are light enough for a two-person crew to lift overhead, rigid enough to span long runs without sagging, and pre-textured so the finished look is consistent from end to end. A typical 20-foot steel I-beam can be wrapped in a single working day once the materials are on site, compared with three to five days for a comparable drywall box.
What Makes Polyurethane a Good Fit Around Steel
Steel and polyurethane behave very differently from steel and wood. Wood expands and contracts with humidity, and over a decade that constant movement can open joints, telegraph knots through finishes, and leave gaps where the wrap meets the ceiling. Polyurethane, by contrast, is dimensionally stable. It does not swell in summer or shrink in winter, and it does not need to breathe against the steel behind it.
Thermal performance is the other big reason. Steel conducts heat rapidly. In a cold climate, an uncovered steel beam radiates chill down into the room; in a hot climate, it bakes under the afternoon sun and slowly conducts that heat inward. A PU wrap adds an insulating buffer of closed-cell foam that slows conductive transfer noticeably. Many installers report a small but measurable improvement in room comfort after wrapping a large beam.
Measuring and Selecting the Right U-Shape
Most steel beams are wrapped using U-shaped PU casings, sometimes called three-sided box beams. The U opens toward the ceiling, slides over the steel, and is then secured through its side flanges into blocking or directly into the steel web with self-tapping fasteners. Choosing the correct interior width and height is the single most important step.
How to Measure the Steel You Are Covering
Pull down any old light fixtures, sprinkler heads, or surface conduit that interferes with the wrap. With the steel fully exposed, measure the flange width (the horizontal foot of the I-beam), the web depth (the vertical plate between the flanges), and the overall height of the section. A W8x18 beam, for example, has an 8-inch depth and a 4-inch flange width, so the wrap needs an interior cavity slightly larger than 8 inches tall by 8.5 inches wide to slide on without binding.
Add at least a half inch of clearance in every direction so installers can shim and level the casing. If the steel runs close to a finished ceiling and you cannot drop it lower, look for a beam wrap with a low-profile or asymmetric profile. Some manufacturers offer wraps with a tall side and a short side specifically for tight ceiling conditions.
Choosing Texture and Color
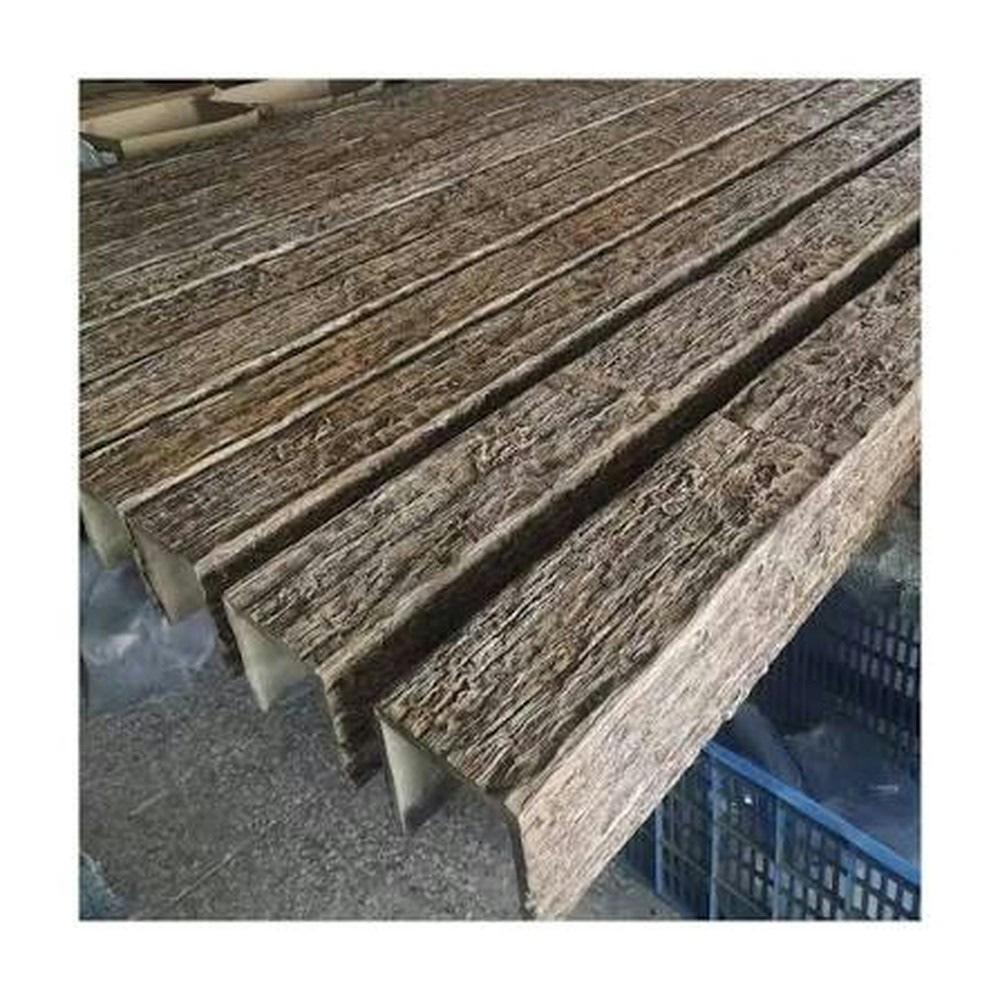
Once the dimensions are sorted, the fun part begins. PU faux beams ship in roughly a dozen standard finishes ranging from rough-sawn barn wood to clean mission oak to a heavily distressed reclaimed pine. Because the texture is molded into the foam at the factory, every foot of beam has the same depth of grain, the same knot pattern density, and the same color variation. That consistency is hard to replicate on site with stain and hand-texturing.
Most product lines also accept a custom topcoat. If you have an existing mantel, door, or piece of furniture that you want the new wrap to match, send a sample to the manufacturer and they can tint the factory finish or supply an untextured wrap ready for a painter to finish on site. Custom orders typically add two to four weeks to lead time and a modest upcharge per linear foot.


Installation Step by Step
Wrapping a steel beam with PU faux casing is straightforward, but the order of operations matters. Rushing the layout or skipping shimming steps causes ripples along the bottom face of the wrap that are impossible to hide once the lights are on.
Preparation and Blocking
Start by snapping a chalk line on each side of the steel at the finished elevation of the bottom flange of the wrap. This line becomes the reference plane for the entire installation. Next, install wood blocking or steel track along the ceiling where the wrap meets the deck above. The blocking gives you something to screw the side flanges of the U-shape into and lets you adjust for slight variations in ceiling height.
If the steel beam carries sprinkler pipe, electrical conduit, or low-voltage cabling, now is the time to reroute or extend those runs so they sit inside the wrap rather than fighting it. The PU casing will hide them, but any future electrician needs to know they are in there. A small printed plan tucked into the ceiling access panel saves a lot of guesswork later.
Lifting and Securing the Wrap
PU beam wraps are long, awkward, and deceptively light. Two installers working from rolling scaffolds can usually lift and position a 16-foot section in under five minutes. Start at one end and slide the U over the steel, working toward the opposite wall. Keep the wrap about an inch proud of the chalk line so you can fine-tune the elevation.
Drive self-tapping screws through the side flanges into the blocking every 16 to 24 inches. Do not overdrive the screws; the urethane will dimple if the head sinks more than a quarter inch. Once the screws are set, walk the full length of the wrap and check for daylight gaps along the ceiling joint. Any visible gap wider than an eighth inch gets a backer rod and a bead of paintable urethane caulk.
Joining Multiple Lengths
Long steel beams often exceed the longest available PU wrap. When you need to butt two sections, cut the mating ends square on a miter saw with a fine-tooth carbide blade. Stagger the seams away from the splice in the underlying steel if possible, and reinforce each joint from inside with a short length of L-bracket screwed into the foam flange. Hide the joint with a decorative polyurethane strap or a small block that mimics a hand-hewn scarf joint.
Outside corners are where most amateur installations fall apart. Buy or fabricate a factory miter for every outside corner; hand-cut miters in urethane rarely look right because the foam chips along the molded grain. Inside corners can be scribed and caulked because they are hidden from direct sight lines.
Finishing Touches That Sell the Look
A wrapped steel beam should look like it has been part of the house for decades, not like a fresh disguise added last weekend. The finishing details do most of the work.
Staggering Hardware and Adding Straps
If the original steel beam had bolted cover plates at the splices, consider adding faux bolt heads or decorative iron straps to the wrap at the same locations. Visual continuity between what was there and what is there now helps the wrap feel structural rather than decorative. Many homeowners add a single wrought-iron strap at each beam-to-column connection to anchor the eye.
Lighting Integration
The flat bottom face of a PU beam wrap is the perfect surface for a recessed linear LED strip. A channel fixture mounted before the final coat of paint disappears into the shadow line of the beam and washes the wall or countertop below with warm light. For a more rustic look, surface-mount a pair of gooseneck barn lights to the wrap with backing plates that distribute the fastener load across the foam.
Painting and Sealing
Factory-finished wraps do not need additional paint, but they benefit from a light coat of matte polyurethane or wax sealer if the beam sits in a kitchen, bath, or other high-humidity area. The sealer prevents cooking vapor, splattered wine, or steam from dulling the finish over time. Reapply every three to five years for the first decade, then less often as the surface ages.
When Wrapping Is Not the Right Answer
PU beam wraps are not a magic eraser for every steel problem. If the steel beam is severely rusted, structurally compromised, or carrying a load it was not designed for, the right answer is a structural engineer, not a facelift. Likewise, if you want to expose the steel as a design feature, wrap a different beam or skip the wrap entirely. A polyurethane sleeve over a beam you actually want to see is wasted money.
There is also an aesthetic question worth asking yourself before you commit. Wrapping a beam visually lowers the ceiling in that part of the room. In a great room with 10-foot ceilings, that is rarely a problem. In a basement with 7-foot-4 clearance, dropping another 9 inches along the centerline can make the space feel cave-like. In those cases, consider furring down the ceiling on either side of the beam to create a coffered look that hides the steel without dropping the centerline as far.
A Real-World Wrap Walkthrough
A recent project involved a 1960s ranch home with a 22-foot W12x40 steel ridge beam running the length of the living room. The owners wanted a warm, modern farmhouse feel without ripping out the steel. The crew measured the steel, ordered two 12-foot U-shaped wraps in a weathered oak finish, and added two custom corner blocks where the beam met the masonry fireplace.
Installation took one day for a three-person crew. The total material cost, including the wraps, blocking, fasteners, caulk, and sealer, came in around 40 percent of what a comparable solid-oak wrap would have cost, and the project added only about 90 pounds of load to the ceiling framing. Eighteen months in, the wrap looks identical to the day it went in, with no visible seams, cracks, or color shifts.
That kind of result is what makes PU beam wraps worth considering for anyone who has been quietly resenting a steel beam for the last decade or two.
Technical References
ASTM standards cited in every specification
Test Data
Lab results from internal testing program
Updated 2026
Reviewed against current product specs


