
Every renovation eventually produces a moment where the beam you ordered is six inches too long. With solid timber, that moment leads to a trip back to the lumber yard, a special saw blade, and the prayer that the cut will not splinter the wood. With PU faux beams, that moment leads to a miter saw, a steady hand, and a clean finish in under a minute.
The foam core that gives PU beams their lightweight character also makes them remarkably easy to cut and shape. Standard woodworking tools handle the material cleanly, which means installers and homeowners can do custom fitting on-site without specialized equipment or training.
This guide explains how PU faux beams respond to common tools, what cutting techniques produce the best results, and which on-site customization projects benefit most from this easy-cutting material.
Why PU Faux Beams Cut So Easily
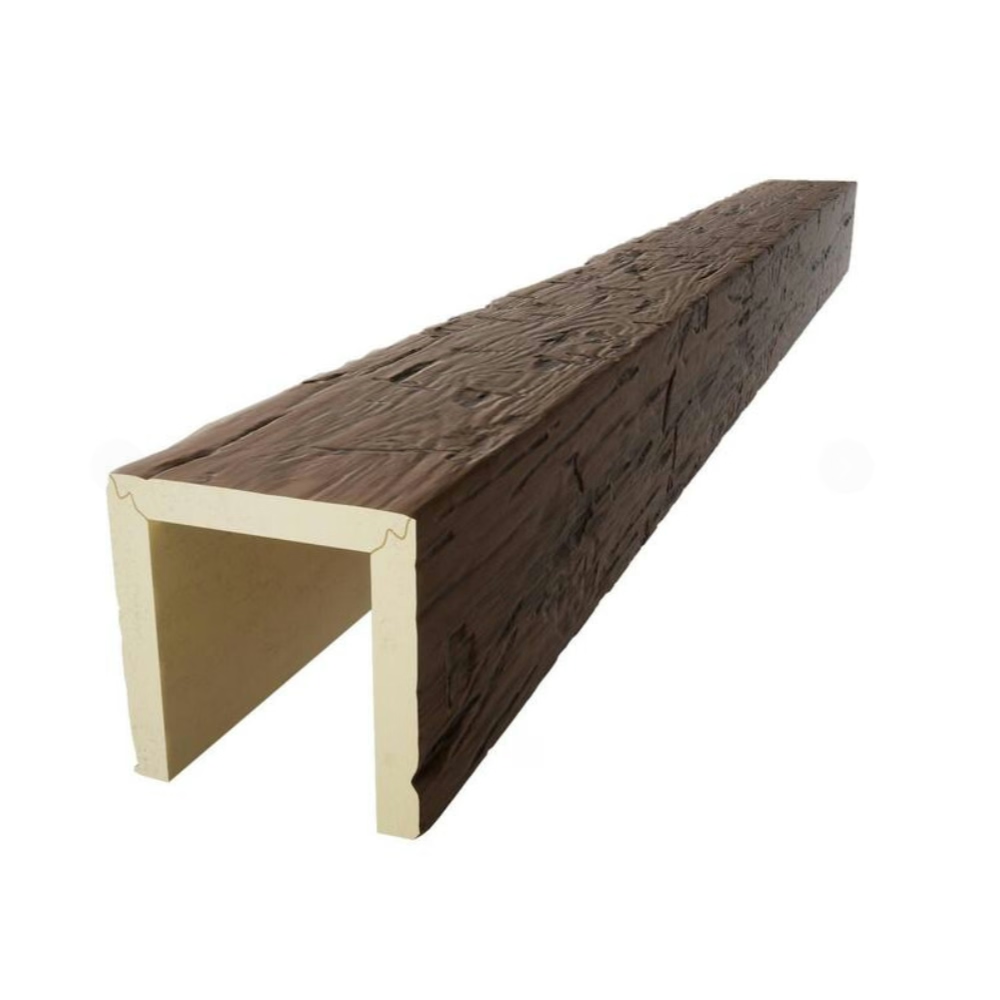
The structure of polyurethane foam is fundamentally different from wood. There are no grain fibers to split, no knots to fight through, and no density variations that cause blades to wander. Instead, the material is a uniform closed-cell foam with a density similar to dense packing material, finished with a thin protective coating on the outside.
This uniformity means saw blades pass through the material smoothly and predictably. The foam does not grab the blade, does not heat up excessively during cutting, and does not produce the kind of tear-out that ruins wood cuts. The result is a clean edge that requires minimal finishing.
The protective coating on the outside of the beam adds a small amount of resistance to cutting, but standard blades handle it without issue. The coating also seals the cut edge, which means freshly cut PU beams do not need extensive sealing or finishing before installation.
Comparing Cutting Effort
To put the cutting effort in perspective, a typical ten-foot PU beam in an eight-inch profile cuts as easily as a piece of medium-density fiberboard. A solid wood beam of the same dimensions would require a much more powerful saw, a higher-quality blade, and significantly more time. The PU beam can be cut with a standard cordless circular saw, a handsaw, or even a sharp utility knife for thin profiles.
For installers accustomed to working with solid timber, the difference is startling. The first cut on a PU beam is often a revelation — the saw glides through the material with almost no resistance, and the resulting edge looks factory-finished.
Tools That Work Best
A few tools produce particularly clean results when cutting PU faux beams. The most common is the miter saw, which delivers perfectly square cuts and accommodates angled cuts for corners and transitions. Most installers set up a miter saw at the installation site and make all cuts on a stable work surface before mounting.
A handheld circular saw with a fine-tooth blade also works well, particularly for long cuts where a miter saw cannot reach. The key with a circular saw is to support the beam on both sides of the cut to prevent the weight of the offcut from snapping the material before the cut completes.
For small adjustments or notch cuts, a sharp utility knife or a jigsaw with a fine-tooth blade handles the job cleanly. The jigsaw is particularly useful for cutting around obstacles like electrical boxes, junction points, or existing structural elements where a straight cut is not possible.
Saws and Blades Worth Considering
For high-volume installation work, a track saw with a fine-tooth blade produces the cleanest straight cuts in PU beams. The track saw rides on a guide rail that prevents the blade from wandering, which is helpful on longer cuts where accuracy matters.
For most DIY projects, a standard miter saw with a 60-tooth or higher blade delivers results that are more than adequate. The high tooth count minimizes chipping in the protective coating and produces edges that need little or no sanding.
Drilling PU beams is similarly straightforward. Standard wood-boring or spade bits work for fastener holes, and the foam material accepts screws and anchors without predrilling in most cases. For larger openings — such as those needed for recessed lighting — a hole saw attached to a standard drill produces clean circular cuts.
Common On-Site Customization Projects
The ability to cut PU beams on-site opens up a range of customization projects that would be impractical or impossible with solid timber. The most common include length adjustments at the end of runs, notched cuts for ceiling fixtures, and angled cuts for vaulted ceilings or dormers.
Length adjustments are the bread and butter of on-site cutting. Most installations involve at least one beam that needs to be trimmed to fit a specific wall-to-wall distance, and PU beams handle this adjustment cleanly. The installer measures the gap, marks the cut, and trims the beam with a single pass through the miter saw.
Notched cuts for ceiling fixtures are another frequent need. Recessed lights, ceiling fans, smoke detectors, and HVAC vents all require openings that interrupt the beam's line. With PU beams, the installer can cut a notch or hole on-site in a matter of minutes, then reinstall the beam around the obstacle.
Vaulted Ceilings and Angled Cuts
Vaulted and cathedral ceilings present a particular challenge for any ceiling beam installation, because the beams need to follow the angle of the ceiling rather than running parallel to the floor. PU beams handle this challenge well, since they can be cut to any angle without the risk of splintering that affects wood.
For vaulted ceilings, installers typically cut a compound angle at the top of each beam where it meets the ceiling slope. The compound angle combines the pitch of the ceiling with the angle needed to mate the beam against the slope. PU beams accept these cuts without the precision tooling required for wood, and the result is a beam that sits flush against the angled ceiling.
The same approach works for beams that meet at corners or that need to transition between different ceiling heights. The flexibility of the material means complex installations become manageable projects rather than engineering challenges.
Finishing Cut Edges
One of the most appreciated features of PU faux beams is how little finishing cut edges require. In most cases, the cut edge is clean enough to install immediately without any additional treatment.
For installations where the cut edge is visible — such as a beam that ends at an exposed location rather than against a wall — installers sometimes apply a light sanding with fine-grit sandpaper to smooth any minor roughness from the cut. The closed-cell structure of the foam means the sanded edge looks consistent with the rest of the beam.
If the cut edge needs to match the color of the beam's surface, the installer can apply a small amount of touch-up stain from the manufacturer's touch-up kit. The stain absorbs into the foam within seconds and dries to match the surrounding finish.
Sealing Cut Edges
Most PU beam manufacturers do not require sealing cut edges, because the closed-cell structure of the foam already resists moisture absorption. However, in installations where the beam is exposed to unusual humidity — such as a bathroom or covered outdoor area — sealing the cut edges with a light coat of water-based acrylic adds an extra layer of protection.
This sealing step is optional in most residential installations, but it is a low-cost insurance policy that extends the life of the beam in challenging environments.

Common Mistakes to Avoid
The most common mistake when cutting PU beams on-site is using a blade designed for solid wood with too few teeth. A coarse-tooth blade tears the protective coating and leaves a rough edge that requires extensive finishing. Investing in a fine-tooth blade eliminates this problem.
Another mistake is failing to support the beam properly during cutting. PU beams are lightweight, but they are not rigid in the way that wood is. An unsupported cut can cause the material to flex, which results in an uneven edge or a broken piece.
Finally, some installers try to cut PU beams with tools designed for metal or masonry. While the material is tough enough to handle aggressive cutting, the wrong tool produces excessive heat and rough edges. Standard woodworking tools are the right choice for PU beams in nearly every situation.
Working with the Material's Limits
PU beams cut easily, but they are not indestructible. Very thin profiles — under two inches in either dimension — are more fragile than thicker beams and require careful handling during cutting and installation. For very thin decorative trim pieces, a sharp utility knife often works better than a saw.
The foam core also has limits on how much detail it can hold. Deep carvings, sharp edges, and fine moldings are more challenging to cut cleanly than simple profiles. For installations that require detailed millwork, factory-molded beam ends or pre-fabricated corner pieces are usually a better choice than on-site carving.
For most residential and commercial projects, however, the material's limits are well beyond what on-site customization requires. The combination of easy cutting, clean edges, and minimal finishing makes PU faux beams one of the most installer-friendly ceiling products on the market.
The Practical Bottom Line
For contractors, the ability to cut PU beams on-site means faster installations, fewer return trips, and less waste from miscalculated orders. For homeowners, it means the freedom to adjust the design as the project progresses without waiting for new materials to arrive.
In both cases, the result is a more flexible installation process and a more accurate final product. The foam core that makes PU beams lightweight also makes them workable in ways that solid timber cannot match.
Technical References
ASTM standards cited in every specification
Test Data
Lab results from internal testing program
Updated 2026
Reviewed against current product specs


