
There is a moment in every homeowner's relationship with their house when they start looking up at the ceiling and imagining something different. Maybe the room feels flat, or maybe the proportions are off, or maybe the space just lacks the warmth that would make it feel like home. Faux wood ceiling beams are often the answer, and they are one of the few DIY projects that can transform a room in a single weekend.
The versatility of faux beams is what makes them such a popular choice for home improvement. They work in any architectural style, suit any color palette, and adapt to nearly any ceiling configuration. A homeowner who has never installed beams before can complete a basic project over two days with simple tools, and the result looks like it was always part of the house.
This article explores the DIY project ideas that work best with faux beams, from simple weekend makeovers to larger renovations where beams become a foundation for broader design changes.
The Single-Beam Statement
The simplest DIY beam project involves adding a single beam across a ceiling to create a focal point and visual texture. A single beam works particularly well in rooms with vaulted ceilings, in dining areas where a beam can define the eating space, or in living rooms where the beam becomes an architectural anchor above the main seating area.
For a single-beam project, the homeowner typically starts by selecting a location and measuring the span. The beam is ordered in the appropriate length and profile, then mounted over a weekend using the wrap-around block system described in installation guides. The project requires basic tools and a helper, but the skill level is well within reach for first-time installers.
A single beam in a living room can change how the room feels within hours. A vaulted ceiling that previously felt empty suddenly has a horizontal line that grounds the space. A long room that felt tunnel-like now has a visual interruption that creates intimacy.
Combining a Beam With Other Updates
A single-beam project is a natural opportunity to combine beam installation with other small upgrades. The most common pairing is with a new light fixture, since the beam provides a perfect anchor for a chandelier, pendant, or linear light.
Other pairings include fresh paint on walls and trim, new window treatments, or updated ceiling fans. These additions share the same ladder-and-tools setup as the beam installation, so combining them into one project reduces overall disruption.
For homeowners planning to sell their property in the near future, a single-beam statement is one of the highest-return improvements relative to cost. Real estate listings consistently feature ceiling beams in their photo galleries because the visual appeal translates directly into buyer interest.
The Multi-Beam Grid
For homeowners willing to invest a bit more time, a multi-beam grid transforms a flat ceiling into a structured architectural element. Three or four parallel beams across a room create a rhythm that makes the ceiling feel intentional rather than incidental.
A multi-beam project is more involved than a single-beam installation, but it is not dramatically more difficult. The planning involves laying out beam spacing, identifying joist locations for mounting, and ensuring each beam runs straight across its full length. The installation follows the same pattern as a single beam, repeated for each beam in the layout.
Homeowners often choose multi-beam grids for dining rooms, great rooms, and primary bedrooms. The grid provides visual interest without overwhelming the room, and it pairs well with modern farmhouse, transitional, and craftsman design styles.
Perpendicular Beam Patterns
Some rooms benefit from beams running in two directions, creating a coffered or grid-like effect. A typical pattern is a primary beam crossing the center of the room with secondary beams running perpendicular at intervals.
Perpendicular patterns work well in rooms with high ceilings, where the additional beam lines create proportion and scale. The pattern also helps break up large ceiling expanses in open-plan layouts, where the visual segmentation defines different functional areas.
The complexity of perpendicular layouts adds time but not necessarily difficulty to the installation. The main challenge is ensuring the joints where beams meet are clean and tight, which requires accurate cuts and careful alignment.
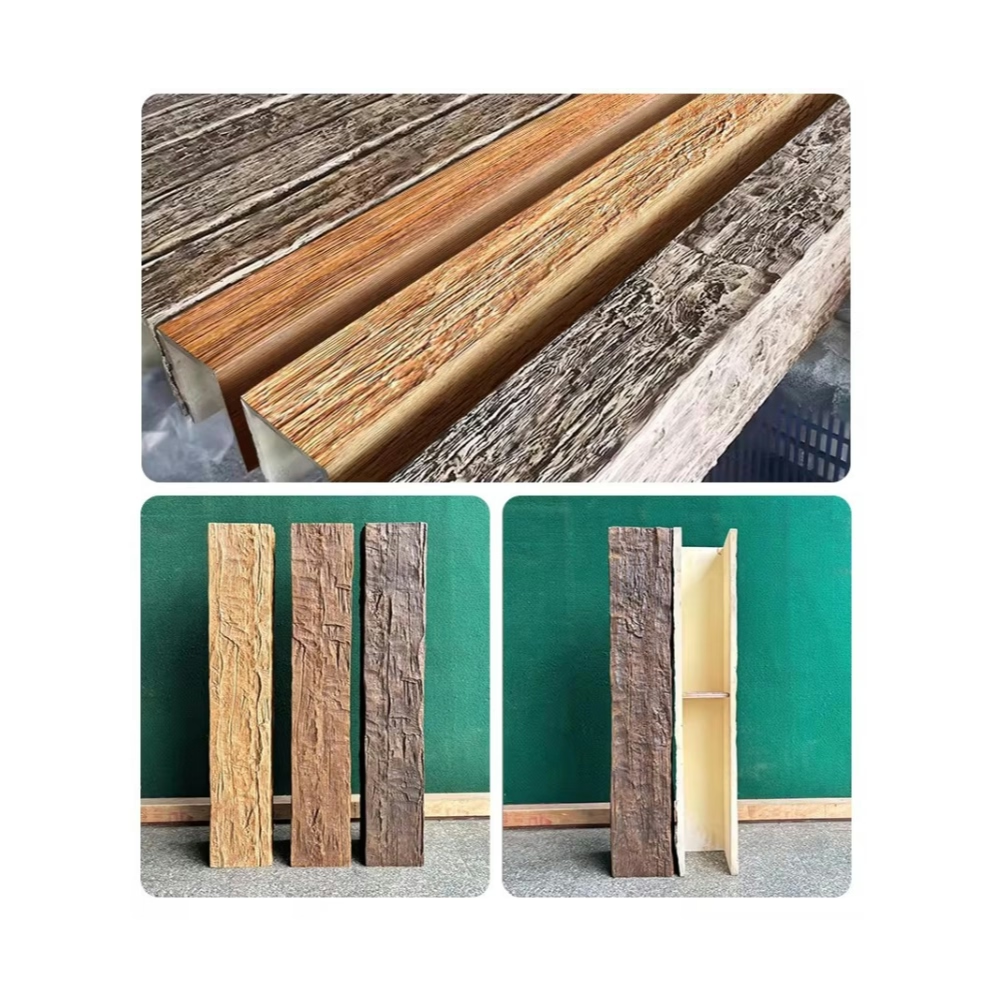
Beams Over Specific Features
Another common DIY approach is to install beams above a specific feature rather than across the entire ceiling. The most popular applications are above kitchen islands, over beds, and around fireplaces.
A beam over a kitchen island serves multiple purposes. It defines the island as a distinct zone within an open-plan layout, provides a mounting point for pendant lights or a linear fixture, and adds character to what is typically a flat ceiling. The installation is a single-beam project with the beam running parallel to the length of the island.
A beam over a bed creates an architectural headboard effect on the ceiling. The beam typically runs horizontally above the bed at the height of a traditional headboard, creating a visual frame for the sleeping area. Many homeowners combine this beam project with a wall treatment or a real headboard to create a layered focal point.
Beams around fireplaces serve both decorative and practical purposes. The decorative aspect is the visual weight they add to the fireplace wall. The practical aspect is that beams provide mounting points for mantel lighting, TV brackets, or seasonal decorations.
Seasonal and Trend-Driven Updates
Faux beams are particularly well-suited to seasonal updates and trend-driven design changes. Because they can be installed relatively quickly, homeowners can experiment with beam placements, colors, and configurations without committing to a permanent change.
A common seasonal approach is to add temporary-looking beams that can be removed without significant ceiling repair if the homeowner wants to change the look. Lightweight PU beams can be installed with minimal mounting hardware that does not leave major marks when removed, which makes them flexible for renters or for homeowners who like to refresh their spaces regularly.
Trend-driven updates might include adding beams in colors that complement current design movements. Earthy tones and natural finishes are currently popular, but the trend toward more relaxed, lived-in interiors also supports painted or whitewashed beams in some applications. The relatively low cost of faux beams compared to solid timber makes trend experimentation more accessible.
Small-Scale and Accent Beam Projects
Not every beam project needs to cover an entire ceiling. Small-scale and accent applications can have an outsized impact in the right location.
One popular project is adding beams to a tray ceiling. The beams follow the perimeter of the recessed tray, drawing attention to the architectural detail. The installation is typically faster than a full-coverage project because the tray's perimeter dictates the beam placement.
Another small-scale project is adding a faux beam to conceal a structural element, such as a duct, pipe, or wire run. The beam wraps the obstruction while maintaining the appearance of an architectural feature. This approach is both functional and decorative.
A third option is adding beams to outdoor living spaces like covered patios and pergolas. PU beams rated for exterior use handle these environments well and provide the same architectural appeal indoors as outside.
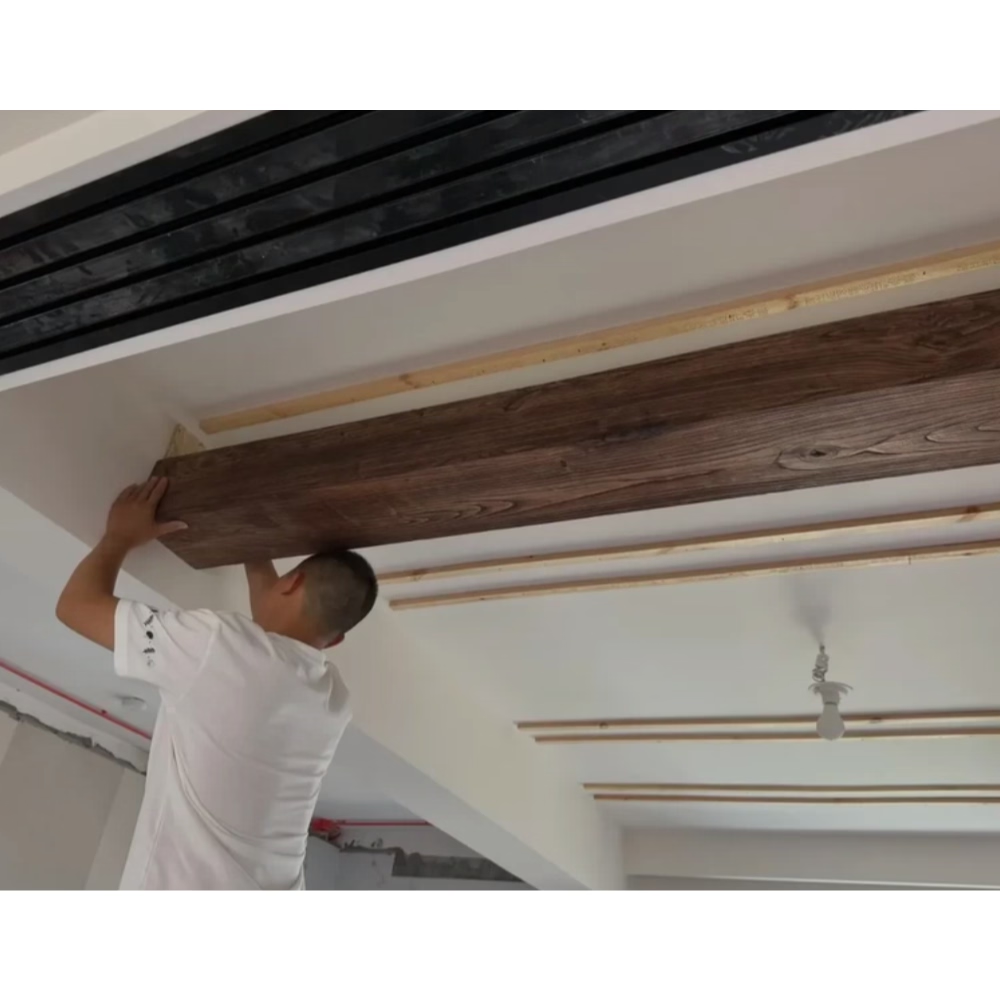
Combining Beams With Other Ceiling Upgrades
The most ambitious DIY projects combine beam installation with broader ceiling upgrades. This approach makes sense when the existing ceiling needs attention anyway, since the disruption overlaps.
A common combination is beam installation with ceiling fan replacement or addition. The new beams provide secure mounting for the fans and create a more architecturally finished appearance than fans on a flat ceiling. The two projects share the ladder work and electrical considerations.
Another combination is beam installation with recessed lighting. The beams serve as visual breaks that complement the recessed lights, and the electrical work for both projects can be done in a single visit from an electrician if needed.
For homeowners replacing popcorn ceilings or repairing water damage, the ceiling is already disrupted, which makes it a natural time to add beams. The new drywall or texture provides a clean canvas for mounting, and the beams help draw attention away from any imperfections in the rest of the ceiling.
Planning for Future Beam Projects
Homeowners who install faux beams once often find themselves planning future projects. Once they see how dramatically a beam changes a room, the appeal of doing another room becomes obvious.
A practical approach is to plan beam projects in a sequence that allows for skill-building. Starting with a single beam in a low-stakes room like a guest bedroom builds confidence for a more complex multi-beam project in a main living area later. The cost of materials is also spread out over time, which makes the overall investment more manageable.
For households with multiple family members, beam projects can be family activities with a clear division of labor. One person handles measuring and layout, another handles the cutting, and others help with the mounting. The collaborative aspect can make the project more enjoyable than a solo undertaking.
The Takeaway for DIY Homeowners
Faux wood ceiling beams deserve their reputation as one of the most accessible high-impact DIY projects available. They transform rooms, suit a wide range of design styles, and work with basic tools and modest skills. For homeowners looking for a project that delivers visual results without requiring professional contractors, beams are hard to beat.
The smart approach is to start with realistic expectations, plan the project carefully, and use the installation as a chance to learn skills that transfer to future home improvement work. The room will look better when the project is done, and the homeowner will have new confidence in their ability to shape the spaces they live in.
Technical References
ASTM standards cited in every specification
Test Data
Lab results from internal testing program
Updated 2026
Reviewed against current product specs


