
The first time most homeowners handle a hollow shell faux beam, the immediate reaction is surprise at how light it feels. A ten-foot beam in a substantial eight-inch profile weighs about as much as a bag of groceries. That weight makes the entire installation process different from working with solid timber, and it is what makes hollow shell beams the format most beginners should start with.
Hollow shell design splits the beam into two components: the decorative outer shell and a structural wooden mounting block inside. The shell wraps around the block, hiding it completely while the block provides the rigidity and mounting strength that the shell alone cannot. This division of labor is what makes the format both lightweight and structurally sound.
This article walks through the entire process of installing hollow shell beams as part of a home renovation, with practical detail that addresses the questions first-time installers actually ask.
Understanding the Hollow Shell Concept
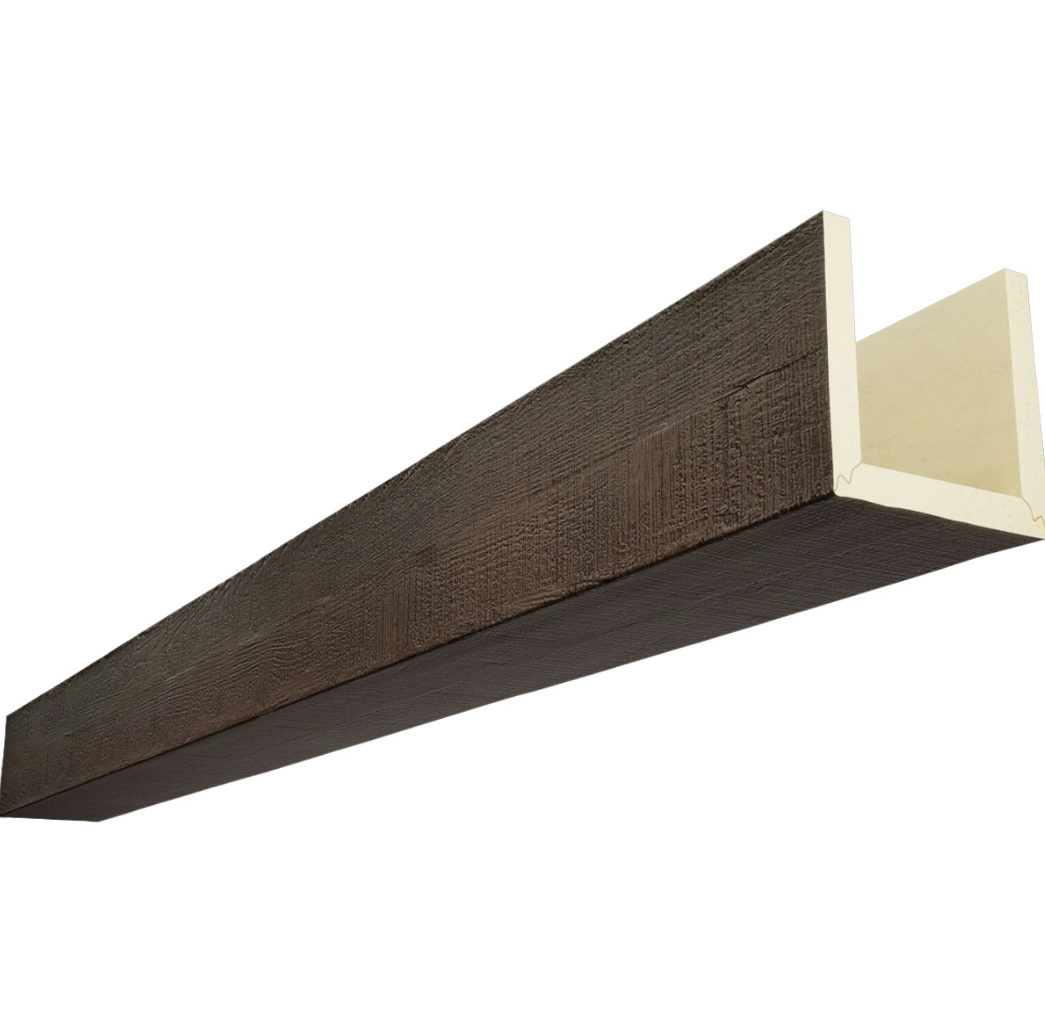
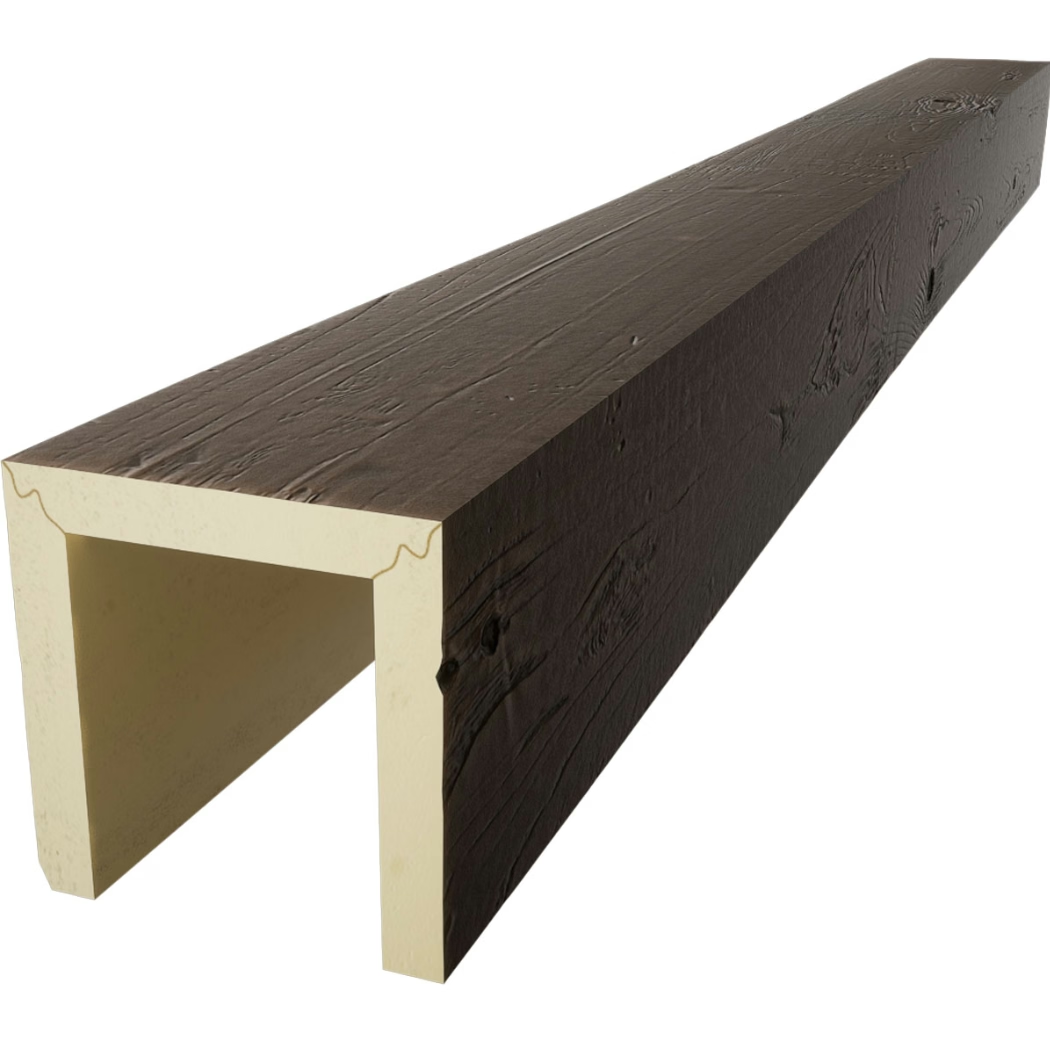
The hollow shell is essentially a U-shaped or L-shaped piece of molded polyurethane, finished on three sides (for U-shape) or two sides (for L-shape) to mimic the appearance of a solid timber beam. The fourth side — the side that faces the ceiling — is unfinished and designed to fit over a wooden mounting block.
The mounting block is typically a piece of standard lumber, usually a two-by-six or two-by-eight, sized to fit snugly inside the hollow space. The block is mounted to the ceiling first, then the shell slides over it and is secured with screws driven at angles through the shell's sides into the block.
This design serves several practical purposes. It reduces the weight of the beam dramatically because the foam shell is far lighter than solid timber of the same dimensions. It simplifies installation because the block provides a solid structure to attach to. It allows for on-site length adjustments because the shell can be cut to size without affecting the structural mounting.
Why the Split Design Wins for DIY
For DIY installers, the split design solves several problems that complicate solid timber installations. The most obvious is weight — a hollow shell beam at ten feet can be lifted into place by a single person, whereas a solid timber beam of similar dimensions typically requires two strong adults.
The split design also separates the structural work from the cosmetic work. The block handles all of the load-bearing and structural connections. The shell handles all of the appearance and finishing. This separation means mistakes in one area do not compromise the other.
For example, if the shell is scratched during installation, the scratch can be touched up without affecting the structural integrity of the mounting. If the block is slightly off-center, the shell can be adjusted to hide the misalignment. The same forgiveness does not exist with solid timber, where every part of the beam serves both structural and cosmetic purposes.
Materials Needed for the Project
The materials list for a hollow shell beam installation is shorter than for solid timber. The list typically includes the hollow shell beams themselves, mounting blocks cut to the appropriate length, wood screws long enough to penetrate the blocks by at least an inch and a half, construction adhesive, and touch-up materials from the manufacturer.
The mounting blocks are usually purchased separately or cut from standard lumber available at any home center. For a typical eight-inch hollow shell beam, a standard two-by-eight lumber piece works well. For wider beams, the block dimensions increase accordingly.
Tools include a drill, a level, a measuring tape, a pencil, a saw for cutting blocks to length (a handsaw or circular saw works fine), safety glasses, and a ladder. A miter saw is helpful for cutting the shell to length but not strictly required.
Choosing the Right Block Material
The block material affects both the structural strength of the installation and the ease of working with it. Standard construction-grade lumber (spruce-pine-fir or similar) works well for most residential applications. For heavier beams or wider spans, denser lumber like fir or even engineered lumber products may be warranted.
Pressure-treated lumber is not necessary for indoor installations and can sometimes cause issues with the foam shell due to the chemicals used in the treatment process. Standard kiln-dried lumber is the best choice for interior block installations.
Some homeowners opt for engineered lumber products like LVL (laminated veneer lumber) for very long beam runs where consistency and straightness matter. These materials resist warping and twisting better than standard lumber, which helps keep the beam straight over time.
Installation Step by Step
The first step in the installation is locating the ceiling joists and marking the beam location on the ceiling. A stud finder identifies the joists, and a chalk line snapped across the ceiling establishes a clean visual reference for the block mounting.
The next step is mounting the blocks. Each block is cut to length, positioned along the chalk line, and screwed into the ceiling joists using two or three screws per joist. For joists spaced sixteen inches apart, a block spanning multiple joists provides excellent mounting strength.
Once the blocks are in place, the shells are dry-fit by sliding them over the blocks. The fit should be snug, with the shell resting against the ceiling and the block fully concealed inside. Any gaps or tight spots are addressed before proceeding to the final mounting.
After dry fitting confirms the fit, construction adhesive is applied to the contact surfaces between the shell and the block. The shell is then positioned over the block and secured with screws driven at angles through the sides of the shell into the block. The angled screws are hidden by the natural shadow lines of the beam profile.
Working With Multiple Beams
For installations involving multiple parallel beams, consistency in spacing and alignment matters more than in single-beam projects. The first beam establishes the reference, and each subsequent beam is measured from the previous one rather than from the chalk line.
A useful technique is to install all of the blocks first, then dry-fit all of the shells to confirm alignment before securing any of them. This approach allows for adjustments across the entire array rather than fixing problems one beam at a time.
For beams that need to meet at corners or terminate against walls, the order of installation matters. The longest or most visible beam typically goes in first, and shorter or hidden beams are cut to fit around it.
Common Challenges and Solutions
The most common challenge in hollow shell installations is getting the shell to seat fully against the ceiling. The shell's design includes a small lip at the ceiling line that should rest flush, but minor variations in ceiling flatness can prevent this fit.
The solution is to shim the block slightly away from the ceiling at the low spots, which brings the shell's seating plane into consistent contact. Thin washers or small pieces of cardboard work well as shims and do not affect the structural integrity of the mounting.
Another challenge is the angled screws not engaging the block properly. If a screw misses the block, it will spin freely and not tighten. The solution is to remove the screw, fill the hole with a small amount of wood filler, and try again with a slightly different angle. Most installers find that a fifteen-degree angle works reliably for engaging the block.
For installations where the shell does not align with the block's actual position, the block can be repositioned on the ceiling to match the shell's expected position. This adjustment is easier than trying to fit a misaligned shell, and it preserves the appearance of a clean installation.
Handling Long Beam Runs
Beams longer than twelve feet introduce additional considerations. The mounting block must be straight and true, because any curve in the block becomes visible in the shell once installed. Long blocks may need to be purchased as engineered lumber to ensure straightness.
For very long runs, installers sometimes use two shorter blocks butted together inside a single shell, rather than trying to find a single continuous block of sufficient length. The joint between blocks should be reinforced with a small splice plate to prevent movement, and the shell should be positioned so the joint falls in the middle of the shell rather than at the ends.
Long shells are also more challenging to handle during installation. They can flex during lifting, which makes precise positioning more difficult. A helper is essential for long beam installations, and some installers use temporary support brackets to hold the shell in place while driving the final screws.
Finishing Touches
Once the shells are mounted, the finishing steps include filling any visible screw holes with matching wood filler, applying touch-up stain to any cut edges, and installing end caps at any exposed terminations.
The screw holes should be filled in a way that matches the surrounding grain pattern. Most manufacturers provide colored wood filler that matches the beam's stain, and a small amount applied with a fingertip and immediately wiped clean typically disappears once dry.
End caps are particularly important in hollow shell installations because the open end of the shell is visible if not capped. The caps are typically molded with a closed end that mimics the end grain of a solid wood beam. Construction adhesive secures the cap in place, and a small amount of touch-up stain blends the seam between the cap and the shell.
For beams that terminate against walls rather than in open space, the open end is hidden by the wall itself, and no end cap is needed. This is convenient for installations where the wall provides a natural visual termination.
When to Call in a Professional
Most hollow shell installations are well within DIY capability, but there are situations where professional help is warranted. Beams that run across load-bearing structures, installations that involve relocating electrical or HVAC systems, and projects requiring significant ceiling modifications are best left to professionals.
For homeowners who are uncomfortable with heights or unfamiliar with basic construction techniques, hiring a professional for the first installation can build confidence for future projects. Many contractors are happy to walk a homeowner through the process while doing the work, providing a learning opportunity that pays off in future projects.
The cost of professional installation varies by region and project size, but it is typically much lower for hollow shell beams than for solid timber because the installation is faster and simpler. Homeowners should get quotes from two or three contractors to establish a fair price for their specific project.
The Long-Term Picture
Hollow shell faux timber beams are designed to last for decades with minimal maintenance. The polyurethane material resists moisture, fading, and wear, and the mounting blocks provide structural integrity that exceeds the requirements of most residential installations.
For homeowners approaching a renovation, hollow shell beams offer a combination of visual impact, installation simplicity, and long-term durability that is hard to match with other ceiling treatments. The DIY-friendly nature of the format means the project is accessible to beginners while still producing professional-looking results.
Technical References
ASTM standards cited in every specification
Test Data
Lab results from internal testing program
Updated 2026
Reviewed against current product specs


