
There is a particular kind of nervousness that comes with the first home renovation project. The fear of making a permanent mistake, the worry about whether the result will look professional, and the uncertainty about how long the project will actually take can all make even simple improvements feel intimidating. For homeowners considering their first project, PU faux wood beams are a deliberately forgiving place to start.
Manufacturers have spent years refining PU beams to be beginner-friendly. The materials are forgiving of minor errors, the tools required are basic, and the installation steps build on each other in a way that creates confidence as the project progresses. The result is a project that looks impressive when complete but does not require years of construction experience to pull off.
This guide is written specifically for homeowners who have never installed a ceiling beam and are wondering whether they can handle the project themselves. The honest answer is yes, with a few caveats about preparation and realistic expectations.
Why Beginners Choose PU Faux Beams
PU faux beams are popular with first-time installers for several practical reasons. The lightweight material reduces the physical demands of the project. The factory finish eliminates the need for painting or staining. The standard mounting systems work with tools most homeowners already own. And the forgiving installation methods allow for adjustments without compromising the final result.
Compare this to solid timber beams, which require multiple strong adults to lift, specialized cutting tools, and significant expertise to mount without damaging the structure or the surrounding ceiling. The learning curve for solid timber is steep enough that most first-time installers feel overwhelmed before they even start.
PU beams flatten that learning curve. The same project that would take a professional carpenter a day with solid timber can take a DIY beginner a weekend with PU beams, and the result looks essentially identical to a casual observer.
The Real Skill Requirements
The honest assessment of skills needed for a first PU beam installation is short. Comfort using a drill and a level. Ability to measure accurately and transfer measurements to the ceiling. Willingness to work on a ladder safely. Patience to follow a sequence of steps without skipping ahead.
That is essentially the list. There is no electrical work required unless the installation includes new light fixtures. There is no plumbing involved. There is no framing or structural modification in most installations. The project involves securing a pre-finished shell to a ceiling using basic fasteners, which is well within the capability of anyone comfortable with common household tools.
For homeowners who have assembled flat-pack furniture, hung heavy mirrors, or installed ceiling fans, the skill set transfers directly to beam installation. The motions are similar, the tools are the same, and the principles of secure mounting apply across all of these projects.
Realistic Timelines for a First Project
Beginners often underestimate how long a project will take, which leads to frustration and rushed decisions that affect the final result. A realistic timeline for a first PU beam installation helps set expectations that lead to a better experience.
For a single beam in a straightforward room, the timeline is typically:
- Day 1, morning: Receiving the beam, inspecting for damage, gathering tools
- Day 1, afternoon: Locating joists, marking the ceiling, mounting the block
- Day 1, late afternoon: Dry-fitting the shell, making any final adjustments
- Day 2, morning: Securing the shell, finishing screw holes, installing end caps
- Day 2, afternoon: Final inspection, cleanup, enjoying the new beam
For a project with three to four beams in a single room, the timeline extends to a full weekend plus one evening during the following week. The additional time is for marking and mounting multiple block locations, which is repetitive but not difficult.
These timelines assume two people working together. A single installer can complete the projects, but the time roughly doubles because of the handling challenges of holding beams in place while driving screws.

What to Buy and What to Skip
For a first project, the smart approach is to buy good-enough materials and tools without overspending on premium options that do not add value for a beginner. The beams themselves should come from a reputable manufacturer, since quality varies significantly across the market, but the mounting hardware can use standard products available at any home center.
Beams worth the investment: PU faux beams from established manufacturers with consistent color matching across pieces and solid construction that does not feel flimsy during handling. The price difference between budget and quality beams is meaningful but not enormous, and the quality shows in the final result.
Beams worth skipping for now: Custom-stain matches that require sending samples to the factory. Specialty mounting systems that require proprietary tools. Beams with intricate hand-finished details that add cost without significant visual benefit.
For tools, the list is the same one used for many other home projects. A cordless drill with two batteries (one always charging while the other is in use). A four-foot level, ideally with a built-in laser line for long runs. A stud finder, plus a small magnet for confirming joist locations. A quality measuring tape that does not stretch or kink.
Helpful Tools for Beginners
A few additional tools make the project easier but are not strictly necessary. A laser level projects a clean reference line across the ceiling, which is helpful when installing multiple beams. A workbench or sawhorses provide a stable cutting surface for trimming beams to length. A headlamp frees up both hands for working overhead.
Homeowners who plan to do more renovation projects after the beam installation may want to invest in these tools now. For a single beam project, borrowing the tools is usually sufficient.
Planning the Layout
The most important part of the project happens before any drilling begins. Planning the layout involves deciding where the beams will go, how they will be spaced, and how they will interact with existing features like light fixtures, ceiling fans, and vents.
For a single-beam project, the planning is straightforward. The beam typically runs perpendicular to the ceiling joists, centered above a key feature like a seating area, dining table, or bed. The length is determined by the wall-to-wall span, and the height is set by where the ceiling joists allow solid mounting.
For multi-beam projects, the planning involves spacing decisions. Equal spacing between beams is the most common approach, with the outer beams typically positioned one-half of the spacing distance from each side wall. This creates a balanced look and avoids the visual awkwardness of a narrow gap at one end.
The planning step is also when homeowners decide whether to include any additional features. If a chandelier or pendant light is part of the plan, the mounting hardware for the light should be considered alongside the beam mounting. Adding blocking inside the beam for the light fixture is much easier during installation than retrofitting later.
Dealing With Existing Features
Most rooms have at least one feature that complicates beam installation. Ceiling fans, recessed lights, smoke detectors, and HVAC vents all need to be considered during planning.
The simplest approach is to end beams at the obstacle and resume on the other side. The obstacle itself hides the gap between beams, which makes this approach nearly invisible in the finished installation.
For obstacles that cannot be hidden easily, the beam can be notched on-site to fit around them. The foam material cuts cleanly, and the resulting notch can be finished with touch-up materials from the manufacturer. This approach is more work but produces a continuous beam line that some homeowners prefer visually.
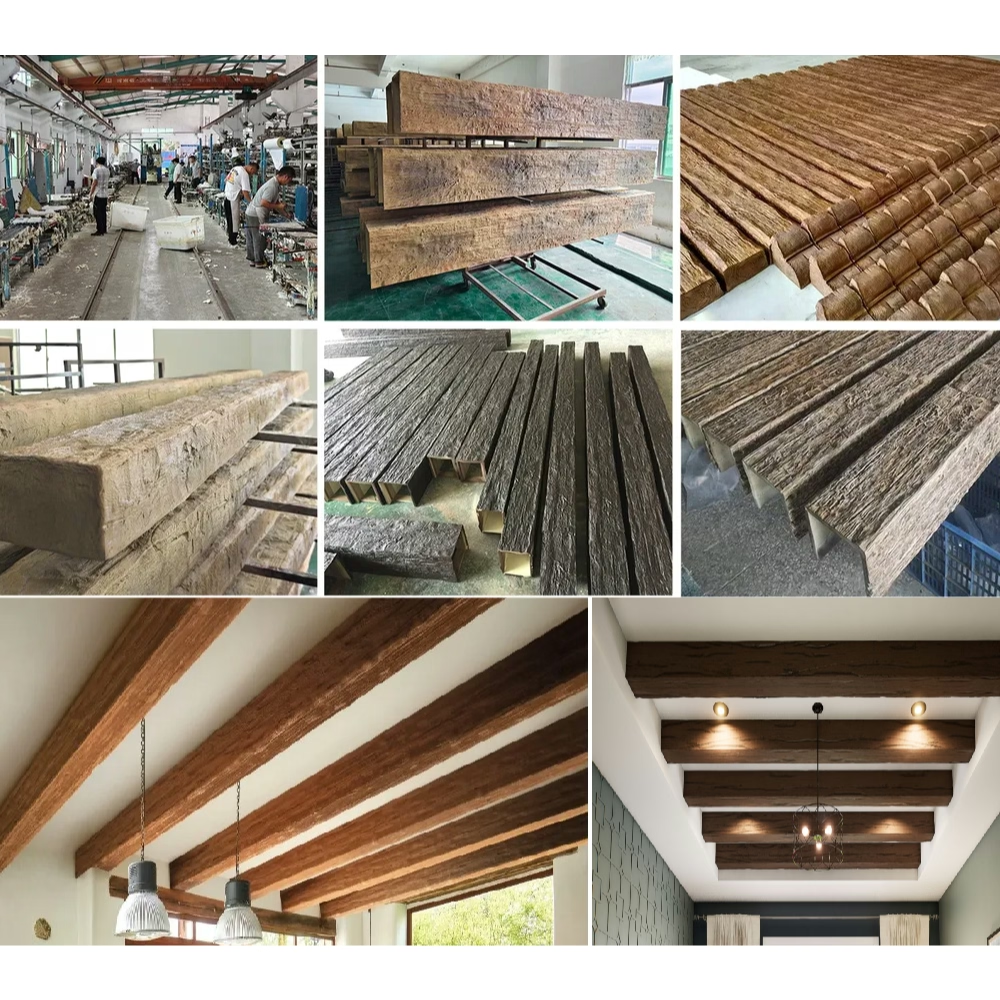
Common Beginner Mistakes
Every beginner makes some mistakes, and the most common ones are worth knowing about in advance. None of them are catastrophic, but each affects the final result in ways that are easier to prevent than to fix.
The first mistake is failing to verify joist locations. Stud finders can give false readings on textured ceilings, on ceilings with multiple layers of paint, or near metal junction boxes. A small pilot hole and a bent piece of wire confirm the joist location beyond doubt.
The second mistake is rushing the dry fit. The dry fit is the homeowner's chance to confirm that everything aligns correctly before any adhesive or permanent fasteners are applied. Skipping this step to save time usually costs more time later when adjustments become more difficult.
The third mistake is over-tightening screws. The foam material can compress under too much pressure, which creates a slight dimple around the screw head. The dimple fills with wood filler, but it is an extra step that careful screw pressure avoids.
The Mistake That Matters Most
The mistake that matters most is also the easiest to avoid: not having a helper. Beam installation is a two-person job, and trying to do it alone usually results in misalignment, dropped materials, or safety issues. Even the most capable homeowner should recruit a friend, family member, or neighbor to help for a few hours.
The helper's role is simple: hold the beam in position, fetch tools, and provide an extra pair of eyes for alignment checks. The work does not need to be physically demanding, but having two bodies available makes everything easier and safer.
Building Confidence for Future Projects
A successful first beam installation does more than add an architectural feature to a room. It builds confidence that transfers to future home improvement projects.
The skills developed during beam installation — accurate measuring, secure mounting, ladder safety, attention to detail — apply broadly to other DIY projects. Homeowners who complete a beam project often find themselves more willing to try deck construction, fence installation, or kitchen updates.
For first-time homeowners, this confidence is particularly valuable. The satisfaction of completing a project that transforms a room, combined with the skills learned during the process, creates a positive cycle that encourages continued engagement with home improvement. PU faux beams are a reliable starting point for that cycle.
Technical References
ASTM standards cited in every specification
Test Data
Lab results from internal testing program
Updated 2026
Reviewed against current product specs


