
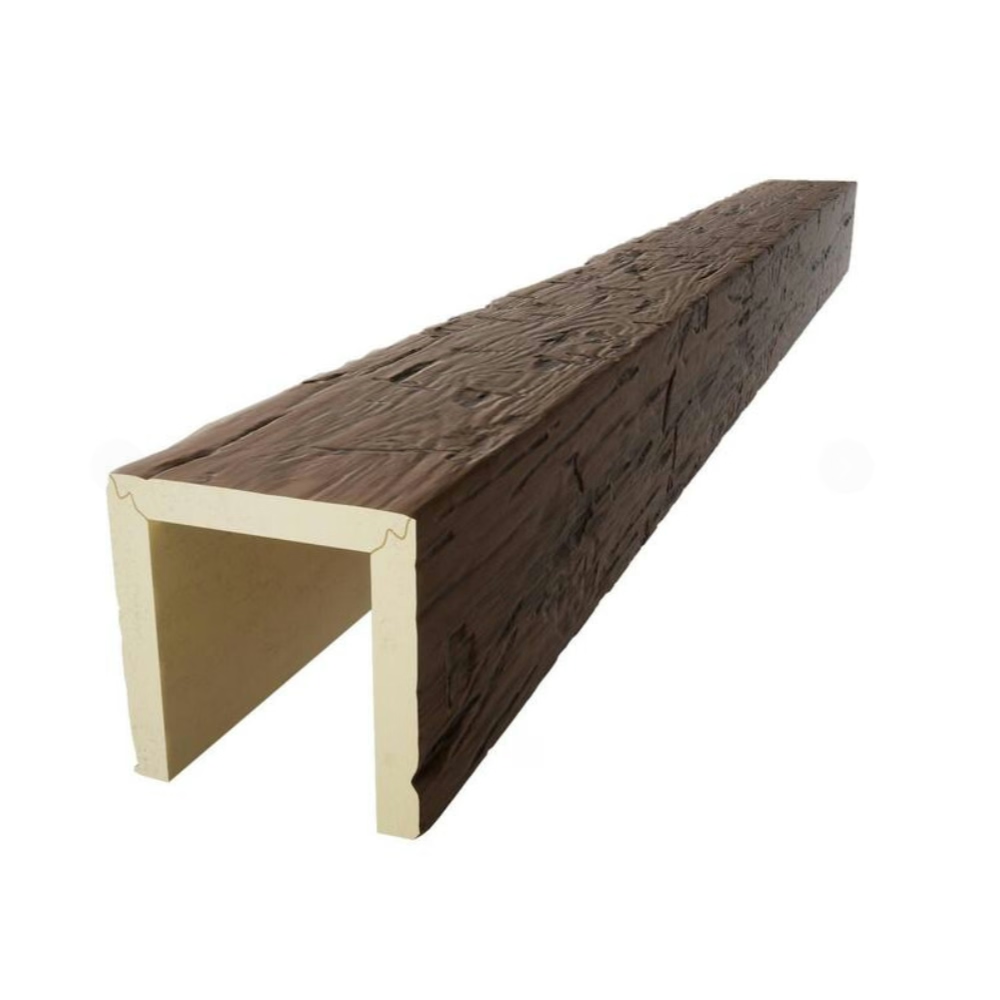
Not every DIY renovator is a carpenter, and most do not need to be. Easy-fit install design faux wood ceiling beams are made for people who want professional-looking results without years of practice. The design choices that go into an easy-fit beam take the most frustrating parts of beam installation off the table.
A beam that is genuinely easy to fit has several characteristics. The routed channel is pre-cut at the factory to a depth that matches the supplied brackets, which removes the trial-and-error of getting the fit right. The brackets themselves are adjustable within a reasonable range, so small miscalculations on site can be corrected without re-ordering parts. The end caps press in rather than needing to be screwed or glued. And the color-matched hardware disappears into the beam finish without requiring touch-up paint.
What Makes a Beam Easy-Fit
The most important feature is the bracket system. A bracket that has to be screwed through the beam face at exactly the right depth and angle is not easy-fit, even if the manufacturer calls it that. A bracket that slides into a pre-routed channel and locks with a quarter turn of a set screw is easy-fit because the beam itself controls the depth and the angle.
The second feature is tolerance for variation. Real ceilings are not perfectly level. Real walls are not perfectly plumb. Real joists are not always exactly where the stud finder says they are. An easy-fit beam system absorbs these variations through adjustable brackets, shimmable mounting points, and forgiving channel depths that still work even if the bracket is a few millimeters off from the ideal position.
The third feature is finishing. An easy-fit beam comes with end caps, color-matched fasteners, and touch-up stain for the cut ends. The DIYer does not need to source these separately or figure out how to make them match the beam finish.
Tools You Need
The tool list for an easy-fit beam installation is short. A cordless drill with a driver bit, a level (a four-foot level is better than a short one for beam work), a tape measure, a pencil, a stud finder, and a ladder are the basics. A miter saw with a fine-tooth blade is helpful for cutting beams to length, though a hand saw and a miter box work too.
Most easy-fit kits also include a small hex key or Allen wrench for the set screws on the brackets. If you have a set of Allen keys in your toolbox, you may not need the included one, but it is worth having on hand in case the included key is sized for a metric fastener that your domestic set does not have.
Planning the Project
Spend more time on planning than on installation. Measure the ceiling length, mark the joist locations with painter's tape, and sketch the beam layout on paper. Order the beams with enough lead time to receive them before you plan to install.
Decide on the beam direction first. Beams that run perpendicular to the joists are easier to mount because each bracket can land on a joist. Beams that run parallel to the joists require backing strips between the joists, which adds time and complexity.
Decide on the beam spacing next. For a single beam, the position is usually determined by the room's focal point, like a fireplace, a kitchen island, or a window wall. For multiple beams, the spacing is usually even across the room, with the outer beams positioned so the spacing to the walls matches the spacing between the beams.
Installing the Brackets
Hold each bracket in position against the ceiling at the marked location and drive a screw through the top hole into the joist. Check the bracket for level before driving the second screw. Once both screws are in, the bracket is secure and ready to receive the beam.
Adjustable brackets have a threaded section that lets you raise or lower the beam relative to the ceiling. Set each bracket to the same nominal height, then make fine adjustments once the beam is in place. The fine adjustment is what allows the system to absorb small variations in ceiling level.
Bracket spacing follows the manufacturer's recommendations, usually every 60 to 90 centimeters along the beam length. A bracket within 15 centimeters of each beam end is also typical. Closer spacing provides more support but uses more hardware and takes longer to install.
Hanging the Beam
Lift the beam up to the brackets with the routed channel facing the bracket arms. Tilt one end up and over the first bracket, then walk the beam along the run until it is in position. The brackets should drop into the routed channel with a slight downward push.
For long beams, this step requires two people. One person holds each end of the beam while a third person on the ladder guides the channel over the brackets. For shorter beams, one person on the ladder can manage the lift alone, though a helper on the ground makes the job safer and faster.
Once the beam is in position, secure it to the brackets. Most easy-fit systems use a set screw on each bracket that locks the beam into the channel. Tighten the set screw until it is snug, but do not over-tighten, which can dimple the channel or crack the foam.
Leveling and Adjusting
Check the beam for level along its full length using a four-foot level or a laser level. A beam that is level at each individual bracket can still be out of level overall if the ceiling is not flat. Adjust the bracket heights as needed to bring the beam to level.
Check the beam from several angles around the room. A beam that looks level from directly below can show a slight twist when viewed from the side. The twist is usually correctable by adjusting one bracket slightly higher or lower than the others.
Once the beam is level, double-check the set screws on each bracket. The act of adjusting the beam can sometimes loosen a set screw on an adjacent bracket, and a loose bracket can allow the beam to shift over time.
Finishing the Installation
End caps press into the open ends of the beam and hide the cut edges. Most easy-fit kits include end caps sized to the specific beam profile. Press the cap in by hand until it seats fully against the beam end. A small amount of construction adhesive on the back of the cap holds it permanently in place.
Where the beam meets a wall, run a small bead of paintable caulk along the seam. Smooth the caulk with a wet finger and remove any excess before it skins over. The caulk should match the wall finish so the seam disappears visually.
For beams that meet other beams at a corner, use a miter joint. Cut each beam end at 45 degrees using a miter saw or a miter box. Dry-fit the joint before applying adhesive, and reinforce the joint with a small dowel or spline if additional strength is needed.
Common Mistakes
The most common mistake with easy-fit systems is assuming they require no attention to detail. The hardware is forgiving, but the layout still needs to be done properly. A beam that is installed to an incorrect layout is just as wrong with easy-fit hardware as it would be with traditional hardware.
The second most common mistake is over-tightening the set screws. The foam in the routed channel is strong enough to hold the beam securely with moderate torque. Excessive force on the set screw can crack the foam or strip the threads in the bracket.
Finally, do not skip the leveling step just because the brackets are adjustable. The adjustability is there to compensate for small variations, not to correct for a fundamentally crooked installation. Take the time to get the layout right, and the adjustments become fine-tuning rather than major corrections.
Technical References
ASTM standards cited in every specification
Test Data
Lab results from internal testing program
Updated 2026
Reviewed against current product specs


