
The wrap-around PU faux beam cover exists because not every renovation can accommodate a full construction project. Some buildings need to stay operational during the work, some rooms cannot tolerate the dust and debris of traditional construction, and some budgets do not allow for the labor involved in framing and finishing a soffit. In each of these situations, a wrap-around cover offers a way to change the appearance of an existing structural beam without the downsides of conventional construction.
The cover arrives from the factory as two pre-finished halves that fit around the existing beam. The two halves are lighter and easier to handle than a single-piece sleeve, and the installation can usually be completed in a single afternoon for a typical residential room.
Where Wrap-Around Covers Make Sense
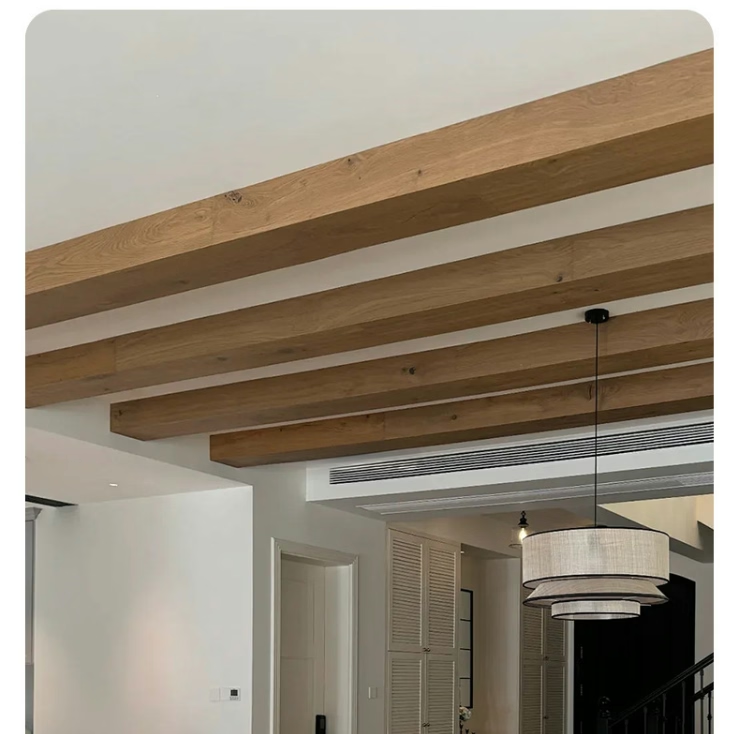
The most common application is a renovation where the existing structural beam is visually disruptive. A steel I-beam in a converted loft, a heavy timber in a modern farmhouse renovation, or an HVAC duct that crosses the room at ceiling level can all be wrapped in a PU cover that gives the room a more cohesive appearance.
Wrap-around covers also work well in commercial renovations where the space needs to remain operational. A restaurant can wrap its exposed beams overnight and reopen the next morning with a refreshed interior. An office building can wrap its ductwork during a weekend and have the space ready for Monday without any business interruption.
Historic renovations are another strong use case. The original structural elements of an older building often have historical value, and removing them can violate preservation guidelines. A wrap-around cover preserves the original structure while changing its appearance to suit the new design intent.
How the Wrap-Around Design Differs From a Sleeve
A sleeve and a wrap-around cover are similar in concept, but they differ in execution. A sleeve is typically a single piece or a two-piece assembly that drops over the existing member. A wrap-around cover is specifically designed to fit around an existing member that cannot be slid into from the end, often because the member is too long, too close to a wall, or interrupted by other structural elements.
The wrap-around cover usually has an open seam along one long edge that allows it to be positioned around the existing member from the side rather than from the end. The seam is then closed and concealed once the cover is in place.
This design makes wrap-around covers more versatile than drop-on sleeves, especially for renovations where the existing member is part of a larger structural system that cannot easily be modified to accommodate a sliding installation.
Measuring for a Wrap-Around Cover
Measure the existing beam at several points along its run. Heights and widths can vary along a long beam, especially for older wooden members that have moved over time. Use the largest measurement in each direction when ordering, and add a small clearance margin to allow the cover halves to fit without forcing.
Pay particular attention to the location of any protrusions on the existing member. Bolt heads, hanger plates, splice plates, junction boxes, and lighting conduit all add to the effective dimensions and need to be accounted for in the cover design. Most manufacturers will incorporate these features into the cover pattern if you provide accurate measurements and clear photos.
For wrap-around installations, also measure the clearance around the existing member. The cover needs to be positioned around the member, which requires enough clearance on at least one side to maneuver the cover into place. Tight spaces may require a cover with a deeper routed channel that allows the seam to close more easily.
Choosing the Right Cover Profile
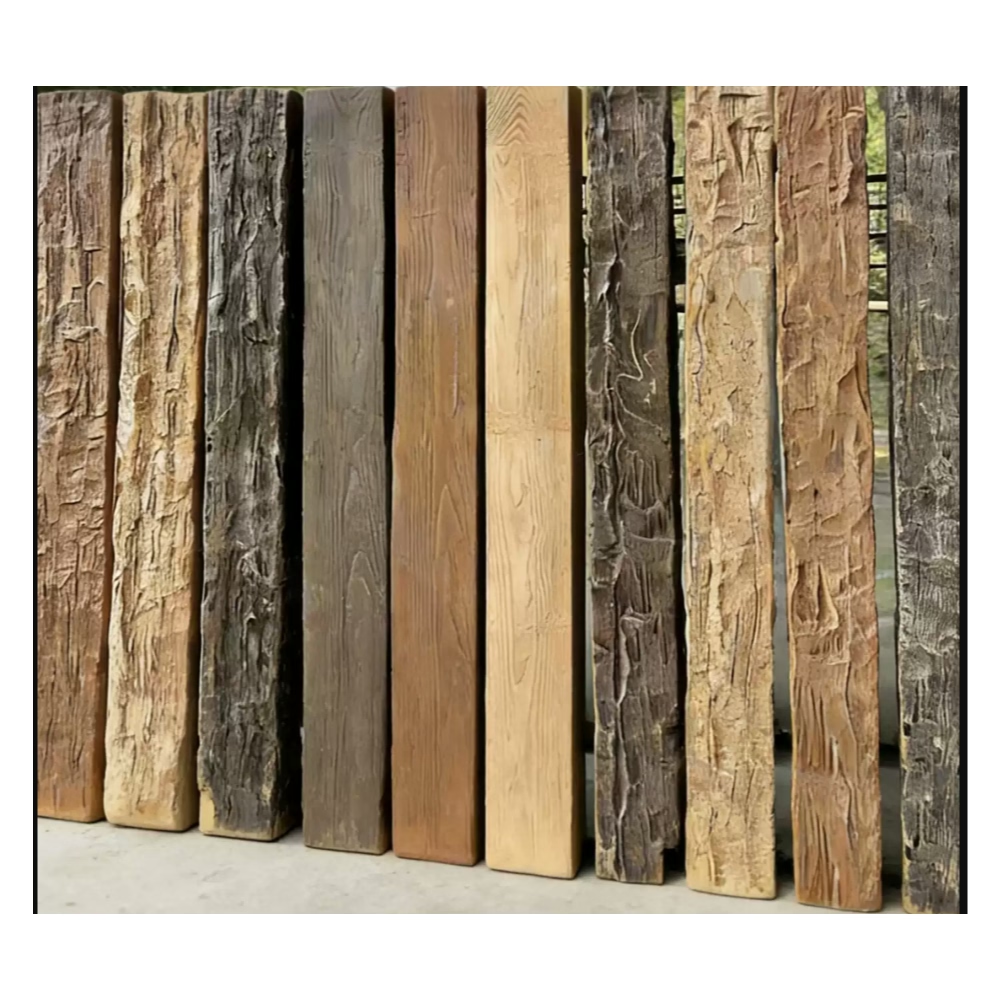
The cover profile should match the style of the room and the design intent of the renovation. Smooth, flat-faced covers work in contemporary interiors. Hand-hewn covers with visible tool marks work in rustic and farmhouse spaces. Reclaimed timber profiles with knots, cracks, and weathering work in industrial and adaptive reuse projects.
The depth of the cover is usually determined by the depth of the existing member, plus a small clearance margin. The width can be either matched to the existing member or increased to give the finished installation more visual weight in the room.
Color is the other major choice. Most manufacturers offer a range of standard finishes, and some will do custom color matching against a sample for an additional charge. For renovations that need to blend the cover with other wood elements in the room, custom color matching is usually worth the extra cost.
Preparing for Installation
Wipe down the existing beam to remove dust, oil, and any loose material. Tighten any loose bolts or fasteners, and address any sharp edges that could damage the cover from the inside. Mark the location of any services that need to remain accessible, such as junction boxes or valve covers.
Pre-cut any openings needed in the cover for junction boxes, light fixtures, or other elements. Lay the cover half on a pair of sawhorses, mark the cutout carefully, and use a jigsaw with a fine-tooth blade for the cleanest cut. Measure twice and cut once is especially important here, because mistakes in a PU cover are difficult to patch invisibly.
Have all of the necessary fasteners, brackets, and clips on hand before starting the installation. Most kits include the necessary hardware, but it is worth confirming before ordering.
Installation
Start with the cover half that has the deeper routed channel or the more complex profile. Position this half around the existing member first, working it into place from the side rather than sliding it on from the end. Rest it on a temporary support, like a beam saddle or a stack of lumber, with the open side facing the existing member.
Position the second cover half around the existing member, fitting it against the first half along their long edges. The two halves should meet cleanly, with the routed channels aligning to form the closed shell around the existing beam. Fasten the two halves together with the included clips or brackets, working from one end of the run to the other.
Most wrap-around covers use a clip system that pulls the two halves together along the seam. The clips engage with a satisfying click as they lock into place, and a small set screw or snap fit holds them there. Check each clip as you go to make sure it is fully engaged before moving to the next.
Once the two halves are clipped together, secure the assembly to the existing member with the included brackets. The brackets typically screw into the existing member from inside the cover, so the fasteners are not visible from outside. Tighten the bracket screws until the cover is held firmly against the existing member, but do not over-tighten.
Finishing the Seams and Joints
The seams between the two halves are the most visible part of the installation, so they deserve careful attention. Run a small bead of color-matched caulk along each seam and smooth it with a damp finger or a small plastic spreader. Wipe away any excess before it cures, because cured caulk is very difficult to remove from a textured PU surface without damaging the printed grain.
For covers with deep grain texture, the seams may need additional work to blend the texture across the joint. A fine artist brush and a small amount of stain can be used to draw faint grain lines that bridge the seam. Practice on a piece of cardboard first to get the line weight and spacing right.
End caps press into the open ends of the cover and hide the cut edges. Most kits include end caps sized to the specific profile. Press each cap into the open end of the cover and secure it with a small amount of construction adhesive. Wipe away any excess adhesive immediately with a damp cloth.
Why Wrap-Around Covers Work for Fast Renovations
The combination of pre-finished surfaces, two-piece assembly, and concealed fastening makes wrap-around covers one of the fastest beam renovation options available. A typical residential room can be transformed in a single afternoon, with no framing, no drywall, no painting, and minimal dust or debris.
The disruption to the surrounding space is also minimal. The cover installs around the existing beam, so there is no need to remove or modify the surrounding ceiling. The room can usually be occupied during the installation, with only a small area below the beam needing to be cleared for the ladder and the tools.
For property managers, building owners, and homeowners who need to refresh a space quickly without the cost or downtime of traditional construction, wrap-around PU faux beam covers offer a practical solution that delivers immediate visual impact with minimal disruption.
The reversibility of the installation is another advantage. If the building owner ever wants to expose the original structural member again, the cover can be removed and the structure is unchanged. That flexibility is rare in construction, and it makes wrap-around covers an attractive option for rental properties, commercial leases, and any project where the long-term use of the space is uncertain.
Technical References
ASTM standards cited in every specification
Test Data
Lab results from internal testing program
Updated 2026
Reviewed against current product specs


