
A ready-to-assemble PU faux beam kit is to a beam installation what flat-pack furniture is to a bookshelf project. Everything arrives in coordinated packages, the components are designed to work together, and the assembly process follows clear steps that anyone can follow. The kit format removes most of the complexity from the renovation project and replaces it with a clear path from box to finished ceiling.
For homeowners tackling a renovation that involves multiple beams across one or more rooms, RTA kits offer significant advantages over sourcing individual components. The kit format reduces decision fatigue, ensures compatibility between parts, and provides a complete materials list in a single order.
This article explores what makes RTA kits convenient, what they typically include, and how they simplify the renovation process for first-time installers.
What Makes RTA Kits Convenient
The RTA format solves a specific problem that homeowners face when planning a beam installation: the sheer number of small decisions that need to be made. Beam finish, mounting hardware, touch-up materials, end caps, blocking strips, and fasteners all need to be considered individually. The kit format pre-makes all of these decisions and includes everything needed in coordinated packages.
The decisions that the kit format removes include the color match between components, the compatibility of mounting hardware with the beam material, and the completeness of the touch-up supplies. Each of these decisions, if made wrong individually, can compromise the final result. The kit format ensures they are made correctly because the manufacturer has already coordinated them.
Beyond decisions, the RTA format also reduces the trips to the hardware store that typically accompany a beam installation. Everything needed arrives in the kit, from the screws to the touch-up stain to the end caps. The homeowner can focus on the installation rather than the logistics of sourcing components.
For homeowners who have never installed beams before, the kit format also provides a clear scope for the project. The kit contents define what needs to happen, and the instructions define how it happens. The clarity reduces the anxiety that often accompanies first-time renovation projects.
What a Complete Kit Typically Includes
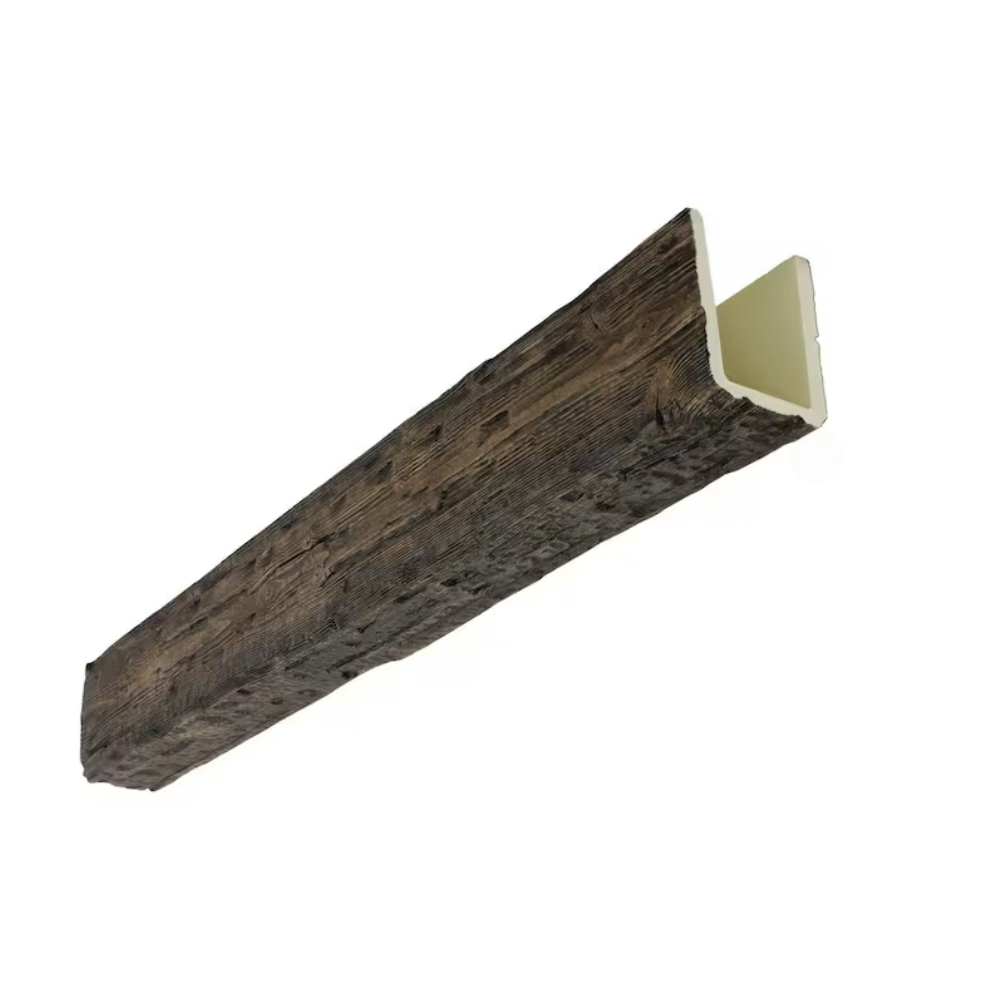
A typical RTA PU faux beam kit includes the beams themselves in the requested lengths and profiles, mounting blocks or cleats sized to match the beam dimensions, the recommended screws or fasteners for the specific beam weight, color-matched touch-up stain, matching end caps for any exposed terminations, construction adhesive appropriate for the foam material, and detailed installation instructions specific to the kit.
Some kits also include corner blocks for inside or outside corners, beam connectors for long runs that require joining multiple pieces, decorative straps or brackets for hardware-style appearances, and primer or surface preparation materials for problematic ceilings.
The inclusion of all these components means the homeowner does not need to make compatibility decisions between products from different manufacturers. Each component in the kit is designed to work with the others, and the manufacturer has tested the combination to ensure reliable results.
Variations Across Manufacturers
The specific contents of RTA kits vary across manufacturers. Some manufacturers include only the beams and basic hardware, leaving the homeowner to source touch-up materials and adhesive separately. Other manufacturers include every possible component the homeowner might need.
The most comprehensive kits are the easiest to work with for first-time installers. The homeowner does not need to research what additional materials to buy or worry about whether separate purchases will match. Everything arrives ready to use.
For experienced installers who prefer to source their own components, the simpler kits provide just the essentials and allow more flexibility in choosing the additional materials. The choice between comprehensive and simple kits depends on the homeowner's preferences and experience level.
Planning a Project Around a Kit
The kit format works best when the project is planned around the kit's contents rather than the kit being chosen to fit the project. The most successful RTA projects start with careful measurement of the installation space, then selecting a kit that matches the requirements.
The measurement phase involves determining the length and number of beams needed, the profile dimensions appropriate for the ceiling height and room proportions, and the color and finish that will work with the room's design. These measurements guide the kit selection to ensure the right product is ordered.
For rooms with non-standard dimensions, custom-length kits are often available from manufacturers. The custom kits may cost slightly more but eliminate the need to cut beams to fit, which saves time during the installation.
The kit selection also involves considering any accessories needed for the specific project. Kits for rooms with corners may include corner blocks. Kits for kitchens may include trim pieces for working around cabinets or fixtures. The right kit for the project includes the accessories that match the installation requirements.
Timeline Planning With Kits
A kit-based project follows a predictable timeline because the steps are defined by the kit instructions. The timeline typically spans two days for a small project to a week for a comprehensive whole-room renovation.
The first day typically involves receiving the kit, inspecting components, gathering tools, and planning the layout. The second day is usually the installation day, with the mounting blocks installed in the morning and the beams assembled and mounted in the afternoon.
More complex projects may extend the timeline with additional preparation, finishing, or coordination with other renovation work. Even for complex projects, the kit's clear steps make the timeline easier to estimate than projects that require sourcing components independently.
The Assembly Process
The assembly process for RTA kits is similar to flat-pack furniture assembly, with each step building on previous steps to produce the finished installation. The kit instructions typically guide the installer through each step with diagrams and written explanations.
The first assembly step is preparing the ceiling surface, which may involve marking the beam locations with chalk lines, locating the joists with a stud finder, and confirming that the planned layout works with the ceiling structure.
The next step is installing the mounting blocks or cleats, which are screwed into the joists or blocking according to the kit's specifications. This step is essentially the same as a non-kit installation, but the kit instructions provide specific guidance about screw types, spacing, and depth.
Once the mounting is in place, the beams themselves are installed by sliding them onto the mounting hardware and securing them with the included fasteners. The kit's instructions typically include guidance about how to handle obstacles, corners, and terminations.
Adapter Components for Common Challenges
RTA kits often include adapter components for common installation challenges. These components are pre-engineered solutions that the homeowner incorporates into the installation rather than improvising on-site.
A common adapter is a corner block that allows two beams to meet at a 90-degree angle with a clean joint. The block is installed at the corner, and each beam fits against it. The resulting joint looks like a professional miter joint without requiring the homeowner to make precise cuts.
Another common adapter is a beam connector for joining two beams end-to-end. The connector bridges the gap between beams and provides structural support at the joint. This component is useful for long runs where a single beam would be impractical to ship or handle.
Some kits also include adapters for common ceiling obstructions, such as light fixtures or HVAC vents. These adapters fit around the obstruction and integrate the beam into the surrounding installation with a finished appearance.
Quality Control Advantages
One of the significant advantages of the kit format is the quality control that comes from coordinated components. Each component in the kit has been tested with the other components to ensure compatibility, color matching, and structural integrity.
The color matching across components is particularly important. The beam, end caps, touch-up stain, and corner blocks all need to match exactly for the finished installation to look consistent. Kits from reputable manufacturers ensure this match because they source all components from controlled production runs.
The compatibility of hardware with materials is equally important. The screws included in the kit are sized correctly for the mounting blocks and the beam material. The adhesive is formulated for the foam type used in the beams. The touch-up materials are designed to bond with the beam's protective coating.
This level of coordination is difficult to achieve when components are sourced separately. Different fasteners may have slightly different coatings, adhesives may not bond equally well with all foam types, and touch-up stains may not match exactly between batches. The kit format eliminates these inconsistencies.
Warranty and Support Advantages
RTA kits typically come with comprehensive warranties that cover all components as a system. If any component fails, the manufacturer replaces it. The system warranty is stronger than separate warranties on individual products because the manufacturer takes responsibility for the entire installation.
Technical support is also more straightforward for kit installations. The installer can call the manufacturer with questions about any component, and the support team can address the issue without needing to coordinate with multiple suppliers.
For first-time installers, this level of support is reassuring. The availability of expert help reduces the anxiety of tackling an unfamiliar project and provides a safety net if something goes wrong during installation.

Common Mistakes When Working With Kits
Despite the convenience of kits, homeowners can still make mistakes that affect the project. The most common mistakes involve skipping the planning phase, misordering components, and rushing the assembly.
Skipping the planning phase is the most common mistake. Homeowners who are excited about the project sometimes jump straight to installation without measuring carefully or considering the room's specific requirements. This approach usually leads to material waste and project delays.
Misordering components is another common mistake. The kit should include the correct quantity and sizes of each component, but mistakes in the order can leave the homeowner short of needed parts. Double-checking measurements and reviewing the order before submission prevents this issue.
Rushing the assembly is a mistake that affects projects where homeowners underestimate the time required. The instructions should be read carefully and each step completed thoroughly before moving on. Rushing the assembly leads to errors that require rework.
When a Kit Is Not the Right Choice
Kits are not the right choice for every project. Highly customized installations, historical renovations with unusual requirements, and projects with significant existing damage may require components and approaches that standard kits do not address.
For these projects, sourcing components individually or working with a contractor who can customize the installation may be more appropriate. The kit format's convenience comes with constraints on customization, and projects that need significant customization may be better served by other approaches.
For the vast majority of residential renovation projects, however, RTA kits provide a level of convenience and reliability that is hard to match. The combination of coordinated components, clear instructions, comprehensive support, and predictable timelines makes kits the preferred choice for homeowners who want to handle their own beam installations.
The Broader Renovation Context
A beam installation rarely happens in isolation. Most homeowners undertake beam projects as part of broader renovation efforts that may include painting, flooring, electrical work, and other improvements. RTA kits integrate well into these broader projects because the timeline, scope, and components are predictable.
When the beam project is part of a broader renovation, the kit installation typically happens after major structural work and before final finishing details. The beams are installed before painting so that any touch-up work blends with the final paint coat. Electrical work that affects the ceiling is completed before beam installation to avoid having to work around finished beams.
Coordinating the beam project with other renovation work requires planning but does not significantly complicate the broader project. The predictable timeline and clear scope of a kit installation actually simplify the coordination by providing a known duration for the beam work.
The Final Word on RTA Kits
Ready-to-assemble PU faux beam kits represent the maturation of the beam installation process into a format that homeowners can confidently tackle. The combination of pre-selected components, clear instructions, comprehensive support, and predictable timelines makes kits the most accessible way to add beams to a renovation project.
For homeowners considering a beam installation, the recommendation is to start by exploring the kit options available from reputable manufacturers. A well-chosen kit provides everything needed for a successful project and removes most of the uncertainty that historically made first-time installations feel overwhelming.
The kit format is not just convenient — it is genuinely the best way to approach most residential beam installations. The manufacturers who developed the format have done so by understanding what homeowners need and providing it in a coordinated package. The result is a renovation experience that produces professional-looking results with DIY effort.
Technical References
ASTM standards cited in every specification
Test Data
Lab results from internal testing program
Updated 2026
Reviewed against current product specs


