
Slide-on mount systems have been quietly changing the way installers think about decorative beams. For decades, mounting a faux timber beam to a ceiling meant drilling into the substrate, balancing heavy sections on a ladder, and holding everything in place while a helper fed screws into a wall plug. Slide-on systems swap all of that for a metal track, a couple of brackets, and a beam that drops into place by hand.
The result is a much faster installation, fewer tools required on site, and a beam that can be removed or replaced without tearing apart the ceiling. For property managers, holiday rental hosts, and homeowners who like to refresh their interiors every few years, that last point is often the most appealing.
How the Slide-On System Actually Works
A slide-on mount system has three components. First is a metal track, usually powder-coated steel, that gets screwed into the ceiling or wall along the run of the beam. Second is a set of L-brackets or hanger clips that attach to the substrate at intervals determined by the beam length and weight. Third is the PU faux beam itself, which has a routed channel along the top inside face that drops over the track and locks under the brackets.
The genius of the design is in how the beam conceals the hardware. Once the beam is in place, the track and brackets are completely hidden inside the hollow PU shell. From below, the installation looks identical to a traditional direct-mount beam, but the person who installed it spent a fraction of the time on the ladder.
The brackets are usually spaced at 60 to 90 centimeter intervals, depending on the manufacturer's specifications. Closer spacing gives a more secure mount for longer spans, while wider spacing is fine for shorter decorative runs. The track itself is typically a thin C-channel or U-channel shape that the beam slides along until it reaches the desired position.
Where Slide-On Mounts Make Sense
The clearest use case is a ceiling with accessible structure above it. Exposed joists, open rafters, or a drop-ceiling grid all give the installer something solid to screw the track into. The track needs to land on a structural member or on a backing plate that can carry the load, because even though PU beams are light, the bracket system still transfers their weight into the substrate.
Another strong use case is a renovation where the existing ceiling finish is something you do not want to disturb. Slide-on tracks can be mounted over plaster, drywall, or wood paneling without requiring large holes. The only penetrations are the small screw holes for the brackets themselves, which are easy to patch if the beams are ever removed.
The third scenario is commercial fit-outs where the beams may need to come down for maintenance access to plumbing, wiring, or HVAC. A traditional screwed-in beam has to be cut out and discarded. A slide-on beam lifts off the track and can be put back up again when the work is done, which is a much cheaper outcome over the life of the building.

Where It Does Not Work as Well
Slide-on systems are not ideal for every situation. If the ceiling is flat drywall with no accessible structure and no clear backing, the track has nothing solid to attach to, and you are back to drilling into a ceiling plug that may not hold over time. In those cases a traditional direct-mount or a wrap-around beam may be the better answer.
The other limitation is aesthetic. Slide-on systems work with beams that have a routed channel along one face. That routing adds a small amount to the cost of the beam, and some very shallow beam profiles do not have enough depth to accommodate it. If the look you want is a thin beam that sits almost flush with the ceiling, slide-on may not be available in the profile you need.
Finally, slide-on systems are designed for horizontal runs. They do not work for vertical posts, corbels, or angled beam installations. Those still require traditional mounting hardware.
Planning the Layout
Before ordering any beams, sketch the ceiling and decide where each beam will run and how it will meet the walls or other beams. The track has to terminate cleanly inside the beam shell at each end, which means the beam needs to be at least 10 centimeters longer than the visible run so the track end is hidden.
Mark the joist or backing locations on the ceiling. If you are working on a finished ceiling and cannot see the joists, use a stud finder or tap the ceiling to locate them. Marking the joist centers clearly on the wall below with painter's tape helps you keep the track aligned as you move along the run.
Decide whether the beams will run perpendicular to the joists or parallel to them. Perpendicular runs let you screw directly into each joist as you cross it. Parallel runs require you to find or install backing between the joists because there will not be a structural member at every bracket location.
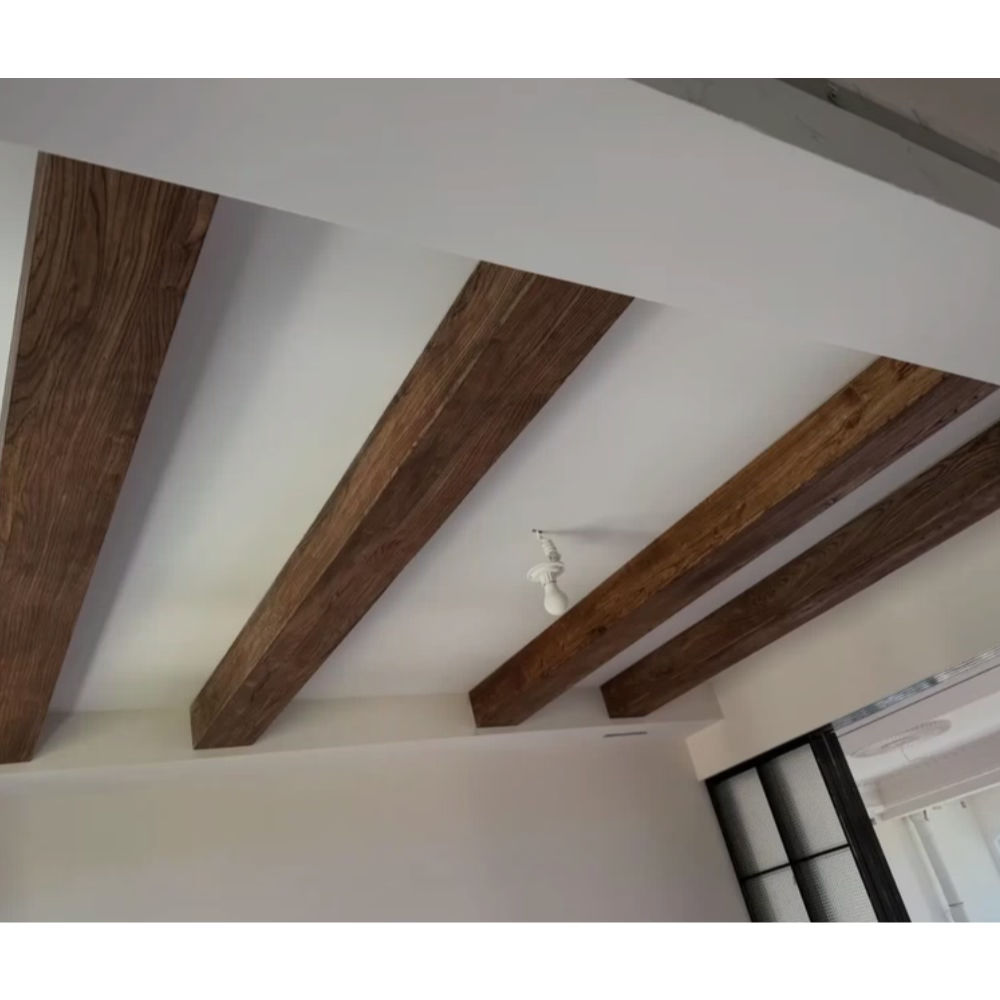
Installation in Practice
Start by pre-assembling the brackets onto the track at the correct spacing. Most manufacturers mark the spacing on the track or in the instructions, but the general rule is to put a bracket every 60 to 90 centimeters and within 15 centimeters of each beam end. Tighten the bracket bolts just enough to hold position. You will want to slide them along the track to fine-tune their position once the track is on the ceiling.
Lift the track into place and have a helper hold one end while you work from a ladder at the other end. Drive screws through the track and into each joist or backing location. Use screws long enough to penetrate at least 25 millimeters into the structural member. Once the track is secure, slide each bracket along it until it lines up with a structural member and screw the bracket into place.
With the track and brackets ready, lift the beam up and angle the routed channel over the track. The beam should drop down and click into the brackets. If it does not seat fully, check that the brackets are oriented correctly and that nothing is blocking the channel. Most installers find that the second beam goes in much faster than the first because they have learned how the hardware interacts.
Finishing Touches
The visible end of each beam needs a cap or a clean cut against the wall. Many PU beam manufacturers sell matching end caps that press into the routed channel and sit flush with the beam end. For runs that meet a wall, a small bead of paintable caulk along the top edge of the beam hides any gap between the beam and the ceiling.
Where two beams meet at a corner, use a miter box or a specialized beam corner kit to cut a clean 45-degree joint. The mitered seam is much easier to hide with stain and finish than a square butt joint, especially when the corner is visible from below.
Long-Term Maintenance
One of the underrated benefits of a slide-on system is how easy it is to remove a beam if it gets damaged. A sharp knock during furniture moving, a water leak from the floor above, or simply a desire to change the beam color all become much simpler projects when the beam can be lifted off the track in seconds. Store the removed beam carefully so it does not warp in storage, and keep the track clean of dust so the next beam slides on smoothly.
Technical References
ASTM standards cited in every specification
Test Data
Lab results from internal testing program
Updated 2026
Reviewed against current product specs


