
The phrase "tool-free" gets thrown around a lot in marketing materials, but in the case of slip-on mount PU faux wood beams it is almost accurate. Once the bracket track is in place on the ceiling, the beam itself goes up with no tools at all. You lift it, slide it onto the track, and you are done.
The brackets and track do require screws to attach to the ceiling, but that work happens once per project and it is hidden inside the beam once it is installed. For the homeowner who is looking at a dated ceiling and wondering whether a beam project is realistic in a weekend, the answer with a slip-on system is usually yes.
Why Tool-Free Installation Matters
Most DIY ceiling projects stall not because the actual work is hard, but because the homeowner realizes halfway through that they need a second person on a ladder, that they are running out of daylight, and that the next step requires a tool they do not own. Slip-on systems reduce those friction points.
Without a drill in your hands at the critical step, the installation becomes more about positioning than about fastening. You can move the beam around until it looks right, walk down the ladder to admire it from below, climb back up and slide it another centimeter if needed. That flexibility is hard to overvalue when working overhead.
It also makes the project safer. Holding a drill overhead while balancing on a ladder is one of the more common ways people get injured during home improvement work. With the fasteners already installed on the ceiling, the only thing you are doing overhead is lifting a lightweight beam into position.
Where It Works Best
The classic scenario is a finished ceiling with accessible joists. Exposed joists in a basement, open rafters in a vaulted ceiling, or a drywall ceiling where the joists are easy to find with a stud finder all qualify. The track screws into the joists directly, and the beam drops on top.
The second good scenario is a drop ceiling grid. The T-bar grid is not strong enough to hold a beam directly, but you can install a backing plate above the grid and screw the track into that. The beam appears to float below the grid line, which is a striking look in modern offices and commercial spaces.
The third scenario is over a flat ceiling where you have installed horizontal backing strips between the joists. This is more work than the first two cases, but it produces a very clean result because the beam ends can sit tight to the ceiling with no visible gap.
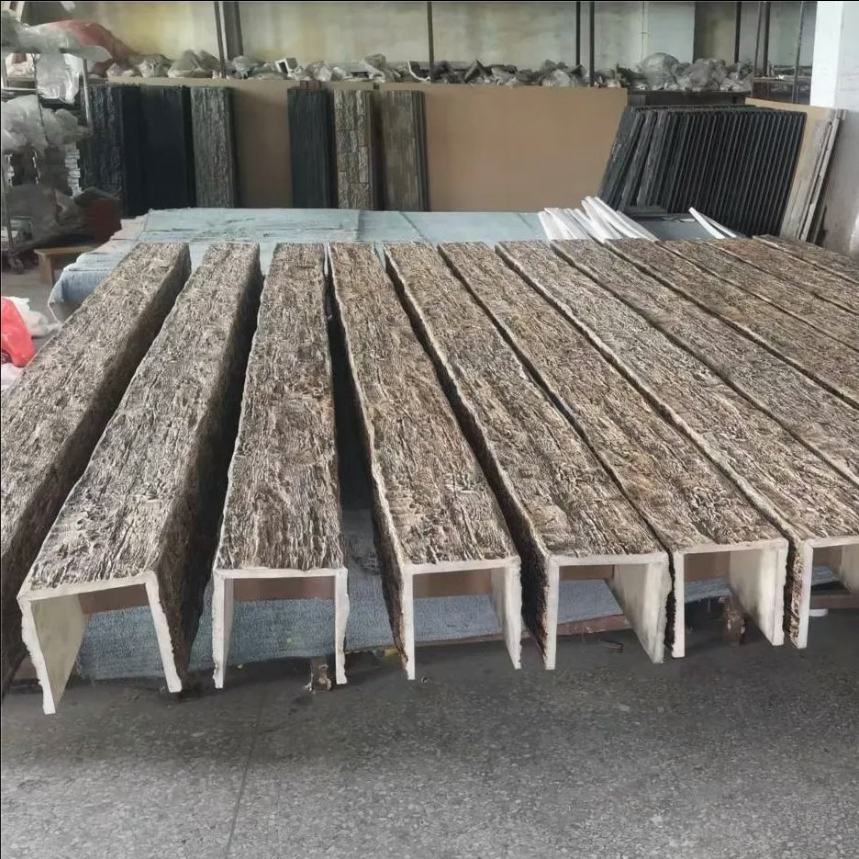
Where It Does Not Work
Concrete ceilings without existing anchors are the toughest case. The track needs screw anchors, and those require a hammer drill and masonry bits. You can still call it a slip-on installation, but it is no longer tool-free in any meaningful sense.
Vaulted ceilings with very steep pitches are also challenging. The beam still drops onto the track, but the angle makes it harder to maneuver on a ladder. Most installers handle this by pre-assembling the track at the bottom of the ladder and lifting the entire assembly into position at once, which usually requires two people on ladders rather than one.
Finally, ceilings with significant sag or unevenness will telegraph through to the beam. The slip-on track can be shimmed to compensate, but it adds time and complexity. If the ceiling is badly out of level, a traditional framed soffit may actually be the easier solution in the end.
Pre-Installation Planning
Spend time on the layout before ordering any materials. Beam runs that align with architectural features like a fireplace, a kitchen island, or a window wall look intentional. Runs that float randomly across the ceiling tend to look like an afterthought no matter how nicely they are installed.
Measure the ceiling length, the wall length, and the distance to any fixed obstructions. Sketch the room to scale and lay the beams over the drawing. Mark the joist directions on the sketch so you can see where the brackets will land.
Decide how the beams will end. A beam that runs into a wall can terminate with a clean cut and a small bead of caulk. A beam that ends in mid-ceiling needs an end cap that matches the beam profile. End caps look better when they line up with something else in the room, like a light fixture or a furniture edge, rather than terminating at an arbitrary point.

The Bracket Track
The track is the backbone of the system. It runs the full length of the beam and is screwed into the ceiling joists at regular intervals. Most kits ship the track in standard lengths that can be cut to size, and joining two pieces of track together is usually done with a small splice plate that sits inside both pieces.
Pre-drill the track at each joist location before lifting it to the ceiling. This makes it easier to drive screws overhead with one hand while steadying the track with the other. Mark the screw locations with a pencil so you can find them easily once the track is in position.
Lift the track into place and have a helper hold one end while you work from a ladder at the other. Drive the screws home, then check the track for level along its full length. A track that is out of level by even a few millimeters will produce a beam that looks obviously crooked from below.
Hanging the Beams
Lift the first beam up and angle the routed channel over the track. The beam should settle into place with a slight downward push. If it binds, lift it back off and check the channel for obstructions. Sawdust, a small piece of packaging material, or an over-tightened set screw on a bracket can all stop the beam from sliding on properly.
Once the first beam is in place, step back and check the alignment. If you are installing multiple parallel beams, the second beam should match the position of the first within a few millimeters. Use a long straightedge or a string line stretched between the two ends of the ceiling to make sure both beams are aligned identically.
For the second and subsequent beams, the process speeds up considerably. Most installers find that by the third beam they can hang it in under five minutes, which is the kind of progress that turns a multi-day project into a single afternoon.
Finishing Details
End caps are the small detail that separates a professional-looking install from an amateur one. Press each cap into the routed channel at the beam end and add a small dab of construction adhesive to hold it permanently. Wipe away any excess adhesive immediately with a damp cloth.
Caulk the seam where the beam meets the wall or ceiling with a paintable latex caulk in a matching tone. Run a wet finger along the bead to smooth it, and remove any excess before it skins over. Cured caulk is much harder to clean off a textured PU surface than wet caulk.
If you are installing beams in a room where the lighting will cast shadows along the grain pattern, walk through the room at different times of day to check how the beams look in different light. Shadows that look subtle at noon can look harsh in late afternoon light, and a beam that looked perfect during installation may need a small adjustment to the bracket height to look right throughout the day.
Technical References
ASTM standards cited in every specification
Test Data
Lab results from internal testing program
Updated 2026
Reviewed against current product specs


