Every renovation eventually runs into the moment where the structural reality of the building refuses to match the design vision. A steel I-beam that drops below the ceiling line, a chunky HVAC duct that crosses the room, or a row of older wooden beams that have seen better days can all get in the way of a clean modern interior. Covering those elements instead of removing them is usually the right call, both for budget and for the structural integrity of the building.
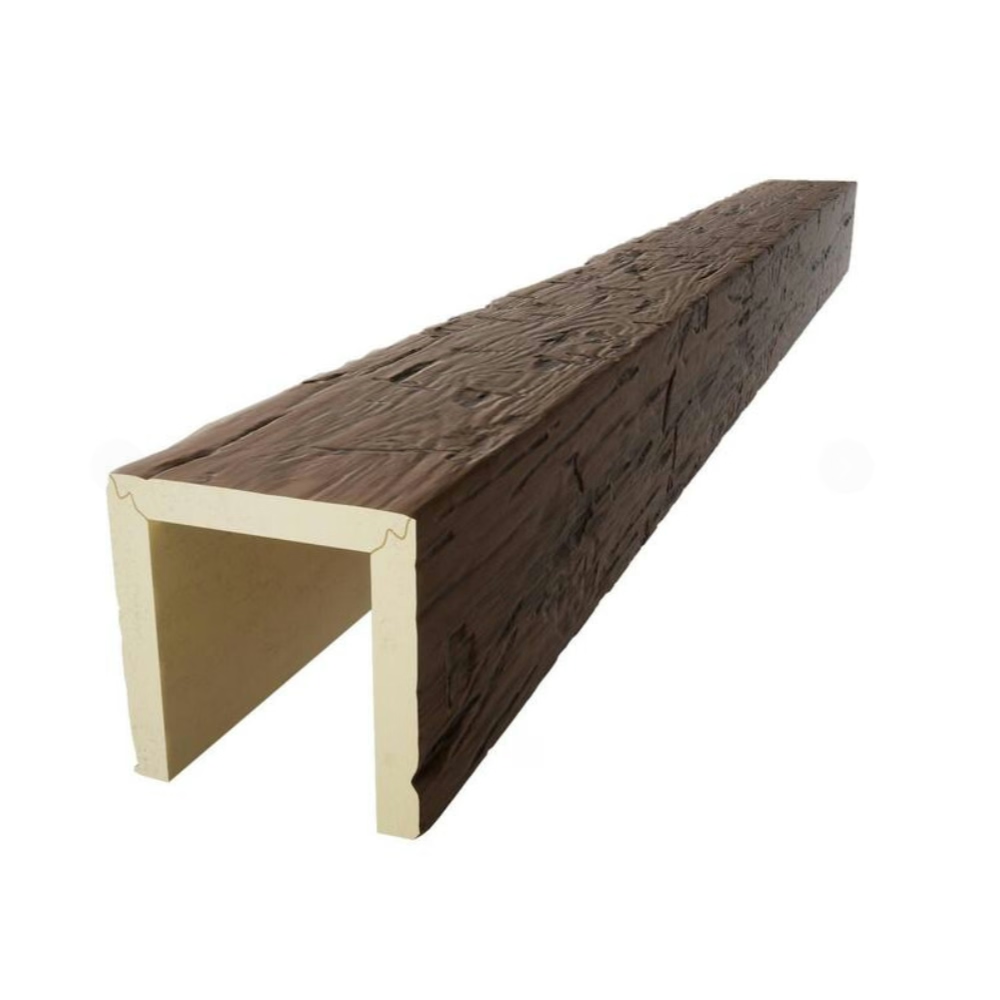
Slip-on PU beam covers exist for exactly this situation. They are pre-finished hollow shells that fit over an existing member and give the appearance of a freshly installed decorative beam. The renovation goes faster, the mess stays contained, and the finished result looks like the building was always meant to have a beam in that spot.
Why Cover Rather Than Replace
Removing an existing structural beam is rarely as simple as it looks on paper. Steel beams need to be supported by temporary shoring while any modifications happen, and the engineers who designed the building included that beam for a reason. Wood beams can sometimes be removed in non-load-bearing situations, but even then you are dealing with patching the ceiling, refinishing the surrounding area, and disposing of a heavy structural member.
Covering is faster, cheaper, and reversible. If a future owner wants to expose the original beam, the cover comes off and the structure underneath is still intact. That reversibility is one of the strongest arguments for the slip-on approach, especially in older buildings where the original structural elements may have historical value.
Measuring the Existing Member
The first step is a thorough measurement of the existing beam. Height, width, and length all matter, and each one should be measured at several points along the run. Structural members are not always perfectly straight, and a beam that looks uniform from the floor may have a noticeable bow or twist when measured up close.
Record the largest measurement in each direction and use that for ordering. Adding a few millimeters of clearance on each side gives you room to slide the cover on without forcing it, and any visible gap can be closed with trim or caulk once the cover is in place.
Pay special attention to any protrusions on the existing member. Bolt heads, hanger plates, splice plates, and lighting conduit all add to the effective dimensions of the beam. Measure around these features rather than just across the clean sections of the member, because the cover has to clear the protrusions too.
Choosing the Right Cover Profile
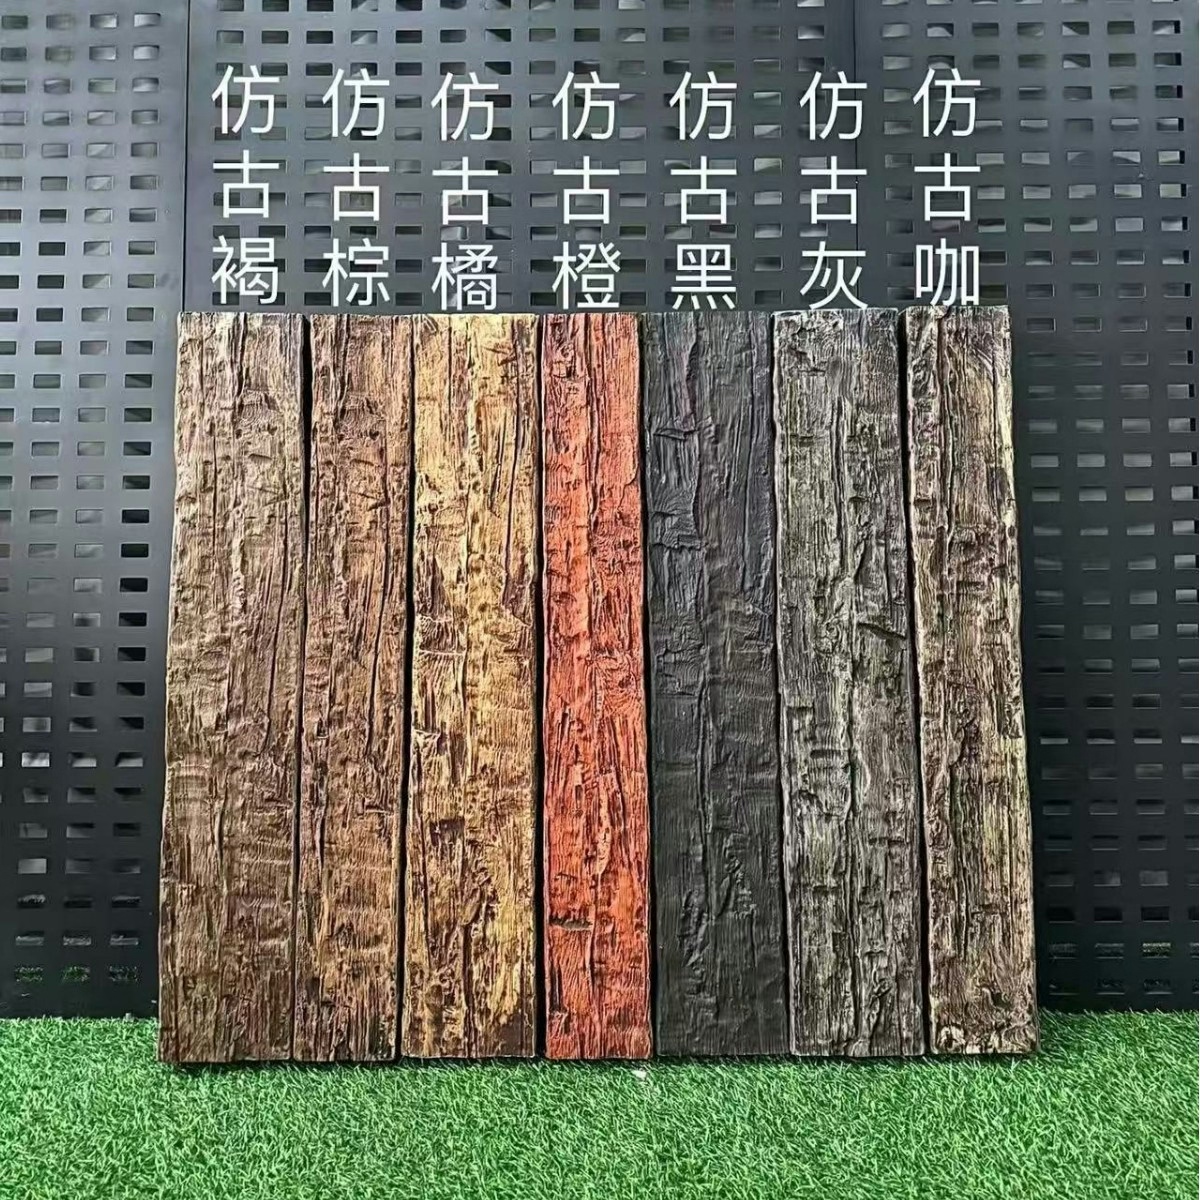
PU beam covers come in a wide range of profiles. Some are smooth and modern, others carry deep hand-hewn textures, and still others mimic the look of reclaimed timber with knots, cracks, and weathering marks. The right choice depends on the style of the surrounding renovation.
For a contemporary renovation in an older building, a smooth cover that contrasts with the original structure can work beautifully. The juxtaposition of clean lines against aged materials is a popular design choice in adaptive reuse projects. For a rustic or farmhouse renovation, a textured cover that blends with the rest of the room's materials often looks more cohesive.
The other profile consideration is depth. A cover that is too shallow will not fit over the existing member, while a cover that is much deeper than the existing beam will leave visible empty space inside. Some manufacturers offer adjustable-depth covers that telescope to fit a range of sizes, which is worth considering if your measurements fall between standard sizes.
Pre-Installation Preparation
Before installing the cover, prepare the existing member. Wipe it down to remove dust and any oily residue, and check for any loose elements that need to be secured. Loose bolts or hanger straps can cause noise later if they shift under the weight of the cover.
If there are services running along the existing beam that you need to access in the future, mark their locations clearly on the inside of the cover before installation. That way you know exactly where to drill if you ever need to cut an access panel into the cover.
For installations in commercial spaces, check the local fire code for any requirements around covering structural members. Some jurisdictions require that fire-rated structural members remain visible for inspection, which means a slip-on cover may not be permitted without special treatment. A quick call to the local building department can save a costly mistake.

Installation Sequence
Lift the cover into position over the existing member. Most covers are designed to drop down from above, which means you slide one end of the cover over the end of the existing member and then walk the cover along the run until it is in position. For long covers, this is a two-person job because the cover can flex and bind if one person is trying to control both ends.
If the cover has an open seam along one long edge, install the cover by tilting one edge under the existing member first and then rolling the cover up into position. The seam closes along the bottom or the side, depending on the design, and is hidden from view once the cover is in place.
Fasten the cover to the existing member with small brackets or clips that are concealed inside the shell. The exact method depends on the manufacturer, but the principle is the same: the cover should be securely attached without any visible fasteners on the outside. Most kits include the necessary hardware, but it is worth confirming before ordering.
Handling Joints and Corners
Beam covers rarely fit a room in a single length, which means joints are inevitable. The easiest joint to hide is a scarf joint where each end of the cover is cut at 45 degrees and the two pieces overlap. The angled seam disappears into the line of the beam much more effectively than a square butt joint, especially when the cover has a strong grain pattern.
For corners, miter the cover ends at 45 degrees each and fit them together at the corner. A small bead of color-matched caulk along the inside of the miter hides any small gap, and the joint is barely visible from below once the caulk is in place.
Where the cover meets a wall, terminate it with a clean cut and a small bead of caulk. If the wall is not perfectly flat, use a flexible caulk that can move slightly without cracking. Pure silicone caulk does not take paint or stain well, so use a paintable acrylic or latex caulk instead.
Access Considerations
One of the underrated benefits of a slip-on cover is that it preserves access to the services running along the existing beam. Unlike a drywall soffit, which has to be cut open and patched every time a plumber or electrician needs to reach the pipes and wires behind it, a PU cover can be removed and reinstalled with minimal effort.
For buildings where maintenance access is a regular need, consider installing the cover with a few removable sections rather than as a single continuous run. The sections can be joined with hidden clips that release with a simple tool, and the rest of the cover stays in place permanently.
When to Call a Professional
Most slip-on cover installations are within the capabilities of a competent DIYer with a helper. There are some situations, however, where a professional installer is the better choice. Very long runs, complex corner conditions, covers that need to integrate with lighting or sprinkler systems, and installations in commercial spaces with code requirements all benefit from the experience of someone who has done the work before.
A professional installer will also have the right tools for the job. Long levels, laser alignment tools, and specialized cutting equipment produce a more accurate result than the basic toolkit most homeowners own. For a single-beam residential project, that level of precision is not always necessary. For a multi-beam commercial install, it usually is.
Technical References
ASTM standards cited in every specification
Test Data
Lab results from internal testing program
Updated 2026
Reviewed against current product specs