
Structural ceiling beams tend to divide opinion. Some owners love the industrial honesty of an exposed I-beam or a heavy timber. Others see them as obstacles to a clean, finished interior. For the second group, slip-over PU resin covers offer a way to keep the structural element in place while changing its appearance completely.
The installation is faster and less invasive than framing a soffit, and the result is reversible. If the building owner decides to expose the original beam again, the covers come off and the structure underneath is unchanged. That reversibility is a meaningful advantage in commercial leases, historic renovations, and any project where future flexibility matters.
What Slip-Over Covers Are Made Of
PU resin covers are molded from the same polyurethane foam used in solid faux wood beams, but with a thinner wall thickness because they do not need to carry their own weight once installed. The exterior carries the wood grain texture, color, and protective topcoat, while the interior is a smooth shell that fits over the existing beam.
The foam density is slightly higher in slip-over covers than in solid beams. The higher density gives the shell more rigidity so it does not flex or dent under minor contact, which is particularly important for covers that will be at or below eye level in the finished room.
Common Applications
The most common application for slip-over covers is a steel I-beam in a residential or commercial space where the owner wants a wood beam look. Steel beams are often deeper and heavier than the wood beam they support, and they sit visibly below the ceiling line. Wrapping them in PU gives the room the appearance of a chunky solid timber beam while leaving the structural steel to do its job undisturbed.
HVAC ducts are another common application. A duct that crosses a room at ceiling level interrupts the lines of the space and limits the placement of light fixtures. A slip-over cover turns the duct into a beam that can be designed around rather than worked around.
Plumbing and electrical runs are also candidates, especially in renovations of older buildings where new services have been added below the ceiling line. A cover that incorporates the plumbing and wiring into a finished beam profile gives the room a cleaner look without requiring the services to be relocated.
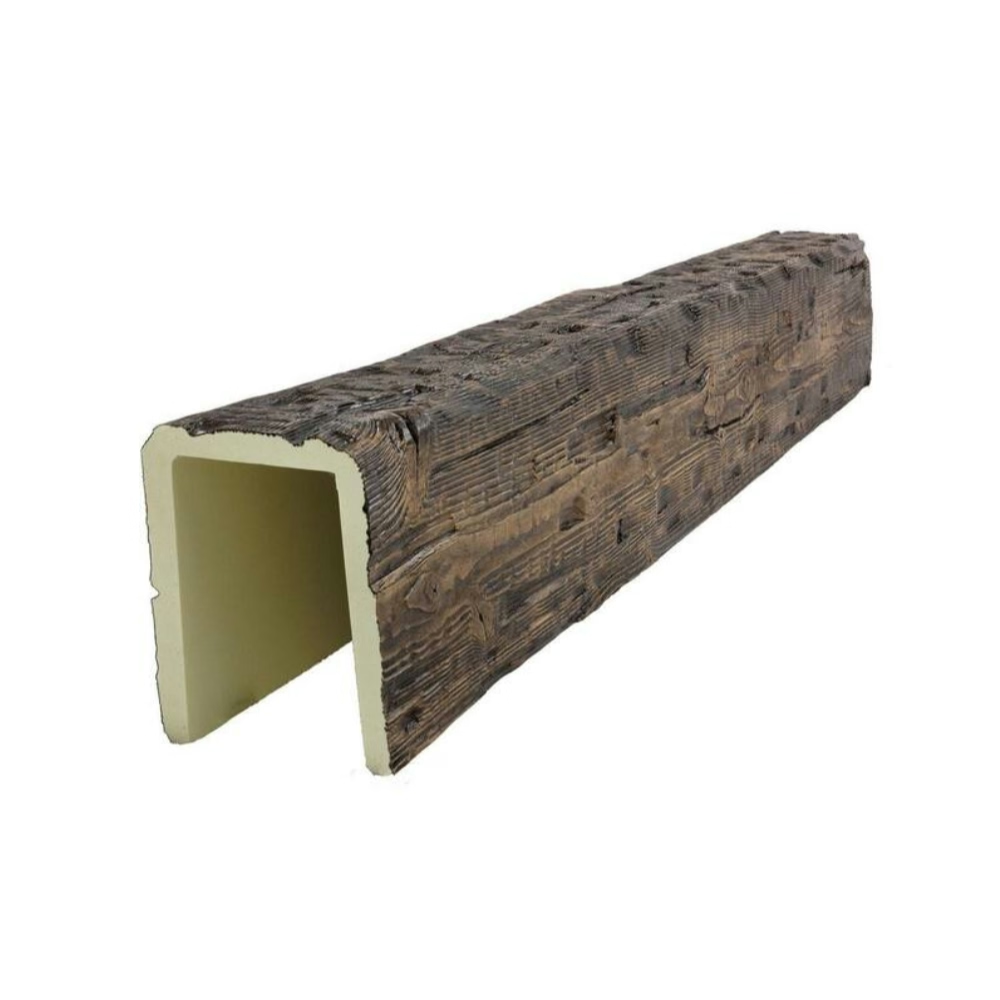
Measuring the Run
Accurate measurements are essential. Measure the height, width, and length of the existing member at several points along its run, including both ends and the midpoint. Use the largest measurement in each direction when ordering, and add a small clearance margin to allow for installation.
Pay attention to the level and straightness of the existing member. A cover that follows a slightly bowed beam will look obviously crooked when finished, so any significant variation should be noted before ordering. Some manufacturers will custom-fabricate covers to follow a specific curve or angle, but standard covers work best on straight runs.
Mark the location of any protrusions like bolt heads, hanger plates, splice plates, or junction boxes. These add to the effective dimensions of the existing member and need to be accounted for in the cover design. Most manufacturers will incorporate these into the cover pattern if you provide accurate measurements and clear photos.
Installation Sequence
Start by preparing the existing member. Wipe it down to remove dust, oil, and any loose material. Tighten any loose bolts or fasteners, and address any sharp edges that could damage the cover from the inside.
Lift the first cover section into position. For a two-piece design, lift one half up and rest it on a temporary support, then slide it horizontally into position. Tilt the second half into place and fasten the two halves together along their long seam. For a single-piece design, slide the cover over the end of the existing member and walk it along the run until it is in position.
Secure the cover to the existing member with the included brackets or clips. Most systems use a combination of friction fit and mechanical fasteners to hold the cover in place. The fasteners should be concealed inside the shell so they are not visible from below.
Check the cover for level along its length. Make any adjustments to the brackets before moving on to the next section. Once one section is installed and leveled, the next section should match the same line, which makes the leveling process faster as the project progresses.

Handling Services Inside the Cover
If the existing beam carries services that need to remain accessible, plan for that access before installation. Junction boxes, valves, cleanouts, and access ports all need to remain reachable, either through cutouts in the cover or through removable sections that can be lifted off when needed.
For routine access, a few well-placed removable sections are usually more practical than a continuous cover with multiple cutouts. The removable sections can be held in place with hidden magnets or spring clips, and they blend into the rest of the cover when closed.
For occasional access, a small access panel set into the cover is usually sufficient. The panel can be finished to match the surrounding cover so it is not immediately obvious as an access point. Mark its location clearly in the building documentation so future maintenance crews can find it.
Finishing and Detailing
Joints between cover sections deserve attention. A scarf joint where each end is cut at 45 degrees hides the seam much better than a square butt joint, especially when the cover profile has a strong grain pattern. Apply a small amount of color-matched caulk along the inside of the joint to seal it and to hide any small gaps.
Where the cover meets a wall, terminate it with a clean cut and a small bead of paintable caulk. If the wall surface is uneven, use a flexible caulk that can move slightly without cracking. Sand or paint the caulk to match the surrounding wall so the seam disappears.
End caps press into the open end of the cover and hide the cut edge. A small amount of construction adhesive holds the cap permanently in place. Wipe away any excess adhesive immediately with a damp cloth, because cured adhesive is very difficult to remove from a textured PU surface without damaging the printed grain.
When Slip-Over Covers Are Not the Right Answer
Slip-over covers are not the best choice for every situation. Very heavy existing members, very long spans, and unusual shapes may all call for a custom solution. A cover that is too heavy to lift onto a ladder by two people should be considered for sectional installation or for a different approach entirely.
Code requirements can also rule out slip-over covers in some cases. Fire-rated structural members often need to remain visible for inspection, and some jurisdictions require sprinklers and other life safety systems to remain unobstructed. Always check with the local building department before covering any structural element.
For most residential renovations and many commercial projects, though, slip-over PU resin covers are a fast, clean, and reversible way to change the look of an existing structural beam. The installation can usually be finished in a single afternoon for a typical room, and the result looks like a solid decorative beam that has always been part of the building.
Technical References
ASTM standards cited in every specification
Test Data
Lab results from internal testing program
Updated 2026
Reviewed against current product specs


