
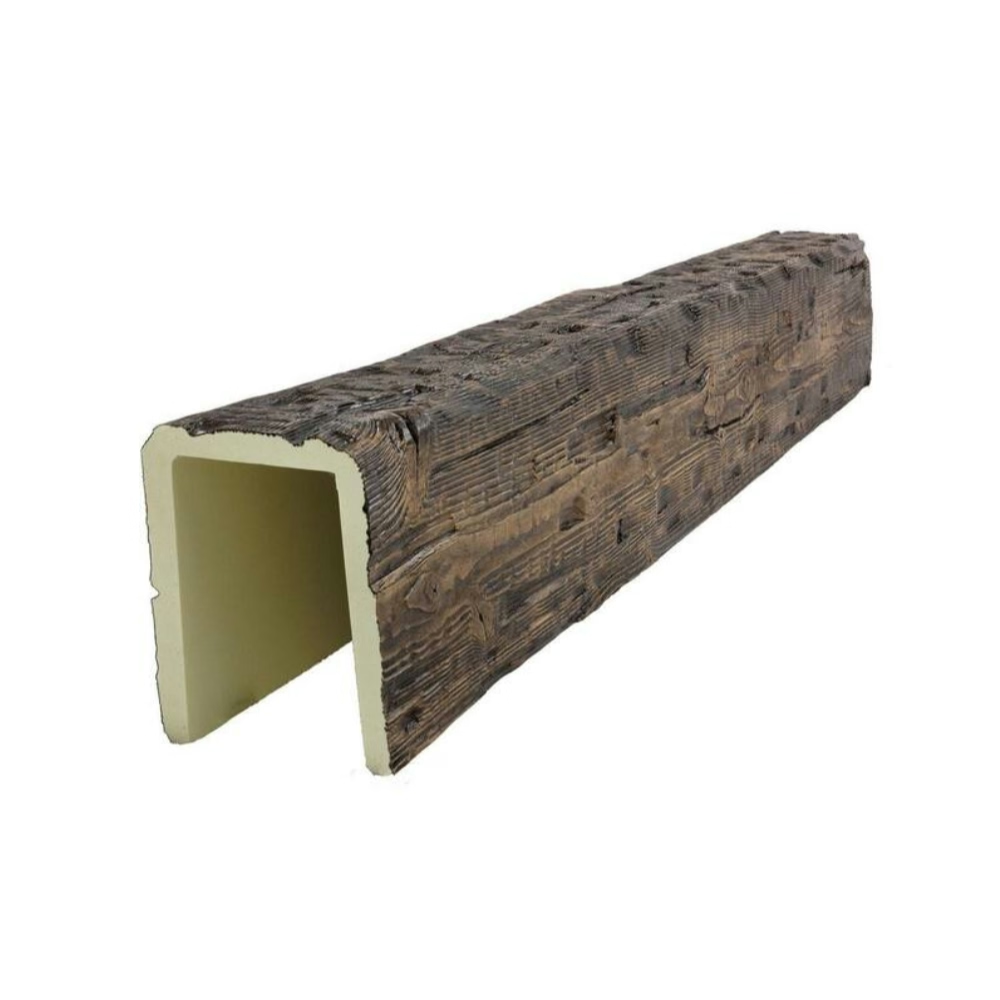
Surface mount installation is the most common way to put a PU faux timber beam on a ceiling. The beam sits against the ceiling surface, brackets hold it in place from inside, and the resulting look is a clean decorative beam that appears to be carrying the load. The reality is that the beam is hollow and the ceiling behind it is doing the work, but the visual effect is identical to a solid structural beam.
For most residential projects, surface mounting is the right choice. It is straightforward, it works with most ceiling types, and it produces a result that satisfies even a close inspection from below. The brackets are hidden inside the beam shell, so there is nothing visible on the beam face to break the illusion of a solid timber beam.
What Surface Mounting Involves
A surface mount installation starts with brackets attached to the ceiling or wall along the run of the beam. The PU beam has a routed channel along the inside of one face that fits over the brackets. Screws driven through the brackets into the substrate hold everything in place, and the beam drops over the brackets to conceal them.
The brackets are typically L-shaped pieces of powder-coated steel. The vertical leg attaches to the substrate with screws, and the horizontal leg extends out to support the beam. Brackets come in different sizes to accommodate different beam depths and different standoff distances from the ceiling.
For most PU beams, the bracket spacing is 60 to 90 centimeters along the run, with a bracket within 15 centimeters of each end. Closer spacing provides more support for heavier beams or longer spans, while wider spacing is adequate for lighter residential installations.
Tools and Materials
The tool list for a surface mount installation is fairly short. A cordless drill with driver bits, a level (a laser level is ideal for long runs), a tape measure, a pencil, and a ladder or scaffold are the basics. A stud finder helps locate joists behind a finished ceiling, and a hole saw or jigsaw may be needed if the beam requires a cutout for a junction box or light fixture.
Materials include the brackets, screws appropriate for the substrate, and the beam itself. Most manufacturers sell brackets as part of an installation kit that includes the right screws for typical residential ceilings. For commercial installations or unusual substrates, the screws may need to be sourced separately.

Locating the Mounting Points
The first step is to mark the location of each bracket along the run. Use a level or laser to establish a straight line on the ceiling where the beam will sit. If the ceiling is finished and the joists are not visible, use a stud finder to locate them and mark their positions on the wall or ceiling with painter's tape.
Bracket positions should align with joists whenever possible. Wood screws driven into a joist provide the most secure mounting. Between joists, the screws have to rely on drywall anchors, which work but do not provide the same holding power. If the run crosses several joists, you can place a bracket at each joist and skip the ones in between.
For runs that parallel the joists, you will need to install horizontal backing strips between the joists to give the brackets something solid to screw into. Backing strips are typically 2x4 lumber cut to fit between the joists and secured with screws through each joist face.
Attaching the Brackets
Hold the first bracket in position against the ceiling and drive a screw through the top hole into the joist or backing. Check the bracket for level before driving the second screw. Once the bracket is secure, move to the next position along the run and repeat.
For longer runs, work from the middle out rather than from one end. This keeps the bracket spacing consistent and reduces the chance of a cumulative error that leaves the last bracket in the wrong position. Check the line of brackets with a string or laser level before attaching the beam.
The screws should be long enough to penetrate at least 25 millimeters into solid wood. For drywall anchors, follow the manufacturer's recommendations for screw size and embedment depth. Screws that are too short will pull out under load, while screws that are too long can hit plumbing or wiring in the ceiling cavity.
Hanging the Beam
Lift the beam up to the brackets with the routed channel facing the bracket arms. The channel should drop over the brackets with a slight downward push. If the beam does not seat fully, check that the brackets are oriented correctly and that nothing is blocking the channel.
For beams longer than about three meters, this step usually requires two people. One person holds each end of the beam while a third person on the ladder guides the channel over the brackets. For very long beams, a temporary support like a beam saddle or a stack of lumber can hold one end while the other end is positioned.
Once the beam is in place, check it visually from several angles around the room. A beam that looks level from directly below can look slightly off when viewed from the side. Small adjustments to the bracket positions can correct for minor variations, but a badly crooked run will need to come down and be repositioned.
Securing the Beam
Most PU beams include additional fasteners that secure the beam to the brackets once it is in position. These are typically small screws driven up through the bottom of the beam and into the brackets. The screw heads are then covered with color-matched caps that blend into the beam face.
Some bracket designs do not require additional fasteners. The beam drops onto the brackets and is held in place by gravity and the close fit of the routed channel. This is the cleaner option because there are no visible fastener heads, but it requires a very precise bracket spacing to work properly.
Adding End Caps and Trim
End caps hide the cut ends of the beam and give it a finished appearance. Most manufacturers include end caps with the beam, sized to fit the specific profile. Press the cap into the open end of the beam and secure it with a small amount of construction adhesive.
For runs that terminate against a wall, a small bead of paintable caulk along the top edge of the beam hides any gap between the beam and the ceiling. Run a wet finger along the bead to smooth it, and remove any excess before it skins over. The caulk should be the same color as the ceiling so it disappears visually.
Common Mistakes
The most common mistake is failing to check for level along the full length of the run. A beam that is level at each individual bracket can still be out of level overall if the ceiling itself is not flat. Using a laser level rather than a short spirit level catches this kind of error early.
The second most common mistake is using the wrong screws. Wood screws that are too short will pull out of the joist under the weight of the beam. Drywall anchors that are undersized will spin in their holes without gripping. Take the time to match the fastener to the substrate.
Finally, do not skip the step of pre-drilling the beam if the manufacturer recommends it. PU foam can crack or split if you drive a screw directly into it without a pilot hole. The pilot hole also makes it easier to drive the screw straight, which produces a cleaner final appearance.
Technical References
ASTM standards cited in every specification
Test Data
Lab results from internal testing program
Updated 2026
Reviewed against current product specs


