
Accent walls get a lot of attention in design magazines, but most of them rely on paint, wallpaper, or paneling to do the work. Adding a few PU faux wood beams to the same wall introduces depth, shadow lines, and a sense of architectural weight that flat finishes cannot match. The beams can be horizontal, vertical, or arranged in a grid pattern, and the effect on the room is significant even with just a few pieces.
Mounting beams on a wall is simpler than mounting them on a ceiling because gravity is working in your favor. The beams hang on brackets rather than balancing on top of them, which makes the installation faster and the structural requirements less demanding.
Why Wall-Mounted Beams Work
A wall-mounted beam creates a shadow line along its edges that the eye reads as depth. Even when the beam is only a few centimeters proud of the wall surface, that shadow line gives the wall a three-dimensional quality that flat finishes cannot achieve. Adding more beams multiplies the effect, creating a pattern of shadows that changes throughout the day as the light shifts.
The wall itself does not need to be perfectly flat for a beam installation. Small variations in the wall surface can be compensated for with shims behind the brackets, which is much easier than trying to float a ceiling beam over an uneven surface. The beams will follow the wall line, and any minor variations will be hidden in the shadow lines.
Wall-mounted beams also give you design options that ceiling beams do not. Vertical beams can frame a doorway or a window. Horizontal beams can act as picture rails or as visual breaks in a tall wall. A grid pattern can create a paneled effect that resembles traditional wainscoting or a contemporary slat wall.
Choosing Profiles and Sizes
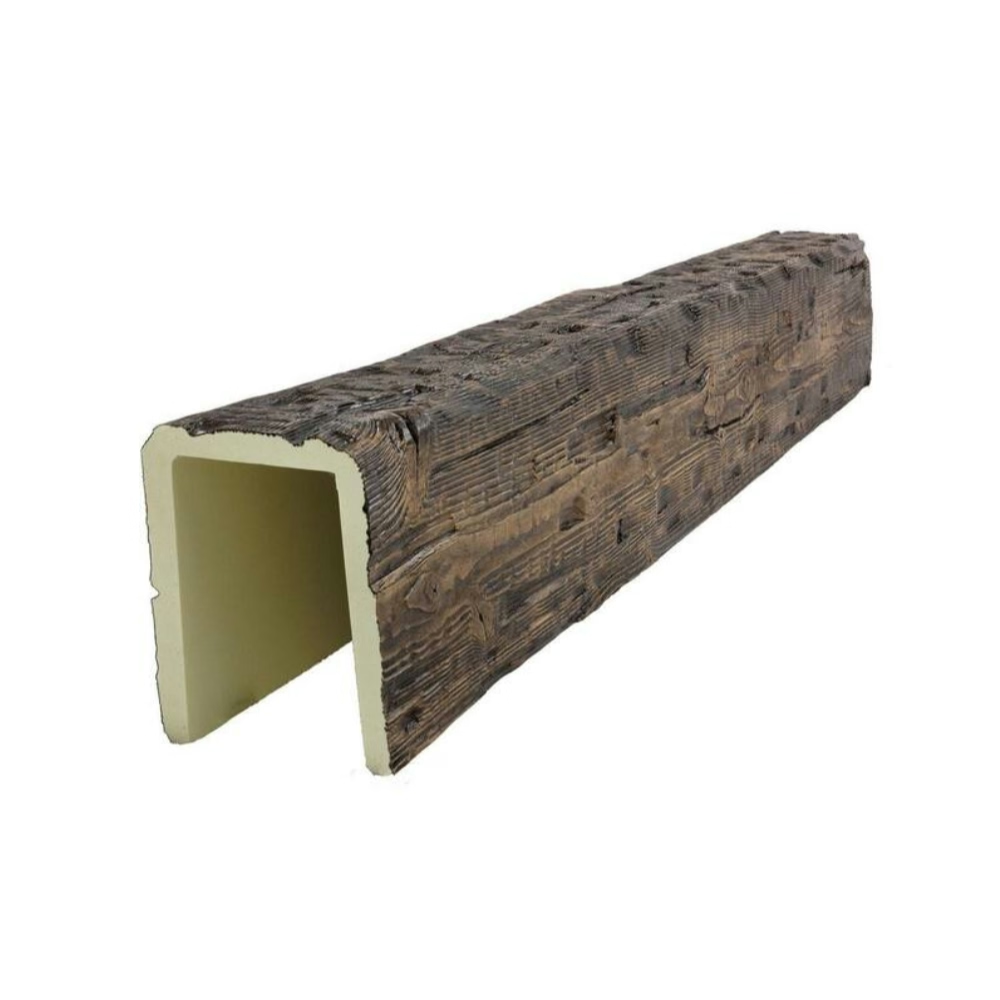
The profile of the beam should suit the style of the room. Smooth, flat-faced beams work well in modern and contemporary interiors. Hand-hewn or rough-sawn beams suit rustic, farmhouse, and craftsman styles. Reclaimed timber profiles work in industrial and adaptive reuse spaces.
Beam depth is a more important consideration for wall mounts than for ceiling mounts. A deep beam on a wall can feel overwhelming, while a shallow beam may not cast enough shadow to justify the installation. A good rule of thumb is to choose a beam depth that is proportional to the room dimensions, with larger rooms taking deeper beams and smaller rooms taking shallower ones.
Beam width affects how the installation reads visually. Narrow beams in a grid pattern create a finer texture that works in contemporary spaces. Wide beams as single accents make a stronger statement and work better in rooms with more substantial architectural details.

Planning the Layout
Sketch the wall on paper before buying any materials. Mark the wall dimensions, the location of any windows, doors, or fixed features, and the position of any outlets or switches that need to remain accessible. Lay the beams over the sketch to test different configurations.
For a horizontal accent, beams typically run at three points along the wall height. A low beam about 60 centimeters from the floor acts like a chair rail. A middle beam at about 120 centimeters provides a strong horizontal line at eye level. A high beam near the ceiling line ties the wall to the ceiling and the rest of the room. Adding beams at intermediate heights creates a more layered look.
For a vertical accent, beams typically frame a feature like a fireplace, a bed, or a piece of art. Two beams on either side of the feature create a strong vertical emphasis that draws the eye to the centered element.
Finding the Mounting Points
Wall studs are the most secure mounting points, and most PU beam brackets can be screwed directly into a stud with a wood screw. Use a stud finder to locate the studs and mark their positions on the wall with painter's tape.
Bracket spacing follows the same rules as ceiling installations, typically every 60 to 90 centimeters along the length of the beam. For wall mounts, the brackets can usually be spaced slightly wider because the load is being transferred vertically rather than horizontally, which puts less stress on each bracket.
For installations where the brackets do not line up with studs, use heavy-duty drywall anchors rated for the weight of the beam. Plastic expansion anchors are adequate for small decorative beams. Metal toggle bolts or snap-toggle anchors are better for larger beams that will carry any weight over the long term.
Installation Process
Mark the bracket locations on the wall with a pencil, using a level to keep the line straight. Hold each bracket against the wall, check it for level, and drive the screws through the bracket and into the stud or anchor. Repeat for each bracket along the run.
For vertical beams, the brackets usually mount to the wall horizontally rather than vertically, with the beam hanging on the brackets from the side. This orientation is stronger for vertical loads because the gravity is pulling the beam straight down onto the bracket rather than at an angle.
Lift the beam into position over the brackets and check it for level. For horizontal beams, shim behind the brackets as needed to correct for any wall irregularities. For vertical beams, the level check is along the vertical axis, and any out-of-plumb condition will be visible as a wedge-shaped gap at the top or bottom of the beam.
Secure the beam to the brackets with small screws driven through the beam face and into the brackets. Cover the screw heads with color-matched caps that blend into the beam finish. Some bracket designs hold the beam in place without additional fasteners, which produces a cleaner look but requires more precise bracket spacing.
Integrating with Lighting and Accessories
Wall-mounted beams are a natural place to add lighting. Small picture lights mounted on the bottom edge of a beam cast light down onto the wall and any art below. Recessed lights set into the bottom of a beam highlight the texture of the wall surface. Uplights mounted on top of a beam wash the wall above with indirect light.
If you are running electrical to the beams, plan the routing before installation. Low-voltage wiring for LED strips can usually be hidden in the gap between the beam and the wall. Line-voltage wiring needs to be run through the wall cavity to a junction box, and the beam can be notched to accommodate the box.
Hooks, brackets, and other accessories can be mounted to the beams for functional purposes. Coat hooks on a beam near an entryway provide hanging space that doubles as decoration. A beam mounted at the right height can serve as a floating shelf with the addition of a top piece.
Finishing the Installation
End caps, caulk lines, and paint touch-ups are the final steps. End caps press into the open ends of the beams and hide the cut edges. A small bead of caulk along the seam where the beam meets the wall hides any gap and gives the installation a finished look.
If the wall paint is fresh, save some of the paint for touch-ups after the beam installation. Even careful installations can leave small scuffs on the wall that need to be painted over once the beams are in place. A small touch-up brush and a cup of the wall paint takes care of these in a few minutes.
Step back and check the installation from across the room. Wall-mounted beams should look intentional and balanced, with the spacing and proportion matching the rest of the room's architectural elements. Any small adjustments at this stage are much easier than re-doing the installation after the paint touch-ups have been completed.
Technical References
ASTM standards cited in every specification
Test Data
Lab results from internal testing program
Updated 2026
Reviewed against current product specs


