
The ceiling renovation started as a Saturday morning conversation. The homeowner had spent the previous evening scrolling through design inspiration photos and was tired of looking up at a flat white expanse with nothing on it. The original plan was to install a single decorative beam across the living room. By Monday morning, the plan had grown to three beams across two rooms, and the budget was suddenly a real conversation. That is a familiar moment for contractors and homeowners alike. The good news is that polyurethane faux beams can deliver the visual transformation the design calls for without requiring a major line item on the renovation budget.
Starting the Renovation With a Clear Plan
A ceiling renovation does not have to start with a full set of architectural drawings, but it does benefit from a clear plan. The most useful first step is to walk the space and identify exactly what the beams are meant to accomplish. Are they adding a sense of scale to a tall room? Framing a specific architectural feature? Hiding an awkward transition between ceiling heights? The answers to those questions affect how many beams are needed, what profile they should have, and how they should be oriented.
Once the intent is clear, the next step is measurement. Beam runs need to be measured to the exact length they will span, with attention to corners, joints, and any penetrations like light fixtures or HVAC registers. A simple sketch with dimensions is often enough to start a conversation with a beam supplier. Most manufacturers can produce a take-off quote from a sketch plus a few photos, which lets the renovation team test ideas against the budget without committing to a full order.
Sequencing With Other Renovation Work
Beams rarely arrive as the first trade on a ceiling renovation. They typically come after any structural work, electrical updates, and HVAC modifications are complete, and they should be installed before the final paint on adjacent surfaces. That sequencing protects the beam finish from accidental damage and lets the painters work cleanly around the beam outline. Coordinating the beam delivery with the rest of the schedule avoids the common problem of having finished beams stored in a garage or basement where they can be scratched, dented, or forgotten.
Setting a Realistic Budget
The honest budget conversation starts with the total installed cost, not just the beam price. That includes freight, any necessary mounting hardware or adhesives, the finishing labor if the beams are not factory-finished, and a small contingency for unexpected conditions like uneven ceilings or hidden wiring. A budget built around the beam price alone almost always ends up overrunning once the supporting costs are added in.
Choosing Beams That Match the Renovation Style
Not every beam profile works in every room. A heavy, rough-hewn beam in a small modern condo feels out of place. A slim, clean-lined beam in a Tudor-style home reads as too contemporary. Matching the beam profile to the architectural language of the renovation is more important than picking the trendiest product on the market.
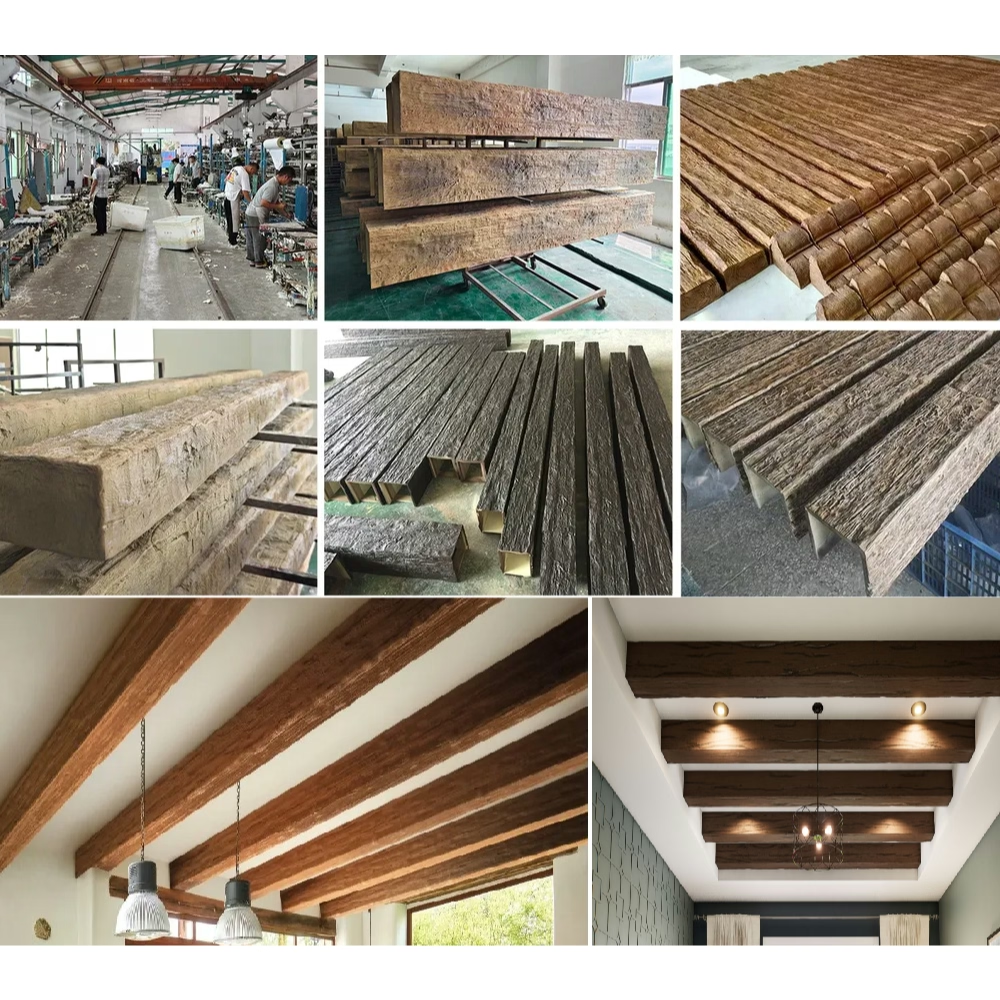
For traditional renovations, profiles with deeper proportions and more visible texture tend to look right. Beams cast from hand-hewn or rough-sawn timber casts carry the irregularity that traditional spaces expect. For modern renovations, cleaner profiles with less surface texture fit better. Beams with smoother surfaces and simpler lines pair well with the minimalist material palettes of contemporary design. For transitional renovations, mid-texture profiles offer flexibility and read well across a range of finishes and furnishings.

Coordinating Beam Finish With Surrounding Materials
The beam finish is the single biggest visual element of the project, and it has to relate well to the surrounding materials. Floors, cabinetry, furniture, and adjacent millwork all contribute to the color story of the room. A beam that is too warm against cool-toned floors reads as an afterthought. A beam that is too cool against warm wood tones looks washed out. The middle path is a beam finish that shares the dominant undertone of the room while being slightly darker or lighter for visual contrast.
Sample boards evaluated on site are the most reliable way to confirm a finish choice. The color of a stain shifts noticeably under different lighting conditions, and the only way to know how a beam will look in a specific room is to put a sample in that room. Designers and homeowners who skip this step occasionally end up with a beam that looked perfect in the warehouse but reads differently once it is on the ceiling.
Considering Texture and Color Variation
Real wood beams have natural variation from piece to piece. Two boards cut from the same tree rarely look identical, and that variation is part of the appeal. Faux beams can replicate that variation in two ways. Some manufacturers produce beams with a consistent finish across every piece, which reads as more orderly and modern. Others intentionally introduce subtle variation between pieces, which reads as more natural and rustic. Either choice is valid, but it should be an intentional one rather than an accident of which product happened to be on the supplier shelf.

Installation Tips That Save Money
A few practical installation habits help renovation projects stay on budget. First, measure twice and order once. Custom lengths cost more than stock lengths, and a project that ends up needing a few custom pieces because of a measurement error pays more than necessary. Second, prepare the ceiling before the beams arrive. Any necessary blocking, furring strips, or mounting hardware should be in place before installation day, so the crew is not paying for idle time while someone runs to the hardware store.
Third, use the adhesive and fastener schedule recommended by the manufacturer. Cutting corners here is tempting on a tight budget, but it usually shows up later as loose beams, visible nail pops, or finish cracks at the seams. Fourth, protect the finished beams during the rest of the renovation. A simple wrap of painter's plastic or a soft cloth over each beam during subsequent trades can prevent scuffs and dings that would otherwise need to be touched up.
Handling Ceiling Irregularities
Older homes and renovated properties often have ceilings that are not perfectly flat. A long beam run can expose unevenness that was invisible before the beam was installed. Shimming the mounting surface before the beam goes up is the standard fix, and it is far easier to do during installation than to correct afterward. For severely uneven ceilings, consider breaking a long beam run into two or three shorter segments with a joint that lands at a high or low point rather than at the worst spot of the ceiling.
Working Around Lighting and Mechanical Penetrations
Beams often share ceiling space with light fixtures, sprinkler heads, HVAC registers, and smoke detectors. Planning the beam layout to avoid these penetrations is ideal, but sometimes the design calls for a beam that has to work around an existing fixture. In those cases, the beam can be notched, drilled, or fitted with a custom blockout. Most manufacturers will produce beams with factory penetrations at specified locations for a modest upcharge, which is usually cheaper than field-modifying a finished beam.
When to Bring in a Professional
Some ceiling renovations are perfect DIY projects. A single beam in a flat ceiling, with no electrical or plumbing complications, can be installed by a homeowner with basic tools and a helper. Other projects benefit from professional installation. Long beam runs, beams installed at significant height, beams that need to wrap structural members, and beams in ceilings with complex mechanical systems all justify the cost of an experienced installer.
A common mistake is to underestimate the difficulty of installation before starting. A beam that looks straightforward in a YouTube video can reveal unexpected complications on site, including uneven ceilings, unexpected wiring, or a mounting surface that is not as solid as it appeared. Bringing in a professional for even a consultation before starting can help the renovation team understand what they are getting into and budget accordingly.
The end result of a well-planned ceiling renovation is one of the most satisfying upgrades a home can receive. Polyurethane faux beams make that upgrade accessible to budgets of every size, and the variety of profiles and finishes on the market today means there is a beam for almost every design direction. A little planning, a clear budget conversation, and the right product choice turn a flat ceiling into a defining architectural feature.
Technical References
ASTM standards cited in every specification
Test Data
Lab results from internal testing program
Updated 2026
Reviewed against current product specs


