
Most ceiling beams are designed to look as if they were installed centuries ago, when heavy timber members sat on stone walls and wooden brackets were more structural than decorative. Modern concealed mounting systems have replaced much of that honesty with hidden clips and cleats, but there is still a strong appetite for projects where the hardware stays in view. Exposed mounted faux timber beams with visible corbels and brackets lean into that aesthetic. They celebrate the joinery rather than hiding it, treating the corbels and brackets as legitimate design elements rather than utility pieces.
Polyurethane is an ideal material for this style because the corbels and brackets can be cast in the same finish as the beams themselves, with consistent grain patterns, color tones, and surface texture. The result is a coordinated system that reads as a unified architectural composition.
The Appeal of Visible Hardware
The trend toward visible structural elements grew out of the industrial loft aesthetic that emerged in converted warehouses and factories in cities like New York, London, and Berlin. Exposed ductwork, visible conduit, and untreated steel beams all became design features rather than flaws to conceal. Architects and designers applied the same logic to traditional interiors, where corbels and brackets that might once have been structural can now be celebrated as ornament.
A faux timber beam with visible corbels has a different visual weight than the same beam with hidden mounting hardware. The eye reads the assembly as three-dimensional, layered, and crafted. It looks like a beam that was installed by a master carpenter who wanted every joint to be appreciated. The decorative corbels create shadow lines that change as the day progresses, adding life to the ceiling.
For homeowners, this aesthetic offers an opportunity to express craftsmanship and tradition. For commercial designers, it creates a focal point that signals quality and attention to detail. Either way, the visible corbels and brackets are doing design work, not just holding up a beam.
Choosing Corbels That Complement the Beam
The corbels have to relate to the beam both visually and proportionally. A heavy rough-sawn timber beam calls for a substantial corbel with deep carving and visible grain. A smooth modern beam works better with a simpler corbel that has cleaner lines and less surface detail. The relationship between the two pieces should feel inevitable, as if one was designed with the other in mind.
Polyurethane corbels are typically cast from the same molds used in traditional woodworking, capturing the deep relief and crisp edges that real carved corbels require. The surface finish matches the beam because both are produced in the same factory using the same pigment system. A rough-sawn oak beam can be paired with a rough-sawn oak corbel in identical finish, and a smooth pine beam can be paired with a smooth pine corbel in matching tone.
Bracket style is another variable. L-brackets, triangular brackets, scrolled brackets, and tapered brackets each create a different visual impression. Some designs favor the simple geometry of a right-angle bracket. Others use curved or scrolled brackets that recall medieval craftsmanship. The choice depends on the overall design language of the room.
Mounting Considerations for Visible Hardware
The mounting system for an exposed corbel and bracket assembly is different from the concealed clip systems used for plain ceilings. The corbels are load-bearing in appearance, even if the actual load is carried by the beam and its mounting brackets. Designers and installers use this visual honesty to their advantage, treating the corbels as the apparent support and the actual mounting hardware as the secondary system.
In practice, this means the beam is typically mounted to the ceiling structure using hidden brackets or direct screws through the top of the beam. The corbels are then attached to the wall and to the beam in a way that suggests structural function. The actual load path goes through the hidden hardware, but the eye reads the corbels as the supporting elements.
The corbels are usually attached with two or three heavy-duty screws into the wall framing and one or two screws into the side of the beam. Where the wall framing is not directly behind the desired corbel location, blocking can be installed during the rough-in phase. This blocking is invisible in the finished installation, but it is essential for the long-term security of the assembly.
Coordinating With Wall and Ceiling Finishes
Visible corbels and brackets interact with the surrounding wall and ceiling finishes in ways that concealed hardware does not. The corbel casts a shadow on the wall, and that shadow is part of the visual effect. Wall finishes should be selected with this in mind. A matte paint finish tends to absorb the shadow and create a soft transition. A semi-gloss finish can highlight the shadow line and make the corbel stand out more sharply.
Ceiling finishes also matter. A flat white ceiling reads as background and lets the beam and corbel assembly stand forward. A coffered or textured ceiling competes with the beam and can undermine the layered look. Most projects using visible corbels favor a simple flat ceiling that allows the beam assembly to be the focal point.
Where the beam runs along a wall that is painted a contrasting color, the corbels can be finished in either the wall color or the beam color. Either approach works, but the choice changes the visual weight of the installation. Corbels in the wall color tend to recede and let the beam dominate. Corbels in the beam color create a unified assembly that reads as a single architectural element.
Profile Options for the Beams Themselves
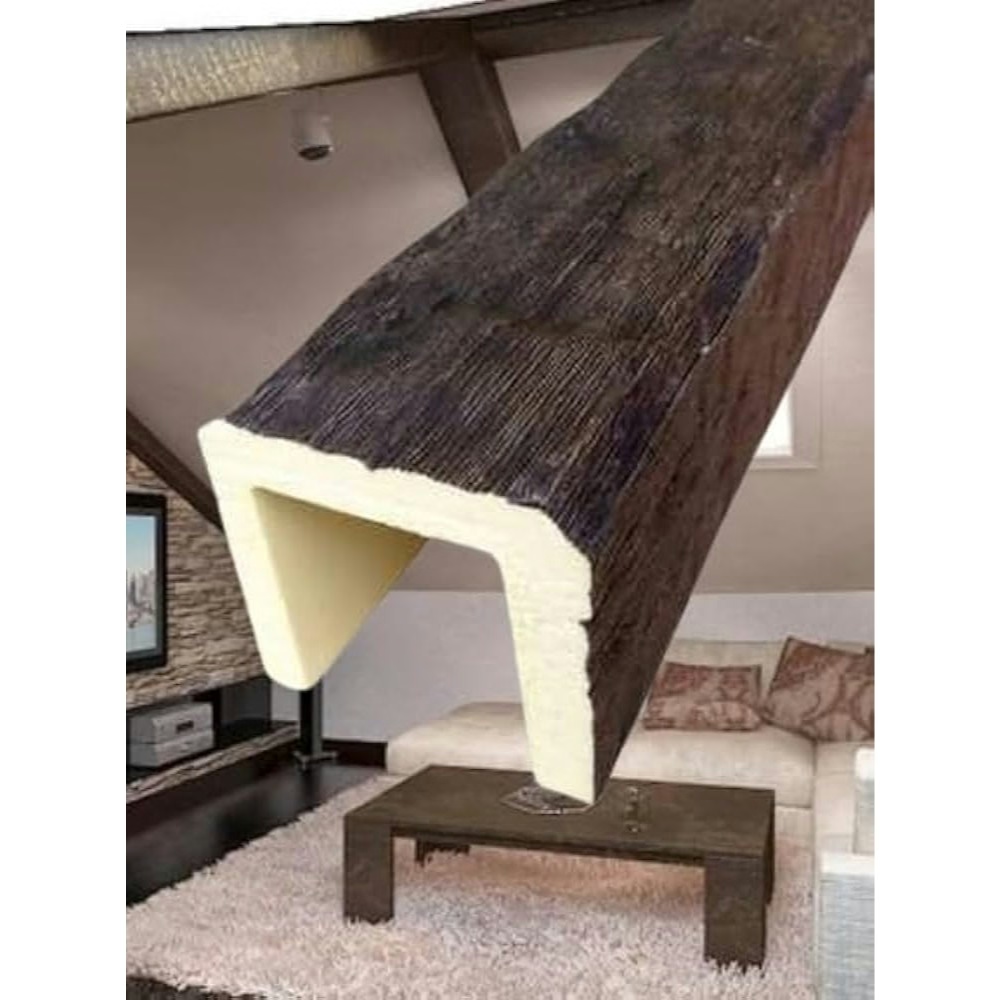
The beams in an exposed assembly are typically larger and more detailed than beams used with concealed mounting. A box beam profile is the most common because the clean rectangular geometry pairs well with the visible corbel hardware. Rough-sawn profiles are also popular because the deep surface texture creates dramatic shadow play as the light changes throughout the day.
Hand-hewn profiles with deep tool marks are a third option. These beams look as if they were shaped by broad chisels and drawknives centuries ago. The exaggerated surface variation pairs especially well with substantial carved corbels, creating an installation that reads as authentically traditional.
Modern profiles are not excluded. A smooth four-sided beam in a contemporary finish can be paired with simple geometric corbels to create a transitional installation that works in modern farmhouse, industrial, and minimalist interiors. The same principle applies: the corbel style should match the beam style, even when both are modern.

Applications Across Interior Styles
Exposed mounted beams with visible corbels appear in a wide range of interior styles. In traditional great rooms, the assemblies anchor a vaulted ceiling and provide a sense of architectural permanence. In kitchens, a single beam with corbels over an island can define the work zone and provide a focal point. In libraries and studies, the assemblies create the kind of scholarly atmosphere that wood and books seem to share.
Hospitality projects use the same assemblies for similar reasons. A restaurant entry with a heavy faux beam and carved corbels announces arrival and creates anticipation. A hotel lobby with a long exposed beam assembly running across the reception area establishes a sense of craftsmanship and quality. A wine cellar with rough-sawn beams and dark-stained corbels feels both rustic and refined.
Even in modern interiors, a single exposed assembly can provide the warmth and texture that minimalism sometimes lacks. A smooth beam with simple geometric corbels can introduce wood into a space without compromising the clean lines. The assembly becomes a sculptural element that anchors the room.
Working With Polyurethane for This Style
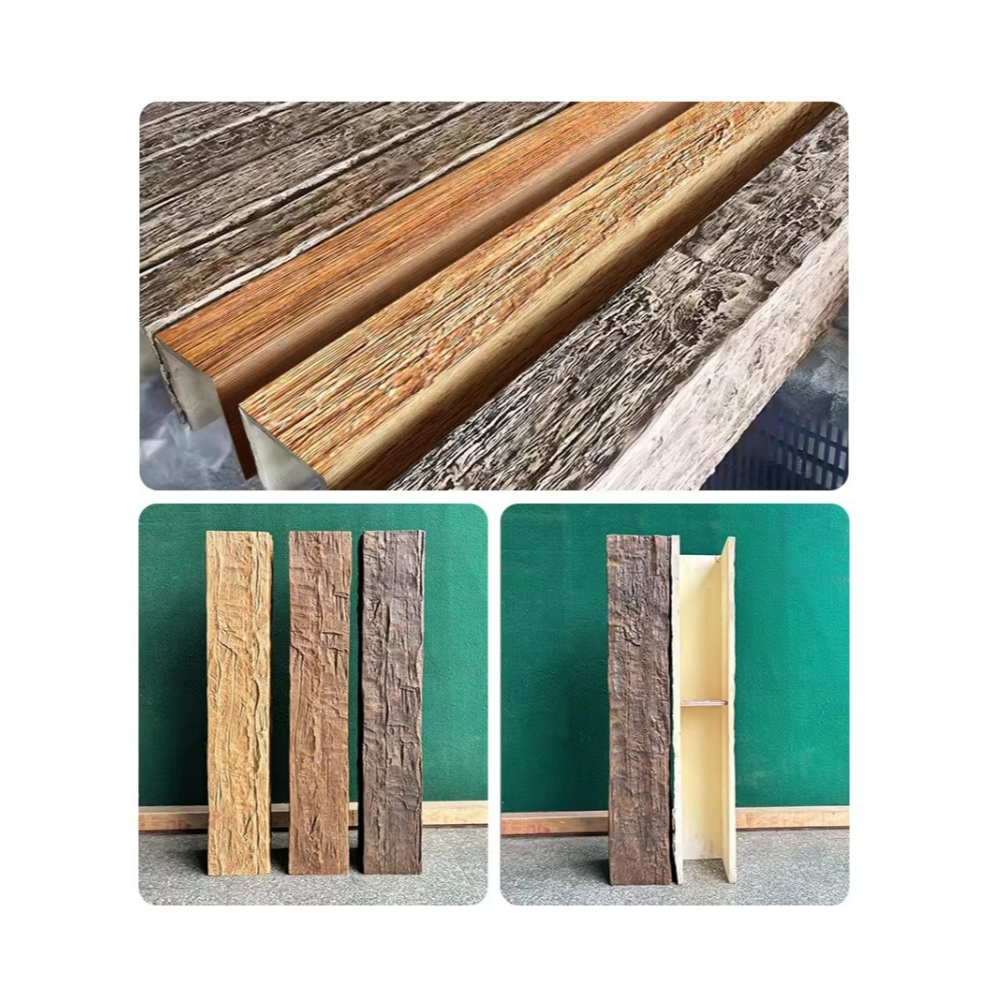
Polyurethane is uniquely suited to visible corbel and bracket installations. The material can be cast with very fine detail that captures the depth and character of carved wood corbels. Real wood corbels of similar detail are expensive and prone to cracking along the grain. Polyurethane corbels maintain their detail indefinitely, with no risk of splitting, warping, or shrinkage.
The weight advantage is significant. A pair of polyurethane corbels can be lifted into place by a single installer, while the same corbels in real wood would require a helper. The reduced weight also means the mounting hardware can be lighter and the wall structure can be less substantial. For renovation projects where the existing wall framing cannot accept heavy loads, polyurethane corbels make exposed mounting practical where solid wood would not work.
Color matching is straightforward. Both the beams and the corbels are produced in the same factory using the same pigment system. A factory order for a complete assembly ensures that every component arrives with identical finish, eliminating the risk of mismatched pieces that sometimes occurs when sourcing from multiple vendors.
Installation Sequence
The installation of an exposed mounted beam assembly follows a predictable sequence. First, the wall blocking is verified or installed. Second, the corbels are mounted to the wall at the correct height and spacing, with the mounting screws driven into the blocking. Third, the beam is lifted into place and secured to the ceiling and to the corbels. Fourth, any visible joints between the beam and corbels are finished with color-matched filler.
The sequence allows the installer to verify the position of each corbel before the beam is in place. If a corbel is misplaced, it can be adjusted without affecting the beam. Once the beam is mounted, the assembly reads as a single architectural element.
Most residential installations of a single beam with two corbels can be completed in a few hours. Larger assemblies with multiple beams and many corbels take proportionally longer, but the basic process is the same.
Maintenance of Visible Hardware
Visible corbels and brackets accumulate dust the same way any decorative element does. Periodic dusting with a soft cloth is usually sufficient. Stubborn spots can be cleaned with a mild soap solution and a soft brush, taking care not to soak the surface. Polyurethane finishes are durable, but harsh solvents can affect the topcoat and should be avoided.
Touch-up paint is sometimes useful for the occasional scuff or scratch. Factory-matched touch-up kits are available from most suppliers and allow small repairs to be blended invisibly. The kits include both stain and topcoat, applied in the same sequence as the original finish.
For commercial installations with high traffic or frequent cleaning, a periodic application of a furniture-grade paste wax can add a layer of protection to the finish. The wax is buffed to a soft sheen and helps the surface resist fingerprints and minor abrasions. It is not necessary for residential installations but is a useful option for hospitality venues and public spaces.
Choosing the Right Combination
The right combination of beam, corbel, and bracket depends on the room, the ceiling height, the wall construction, and the overall design language. Working with a supplier who can show finished samples of multiple combinations helps the decision become concrete. A mock-up of a single beam assembly against a sample wall can confirm that the proportions, colors, and textures work together before a full order is placed.
Designers often specify the beam and corbel style together in their drawings to avoid mismatches. The specification should call out the beam profile, the corbel style, the bracket style, the finish color, and any custom details. A clear specification makes the procurement process smoother and reduces the risk of receiving components that do not work together.
For projects where the design language is still evolving, the supplier can usually provide a recommendation based on past installations. A simple description of the room and the desired aesthetic is often enough for an experienced sales team to suggest a coordinated beam and corbel package. The most popular combinations tend to be the ones that have been refined over many projects.
Technical References
ASTM standards cited in every specification
Test Data
Lab results from internal testing program
Updated 2026
Reviewed against current product specs


