
The right adhesive makes a faux beam install feel like a Sunday afternoon project. The wrong adhesive turns it into a callback situation where the beam starts to peel away from the ceiling within a week. Lightweight polyurethane faux beams are forgiving — they weigh a fraction of what real timber weighs — but they still need an adhesive that grabs fast, holds strong, and cures quickly enough that the installer is not holding the beam in place for thirty minutes. After running hundreds of installations and listening to contractor feedback, here are the adhesives that actually deliver.
Why Adhesive Choice Matters for Faux Beams
Polyurethane faux beams are typically hollow or low-density, with a closed-cell foam interior wrapped in a rigid polyurethane skin. The skin is the surface the adhesive bonds to. That surface is different from wood, drywall, plaster, or concrete, and not every adhesive bonds well to it.
The wrong adhesive might:
- Fail to grab the polyurethane skin, leaving the beam with no initial tack
- Grab well but cure too slowly, allowing the beam to sag before the bond sets
- Bond initially but lose strength over time as the adhesive degrades
- React chemically with the polyurethane, causing discoloration or surface damage
The right adhesive grabs fast, holds during the cure, sets up within hours, and remains stable for the life of the installation.
What Makes an Adhesive "Fast-Curing"
A truly fast-curing adhesive has three properties: high initial grab, short open time, and quick full cure.
Initial Grab
Initial grab is the bond strength the moment the adhesive is compressed between two surfaces. High initial grab means the beam stays in position as soon as it is pressed against the ceiling, without needing mechanical support. The installer does not have to hold the beam or prop it up while the adhesive sets.
Open Time
Open time is the window during which the adhesive can be repositioned before it starts to set. For most construction adhesives, open time is 10–20 minutes. Fast-curing products reduce this to 5–10 minutes, which is enough to position the beam but not so long that the project drags.
Full Cure Time
Full cure is when the adhesive reaches its maximum bond strength. Standard construction adhesives cure in 24–48 hours. Fast-curing products reach full strength in 4–8 hours. The installer can move on to the next beam or the next phase of work without waiting overnight.
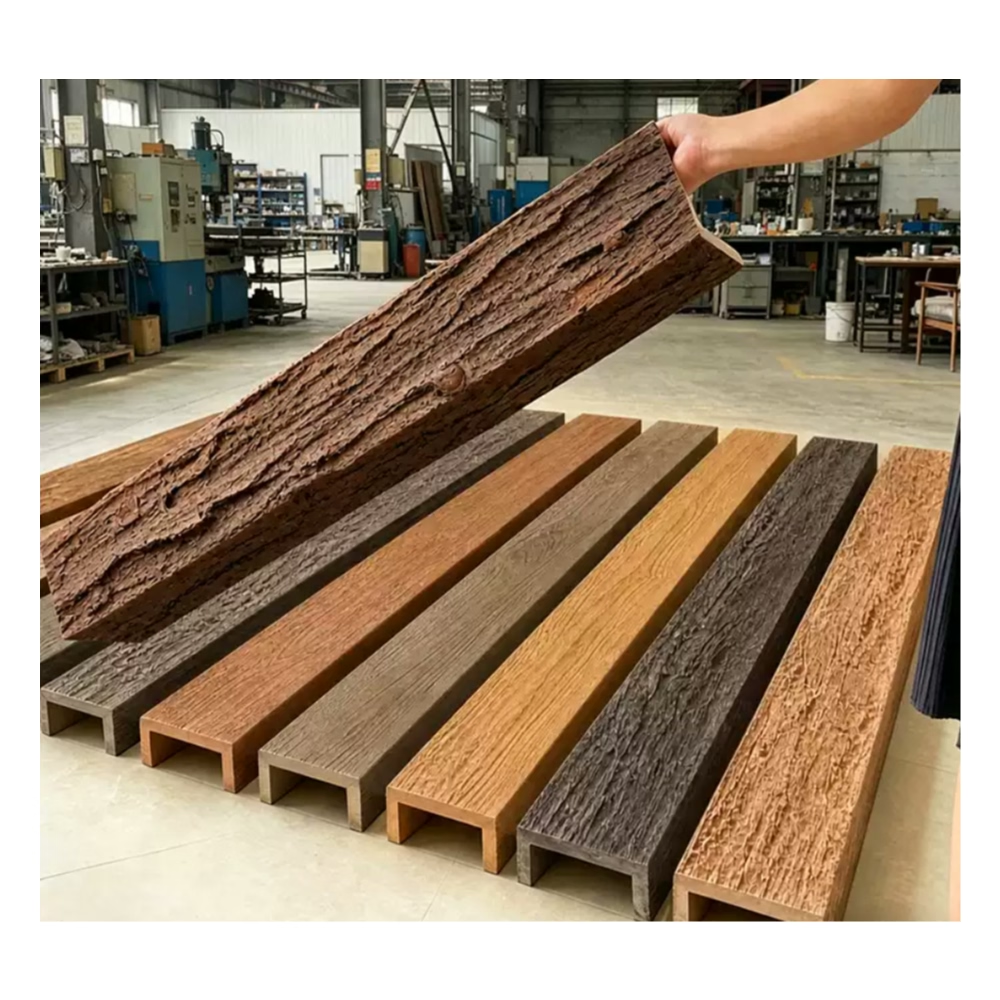
Top Adhesive Recommendations
After testing dozens of products across residential and commercial installations, three adhesives consistently perform above the rest for lightweight polyurethane faux beams.
Premium Polyurethane Construction Adhesive
A premium polyurethane construction adhesive is the workhorse for most faux beam installations. These products are formulated for high initial grab, fast cure, and strong permanent bond to a wide range of substrates including polyurethane foam.
Application is straightforward — a 3/8-inch bead along each mounting surface, the beam pressed into place, and held for 30 seconds while the initial grab takes hold. Within an hour, the beam is bonded well enough that mechanical support can be removed. Within 24 hours, the bond is at full strength.
For ceilings where the beam runs perpendicular to the joists, a polyurethane adhesive on its own is often sufficient because the bond shear strength exceeds the weight of the beam. For ceilings where the beam runs parallel to the joists and the adhesive is bonding to drywall only, a combination of adhesive and mechanical fasteners is recommended.
Hybrid Polymer Adhesive
Hybrid polymer adhesives combine the flexibility of silicone with the bond strength of polyurethane. They grab quickly, cure within 4–6 hours, and remain slightly flexible after cure. That flexibility is valuable in environments with temperature swings or seasonal humidity changes, where a rigid adhesive might crack over time.
Hybrid polymers are also more forgiving of surface imperfections. If the ceiling has slight texture or the back of the beam is not perfectly flat, a hybrid polymer adhesive fills the gaps and maintains contact across the surface. The bond remains strong even if the substrate is not perfectly smooth.
For installations where the beam is bonding to a non-standard surface — metal, tile, plaster, or unusual ceiling types — hybrid polymer adhesives are often the most reliable choice.
Heavy-Duty Panel Adhesive
Heavy-duty panel adhesives are formulated for vertical and overhead applications where sag resistance matters. They have a thicker consistency that does not drip or slump, which is critical for ceiling installations where the adhesive is being applied overhead.
These products have a slightly longer open time than premium polyurethane adhesives — typically 15–20 minutes — but they make up for it with exceptional sag resistance. The bead stays where it is placed, the beam goes up cleanly, and the installer does not have to deal with adhesive sliding down the back of the beam before it cures.
How Much Adhesive to Use
The right amount of adhesive depends on the beam size and weight, but a general rule is a continuous 3/8-inch bead along each surface that contacts the ceiling. For a 3-sided U-beam that wraps around a structural beam, that means three beads. For a flat-back decorative beam, one continuous bead along the centerline.
Coverage Calculations
A 10-ounce cartridge of construction adhesive yields about 30 linear feet of 3/8-inch bead. A 28-ounce sausage pack yields about 80 linear feet. For a typical 12-foot faux beam installation with three beads, you need about 36 linear feet of adhesive, which works out to one 28-ounce sausage per beam with some waste.
For larger projects, bulk adhesives applied with a professional caulking gun reduce both the material cost and the application time.

Surface Preparation
Adhesive bonds best to clean, dry, sound surfaces. Before applying any adhesive, the back of the beam and the ceiling surface should be wiped down to remove dust, grease, or loose material.
Cleaning the Beam Back
The back of a faux beam often has mold-release residue from the manufacturing process. That residue interferes with adhesive bonding. A quick wipe with isopropyl alcohol removes the residue and prepares the surface for adhesive. Skipping this step is one of the most common causes of adhesive failure.
Cleaning the Ceiling Surface
The ceiling surface should be free of dust, cobwebs, and loose paint or texture. A damp cloth wipe is usually sufficient. For ceilings that have been recently painted, allow at least 48 hours of cure time before applying adhesive — fresh paint can interfere with the adhesive bond.
Priming Difficult Surfaces
For ceilings with glossy paint, high-gloss finishes, or unusual coatings, a light sanding or a primer coat improves adhesive bond. The goal is to give the adhesive a slightly rough surface to grab. Mirror-smooth surfaces are harder for adhesive to bond to.
Combining Adhesive With Mechanical Fasteners
For most residential installations, adhesive alone is sufficient. For commercial installations, high-traffic areas, or ceilings where the beam might be subjected to impact or vibration, adhesive plus mechanical fasteners is the safer choice.
Where Mechanical Fasteners Help
- Beams longer than 16 feet, where the adhesive has to support a longer lever arm
- Beams installed in environments with significant temperature swings (unconditioned spaces, exterior ceilings)
- Beams installed in earthquake-prone regions, where lateral movement can stress the bond
- Beams installed in commercial spaces where impact damage is possible
Fastener Options
The two most common fasteners for faux beam installations are:
- Finish nails or brad nails driven through the beam into the ceiling framing
- Screws driven through the beam into blocking installed between joists
Both options work, both leave small holes that can be filled and touched up with the matching finish, and both add significant holding power to the adhesive bond.
Common Installation Mistakes to Avoid
Even with the right adhesive, certain installation mistakes lead to bond failure.
Insufficient Adhesive
A common mistake is using too little adhesive. The installer applies a thin bead, presses the beam into place, and watches the beam sag within hours. The fix is straightforward — use a thicker continuous bead, and check that the adhesive is making full contact across the entire mounting surface.
Wrong Adhesive Type
Another common mistake is using the cheapest general-purpose adhesive available. General-purpose adhesives work for many things, but they do not necessarily bond well to polyurethane foam or to overhead surfaces. The cost savings on a $4 tube of adhesive is not worth the callback to fix a sagging beam.
Cold Weather Application
Construction adhesives cure slowly in cold conditions. Most products are formulated for application above 40°F. In unheated spaces or winter installations, the adhesive should be brought to room temperature before application, and the space should be warmed if possible.
Applying Adhesive to a Wet Surface
Adhesive does not bond to wet surfaces. If the ceiling has any moisture — recent rain through a roof leak, condensation, recent cleaning — the surface must be allowed to dry completely before adhesive application.

Recommended Application Sequence
For most installations, the application sequence is:
- Mark the beam location on the ceiling with a chalk line or laser level.
- Cut and dry-fit the beam to confirm dimensions.
- Clean the back of the beam with isopropyl alcohol.
- Clean the ceiling surface where the beam will mount.
- Apply a continuous 3/8-inch bead of adhesive along each mounting surface.
- Press the beam into place, aligning with the layout marks.
- Hold the beam in place for 30–60 seconds to let the initial grab take hold.
- Use temporary bracing or painter's tape if the beam needs additional support while the adhesive cures.
- Allow 4–8 hours before removing any temporary support.
- Apply finish touch-ups where needed.
Working With Different Beam Profiles
Different beam profiles require different adhesive techniques.
3-Sided U-Beams
U-beams wrap around an existing structural beam or attach to a ceiling-only mounting block. The adhesive goes on three surfaces — the back and both sides of the U. A continuous bead on each surface is standard.
Solid Box Beams
Solid box beams are heavier than U-beams and often have a flat back that mounts directly to the ceiling. A single continuous bead along the back is usually sufficient. For longer beams, a second bead offset from the first adds holding power.
Arched Beams
Arched beams require adhesive along each mounting surface and may require additional support at the apex of the arch until the adhesive cures. Temporary bracing across the arch holds the beam in shape during cure.
Decorative Beam Straps
Beam straps and iron-look hardware are typically decorative and do not bear the weight of the beam. A small amount of adhesive or finish nails holds them in place after the beam is mounted.
Common Questions About Beam Adhesive
Q: Can I use silicone caulk instead of construction adhesive? Silicone does not bond well to polyurethane foam. It also remains flexible, which is not ideal for a load-bearing application. Construction adhesive is the correct choice.
Q: How long do I need to wait before painting or staining the beam? Most construction adhesives are paintable within 24 hours. Check the manufacturer's data sheet for the specific product.
Q: Can I install a faux beam on a popcorn or textured ceiling? The texture creates gaps between the beam and the ceiling. Use a thicker bead of adhesive to fill the gaps, or consider applying a thin layer of adhesive with a notched trowel across the entire back surface.
Q: Will the adhesive fail in a humid environment like a bathroom? High-quality polyurethane and hybrid polymer adhesives are formulated for high-humidity environments and will not degrade with moisture exposure.
The Right Adhesive Is Half the Installation
Most faux beam installation problems trace back to either the wrong adhesive or insufficient adhesive. Get those two variables right and the beam stays in place for decades. The adhesives recommended above have been used across thousands of installations and have a proven track record of holding lightweight polyurethane beams securely, curing fast enough that the project moves forward, and remaining stable through seasonal humidity and temperature swings.
Technical References
ASTM standards cited in every specification
Test Data
Lab results from internal testing program
Updated 2026
Reviewed against current product specs


