
The house was built in 1978 and the original structural beams are still exposed across the living room ceiling. They are solid oak — heavy, dark, and aggressively dated. The homeowner wants the beams to either look like reclaimed wood or to disappear entirely, but they do not want to pay for structural work to remove the load-bearing members. Faux beam covers solve this exact problem. A three-sided U-channel sleeve slides over the existing beam, covers the dated wood, and gives the ceiling a brand new look in a single afternoon. No demolition. No structural engineering. No permits.
What Faux Beam Covers Are
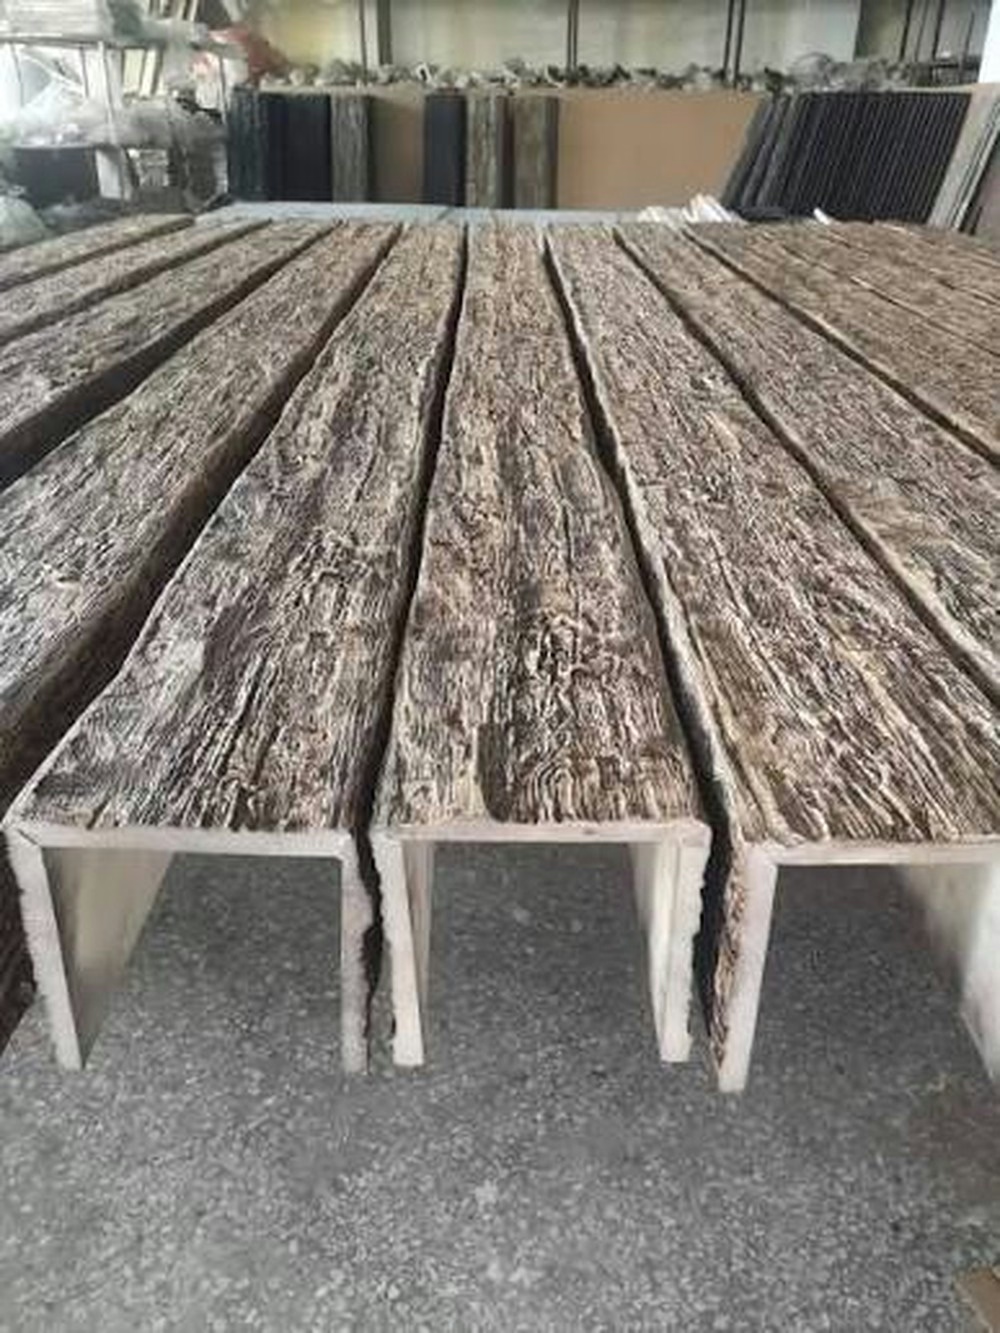
A faux beam cover is a three-sided U-channel sleeve that fits over an existing structural beam. The cover is hollow, made of rigid polyurethane with a faux wood finish, and is sized to slip over the existing beam with enough clearance for the cover to slide easily along the length. Once the cover is in place, it is fastened to the existing beam or to the ceiling framing, and the joint is finished with color-matched end caps and seam treatments.
Why Covers Work So Well
Covers work because they hide what is underneath without requiring the underneath to be removed. The existing structural beam stays in place doing its load-bearing job. The cover sits over it, presents a new face to the room, and transforms the look of the ceiling. The structural work is left alone, the visual work is done by the cover, and the homeowner gets the look they want without the cost of structural renovation.
The Cost Difference
Removing a structural beam is expensive. The beam has to be assessed by an engineer, supported during removal, replaced with a flush header or alternative support, and the ceiling has to be refinished where the beam was attached. The total cost typically runs $5,000–$15,000 depending on the structural complexity. A faux beam cover runs a few hundred dollars per linear foot and installs in an afternoon. The cost difference is the difference between a project that happens and a project that gets postponed indefinitely.
Common Reasons to Cover Existing Beams
Homeowners choose to cover existing structural beams for several reasons.
Dated Wood Finish
The original 1970s or 1980s oak beams are a common culprit. The wood is solid, the construction is good, but the finish is heavy, dark, and out of style. The homeowner wants something lighter, something with a more contemporary grain, or something that looks like reclaimed barn wood. A cover solves the problem without touching the structure.
Damaged or Stained Beams
Beams in older homes often have water damage, sun damage, or staining from roof leaks that have since been repaired. The damage is cosmetic, not structural, but it is unsightly. A cover hides the damage completely.
Mismatched Style in a Remodel
A whole-home remodel often changes the design language of the house. Mid-century modern becomes modern farmhouse. Traditional becomes transitional. The original beams were appropriate to the previous style but no longer fit the new direction. Covers let the homeowner update the beam finish to match the new design without structural changes.
Inconsistent Beams Across Rooms
Older homes sometimes have beams in one room that are a different style or finish than beams in adjacent rooms. A renovation that opens up the floor plan exposes the inconsistency. Covers let the homeowner unify the beam finish across the now-connected spaces.
Asbestos or Lead Concerns
In homes built before 1980, the original ceiling texture or beam finish may contain asbestos or lead. Covering the beams with faux sleeves encapsulates the hazardous material without disturbing it, which is often the most cost-effective and safest remediation strategy.
Measuring for Beam Covers
Accurate measurement is the foundation of a successful cover installation. The existing beams need to be measured precisely so the covers fit correctly.
Beam Width and Depth
The width of the existing beam is the inside dimension of the U-channel cover. The depth is the inside dimension from the top of the beam to the bottom of the beam. The cover is sized to fit over the existing beam with about a quarter inch of clearance on each side.
Length
The cover length is the length of the existing beam plus any overhang the homeowner wants at the ends. Many homeowners extend the cover past the beam termination by a few inches on each side to create a more substantial visual presence.
Special Conditions
The existing beam may have irregularities — knots, twists, slight bows, attachments from old light fixtures or ceiling fans. These conditions need to be noted at the time of measurement so the cover can be sized to accommodate them. A cover that is too tight will not slide over an irregularity. A cover that is too loose will look wrong from the floor.
Cover Profiles and Finishes
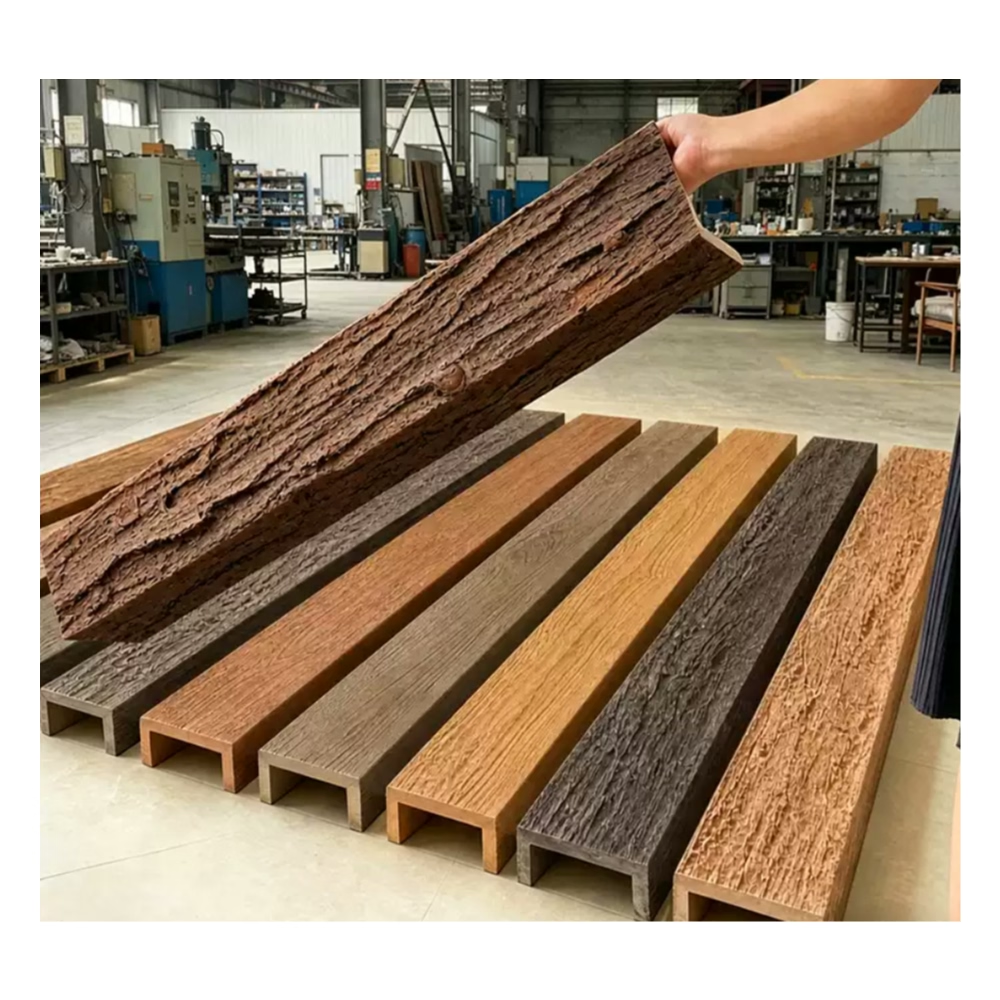
Faux beam covers are available in the same profiles and finishes as standard faux beams, which means the cover can match new faux beams being added elsewhere in the room.
Standard U-Channel Covers
The standard cover is a three-sided U-channel with a flat top and two sides extending down to cover the existing beam. The cover is sized to fit over the existing beam with adequate clearance, and the bottom edges of the sides sit flush against the ceiling or against a small gap that gets sealed with caulk.
Deep U-Channel Covers
For very deep existing beams, a deep U-channel cover has longer sides that extend further down. The cover still fits over the existing beam but provides more visual mass in the room. Deep covers are common in homes with substantial structural beams.
Wrapped Covers
For existing beams that protrude significantly below the ceiling line, a wrapped cover surrounds the entire beam on all four sides. The wrapped cover looks like a solid box beam but is actually a hollow sleeve around the structural member.
Finish Matching
The cover can be finished to match any standard faux beam finish — driftwood gray, dark walnut, natural oak, whitewash, classic pine, deep espresso, or a custom-matched color. The finish is applied at the factory and may include grain texture, hand-detailing, and weathering effects depending on the chosen style.
Installation Process
Installing faux beam covers is one of the more accessible DIY projects for a homeowner with basic carpentry skills. The process is straightforward.
Step 1: Prepare the Existing Beam
The existing beam should be inspected for loose material, protruding fasteners, or obstructions. Loose material gets scraped off. Protruding nails or screws get driven flush or removed. Light fixtures or other attached items get removed and re-attached after the cover is in place.
Step 2: Test Fit the Cover
The cover is slid over the existing beam to confirm fit. The cover should slide easily without binding. If the cover binds, the existing beam may need to be trimmed at the binding point, or the cover may need to be adjusted.
Step 3: Apply Adhesive
A continuous bead of construction adhesive is applied to the back and sides of the cover where it contacts the existing beam. The adhesive provides the primary bond and distributes the load evenly.
Step 4: Slide the Cover Into Place
The cover is slid over the existing beam, with the adhesive making contact as the cover moves into position. The cover is aligned with the ceiling lines and centered over the existing beam.
Step 5: Secure With Fasteners
The cover is secured to the existing beam or to the ceiling framing with finish nails or screws driven through the cover into the substrate. The fasteners are typically placed at the ends of the cover and at intervals along the length.
Step 6: Install End Caps
End caps are installed at the ends of the cover to finish the termination. The end caps are typically secured with adhesive and small brad nails, and the joint is filled and finished to match the cover.
Step 7: Caulk and Finish
The joint between the cover and the ceiling is caulked with a color-matched flexible caulk. Any visible fastener heads are filled and touched up. The cover is now ready for the final room finish.

When Professional Installation Is Recommended
Some cover installations are better left to professionals.
Long Spans
Covers for beams longer than 16 feet are heavy and awkward to maneuver overhead. A two-person crew with proper scaffolding can handle the installation, but a DIY homeowner may struggle with the logistics.
High Ceilings
Covers installed on ceilings above 10 feet require scaffolding or a tall ladder. Working at height with heavy materials is dangerous without proper equipment and training.
Electrical Work
If the existing beam has surface-mounted electrical — conduit, junction boxes, light fixtures — the electrical needs to be addressed before the cover goes on. Most homeowners hire an electrician for this work rather than attempting it themselves.
Structural Concerns
If the existing beam shows signs of structural distress — cracks, sagging, separation from the joists — a structural engineer should assess the beam before the cover is installed. The cover adds weight to the beam, and the existing structure needs to be able to handle the additional load.
What Covers Cannot Do
Faux beam covers are not a structural solution. They do not add strength to the existing beam, do not repair structural damage, and do not address load-bearing issues. If the existing beam has structural problems, those problems need to be addressed by a qualified structural contractor before any cover is installed.
Covers also cannot be installed on beams that have severe irregularities. A beam that is significantly twisted, severely bowed, or has major variations in dimension may not be suitable for a cover. The cover has to fit over the existing beam, and major irregularities will show through the cover or prevent the cover from fitting properly.
Common Questions About Beam Covers
Q: How much weight does a faux beam cover add to the existing beam? A typical 6-inch U-channel cover in a 12-foot length weighs 25–35 pounds. The weight is negligible compared to the load the existing structural beam is already handling.
Q: Can covers be painted after installation? Yes. Polyurethane covers accept paint well. The factory finish can be painted over with any compatible paint, and the cover can be refinished in the future if desired.
Q: Do covers work on metal beams? Yes. The same U-channel cover design works over steel I-beams, laminated beams, or other non-wood structural members. The cover is fastened to the existing beam with appropriate fasteners for the substrate.
Q: How do I handle light fixtures attached to the existing beam? Light fixtures need to be removed before the cover is installed. After the cover is in place, the fixtures can be re-mounted to the cover with appropriate blocking or with surface-mounted fixtures that attach to the cover face.
Q: Can I install covers over beams that have asbestos? Yes, and this is often the recommended remediation approach. Covering the asbestos-containing material encapsulates it without disturbing it. Consult an asbestos abatement professional for specific guidance.
The Cover as a Renovation Strategy
For homeowners dealing with dated, damaged, or otherwise unwanted structural beams, faux beam covers offer a renovation strategy that respects the budget, the timeline, and the structural integrity of the home. The existing beam stays in place, the cover goes over it, and the ceiling takes on a fresh new look. The homeowner gets the design result they want, the contractor finishes the job in a day, and the budget stays under control.
Technical References
ASTM standards cited in every specification
Test Data
Lab results from internal testing program
Updated 2026
Reviewed against current product specs


