
The ceiling has a crack that runs from the light fixture to the wall. The popcorn texture from 1987 is peeling in three places. There is a water stain from a roof leak that was repaired two owners ago. The previous homeowner patched a section of the ceiling where they removed a wall, and the patch shows. None of these problems are major, but together they make the ceiling look tired and the room feel neglected. The homeowner has two choices: repair the ceiling properly (expensive, messy, and might require retexturing the whole ceiling to match) or hide the ceiling behind faux beams. The faux beam solution is faster, cheaper, and adds design value that a ceiling repair does not.
The Ceiling Imperfection Problem
Ceiling imperfections are particularly difficult to address because ceilings are large unbroken surfaces where any flaw is visible. A small crack on a wall can be hidden by a picture. A small crack on the ceiling is exposed to the eye from every angle of the room.
Common Ceiling Imperfections
- Settlement cracks that run from corners toward the center of the room
- Drywall tape cracks where the seam between two drywall sheets has separated
- Water stains from old roof leaks, plumbing leaks, or HVAC condensation
- Popcorn texture that is peeling, falling, or discolored
- Patches from removed walls, removed light fixtures, or previous repair work
- Nail pops where the drywall nails have loosened and pushed the drywall outward
- Texture differences where new drywall meets old
Why Direct Repair Is Expensive
Directly repairing a ceiling imperfection usually means:
- Cutting out the damaged section of drywall
- Installing new drywall
- Taping and mudding the joints
- Sanding smooth
- Re-texturing the surface to match the existing texture
- Painting to match the existing paint
Each of these steps requires skill, the steps have to be done in the right order, and the finished repair has to match the existing ceiling perfectly to be invisible. For textured ceilings (popcorn, knockdown, orange peel), matching the texture is particularly difficult. The result is often a visible patch that draws more attention than the original flaw.
The Cost Comparison
A professional ceiling repair for a single flaw typically runs $300–$800 depending on the size of the repair and the type of texture. Multiple flaws across a ceiling can run $1,500–$4,000 to address. A faux beam solution to hide the same flaws typically runs $500–$2,000 for the materials and a few hundred more for installation. The faux beam solution is often cheaper than the repair, and the result adds design value rather than just restoring the ceiling to its previous state.
How Faux Beams Hide Imperfections
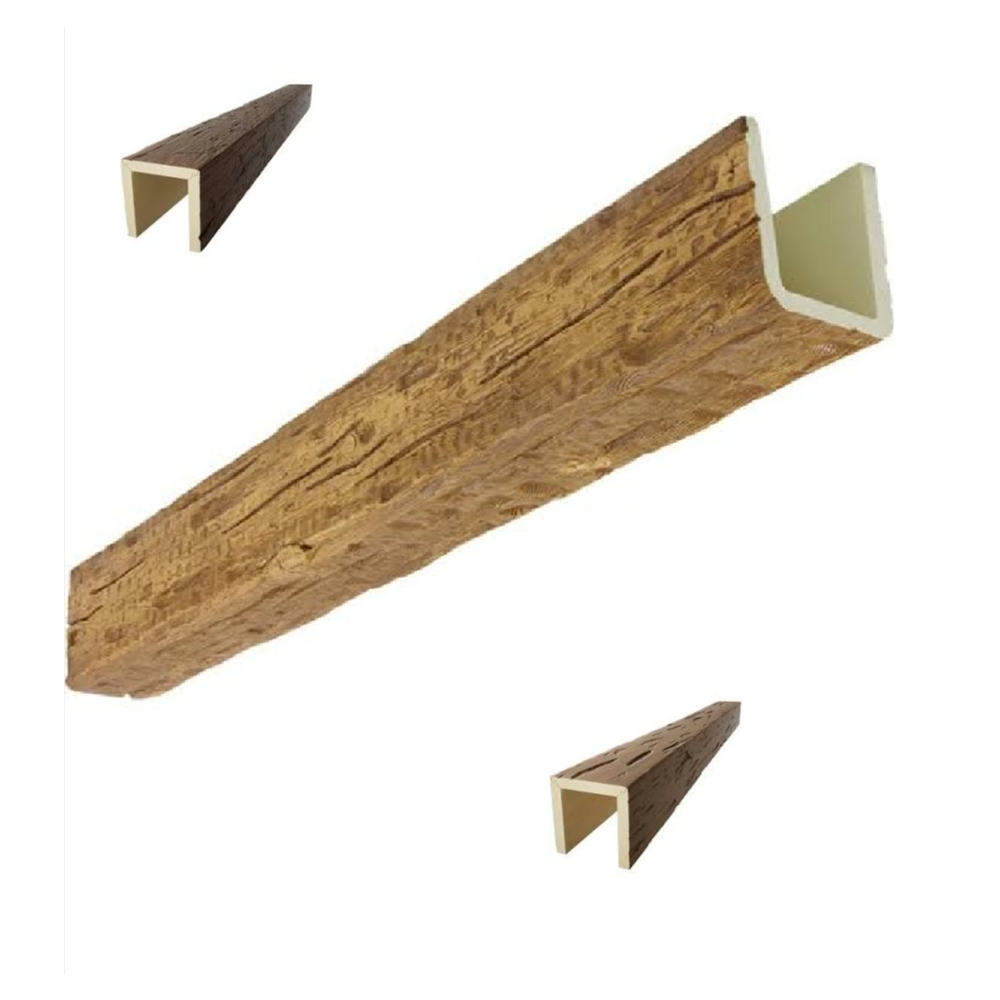
Faux beams hide imperfections by drawing the eye away from the flawed areas and toward a deliberate design element. The eye sees the beams, not the ceiling behind them.
The Visual Distraction Principle
A ceiling with a few well-placed beams has more visual interest than a flat ceiling. The eye follows the beam lines, registers the beam ends, notices the beam-to-ceiling junctions. The imperfections on the ceiling behind the beams are not what the eye sees. The beams become the dominant feature, and the ceiling becomes the background.
Beam Placement to Cover Specific Flaws
For specific flaws in specific locations, the beams can be positioned to cover the flaws directly. A crack running across the ceiling gets covered by a beam running perpendicular to the crack. A water stain on the ceiling gets covered by a beam placed over the stain. A popcorn texture repair gets covered by a beam placed over the repaired area.
Multiple Beams for Multiple Flaws
For ceilings with flaws scattered across the surface, multiple beams in a parallel or coffered pattern cover the flawed areas while creating a deliberate ceiling design. The beams are positioned to cover the worst flaws, and the pattern is consistent enough that the overall design looks intentional.
Specific Imperfections and Beam Solutions
Different imperfections call for different beam strategies.
Settlement Cracks
Settlement cracks typically run from the corners of the room toward windows or doors. The cracks are often diagonal and may be multiple inches long. A beam perpendicular to the crack covers it. If the crack runs the full length of the room, multiple parallel beams in a pattern that crosses the crack hide the issue completely.
Drywall Tape Cracks
Drywall tape cracks typically run in straight lines where two sheets of drywall meet. The cracks often appear in the same location year after year as the house continues to settle. A beam placed along the crack line covers the crack and provides a stable visual anchor.
Water Stains
Water stains are discolorations on the ceiling from previous water exposure. The stain itself is not active damage, but it is unsightly and often cannot be painted over without bleed-through. A beam placed over the stain covers it permanently. If the stain is in a corner or against a wall, a beam placed along the wall-ceiling junction covers the stain and provides a finished transition.
Peeling Popcorn Texture
Peeling popcorn texture is messy and continues to peel if not addressed. The texture can be scraped, but scraping creates more mess and reveals the underlying drywall. A beam placed over the peeling area covers it, and the rest of the ceiling can be left alone. The beam becomes a focal point that draws attention away from any minor imperfections in the surrounding texture.
Patchy Repairs
Previous repair work often shows on a ceiling as a smooth patch in a textured field, or a textured patch in a smooth field. The patch is visible because it does not match the surrounding surface. A beam placed over the patch hides it completely, and the rest of the ceiling does not need to be touched.
Texture Variations Across Rooms
In homes where different rooms have different ceiling textures, opening up the floor plan exposes the texture transition. A beam placed at the transition point creates a visual break between the two textures. The transition becomes a design feature rather than a flaw.
Beam Strategies for Different Room Types
Different room types call for different beam strategies to address imperfections.
Living Rooms and Great Rooms
Large rooms with vaulted ceilings often have the most visible imperfections because the ceiling is so prominent. Multiple beams in a parallel pattern across the ceiling hide a wide range of flaws while adding architectural interest. The beams should be sized in proportion to the room — wider beams for larger rooms.
Bedrooms
Bedroom ceilings are often smaller and have fewer flaws, but the flaws that exist are more noticeable in the quiet, low-traffic environment. A few beams in a simple pattern across the bedroom ceiling add interest while hiding any flaws in the drywall or texture.
Kitchens
Kitchen ceilings often have water stains from cooking steam, plumbing leaks, or HVAC condensation in the ceiling cavity. A beam placed strategically over the stained area covers the stain. For kitchens with multiple flaws, a beam grid pattern similar to a coffered ceiling works well.
Dining Rooms
Dining room ceilings are often the most formal ceilings in the house, and any flaws are visible during dinner parties and family gatherings. Beams in a symmetrical pattern across the dining room ceiling hide flaws and add formal architectural presence.
Basements
Basement ceilings often have exposed mechanical systems, patched penetrations from previous plumbing or electrical work, and various flaws from the original construction. Beams are particularly valuable in basements because they hide flaws while covering the visual mess of the ceiling above.
The Design Upgrade Bonus
The best part of using faux beams to hide ceiling imperfections is that the solution adds design value rather than just restoring the ceiling to its previous state. A ceiling repair returns the ceiling to "the same as before." A faux beam installation transforms the ceiling into "something better than before."
Before and After
Before: a flat white ceiling with multiple visible flaws, requiring the homeowner to either repair the flaws or learn to live with them.
After: a beamed ceiling with deliberate architectural detail, where the flaws are hidden and the ceiling is now a design feature that adds value to the room.
The value difference is significant. A ceiling repair might preserve the home's value. A beamed ceiling upgrade typically increases the home's value, makes the room more appealing to potential buyers, and gives the homeowner a room they actually enjoy.
Adding Other Design Elements
The beams create a foundation for other design upgrades. Recessed lighting can be added between the beams. Wall sconces can be coordinated with the beam pattern. A ceiling fan can be mounted between two beams. The ceiling becomes a design system rather than a surface to be hidden.

Installation Considerations for Flaw Coverage
When installing beams specifically to cover flaws, there are a few additional considerations.
Confirm the Flaws Are Stable
Before covering a flaw, confirm that the underlying issue is stable. A crack that is still moving will continue to move behind the beam, and the movement may eventually telegraph through the beam or show as a ceiling crack near the beam. Settlement cracks in older homes are usually stable. Active structural cracks need to be addressed before covering.
Address Moisture Issues First
Water stains indicate a previous moisture issue. Before covering the stain, confirm that the moisture issue is resolved. A roof leak that has been repaired, a plumbing leak that has been fixed, or an HVAC issue that has been corrected should be dry for several months before the area is covered.
Allow for Texture Differences
The new beams will sit on top of the existing ceiling texture. The beam-to-ceiling junction may show a slight gap where the texture prevents the beam from sitting flush. This gap can be caulked with color-matched flexible caulk. The caulk fills the gap and provides a clean visual line.
Common Questions About Faux Beams for Ceiling Flaws
Q: Will the beams completely hide a water stain? Yes. Polyurethane beams are opaque and will completely cover any discoloration on the ceiling behind them.
Q: Can I install beams over popcorn texture without scraping first? Yes. The beams can be installed directly over the popcorn texture. The texture variations are hidden behind the beam, and the beam-to-ceiling junction is sealed with caulk.
Q: What if the ceiling flaw returns after the beams are installed? If a flaw reappears, it will appear on the visible ceiling between the beams, not behind the beams. The visible flaws are easier to address because they are not hidden by the beams.
Q: Can I add more beams later if new flaws appear? Yes. Beams can be added incrementally. The new beams should match the existing beams in profile and finish for a consistent look.
Q: Do beams reduce ceiling height noticeably? Standard faux beams add 1–3 inches of depth depending on the profile. For typical 8-foot ceilings, this is a minimal reduction. For vaulted ceilings, the reduction is imperceptible.
The Smart Solution to a Stubborn Problem
Ceiling imperfections are stubborn, expensive to repair, and often reappear after repair. Faux beams solve the problem by hiding the imperfections permanently, adding design value, and creating a ceiling that is actually better than it was before. For homeowners dealing with flawed ceilings, the beam solution is the smart answer.
Technical References
ASTM standards cited in every specification
Test Data
Lab results from internal testing program
Updated 2026
Reviewed against current product specs


