
The beams get all the attention in the catalog photos, but on install day it's the accessories that decide whether the project looks professional or rough. End caps that match the beam finish, splice plates that hide the joint where two beams meet over a long span, mounting blocks sized to the exact beam depth, decorative straps for that vintage look — these pieces are usually an afterthought in the ordering stage and a panic on day two when the ceiling still looks unfinished.
A complete PUR faux beam system includes the main beams plus a small ecosystem of supporting pieces. Some of these are structural. Some are purely cosmetic. Knowing which is which, and ordering the right quantities upfront, is the difference between a one-day install and a three-day scramble.
The accessory categories that actually matter
Most accessory lists are long, but the working list is shorter than the marketing suggests. Five categories cover the bulk of what any real install needs: end caps, splice plates, mounting blocks or brackets, decorative straps and iron work, and transition pieces for inside or outside corners.
Each of these comes in sizes matched to the beam profile. A 6-inch by 8-inch hand-hewn oak beam needs a 6-by-8 end cap, a corresponding splice plate, and so on. Mixing sizes is the most common ordering error, because beam dimensions are sometimes listed by face width and sometimes by overall width including the rough edges. Worth confirming which measurement the accessory part numbers reference before placing the order.
End caps and why finish consistency is critical
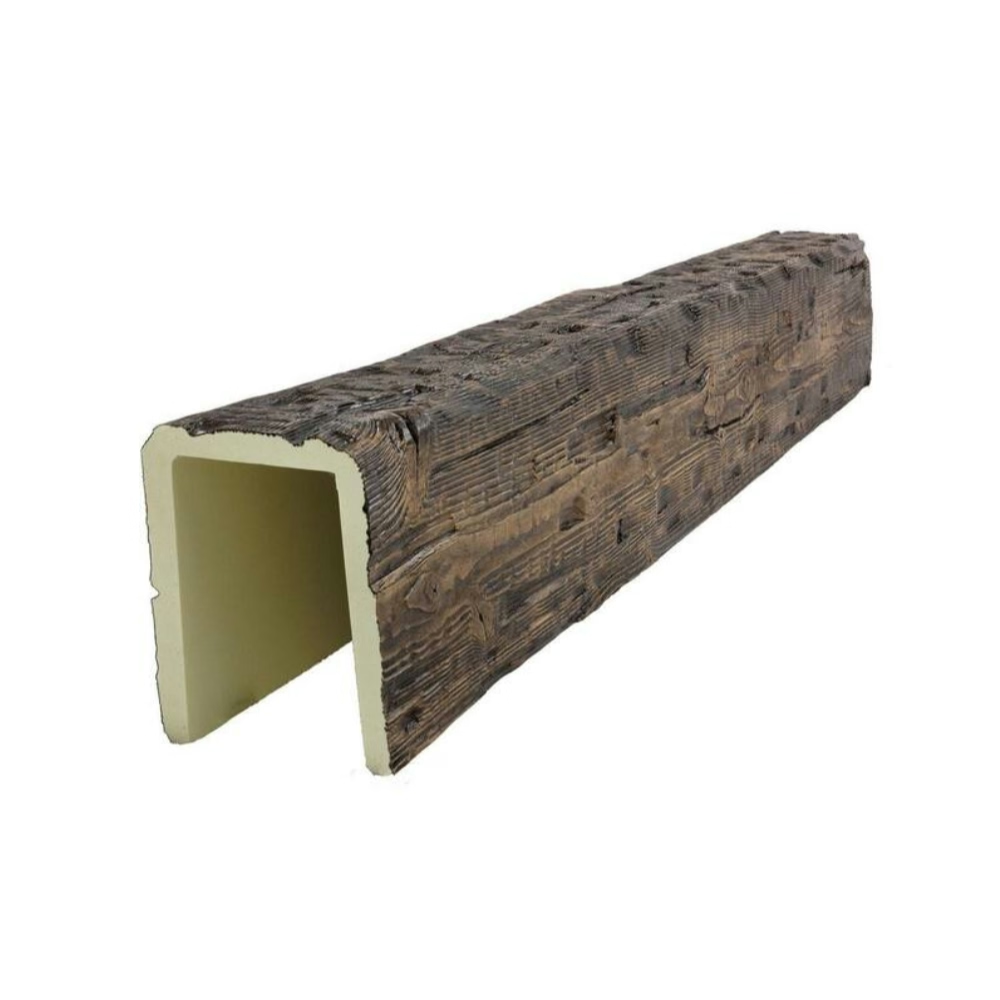
End caps close off the open ends of a U-shell beam or a hollow box beam. Without them, the cross-section of the foam is visible, breaking the illusion that the beam is solid timber. A well-matched end cap is essentially invisible once installed, which is exactly the goal.
The finish on the end cap must match the finish on the beam body. This is harder than it sounds because the end cap is a separate cast piece, sometimes molded in a different tool, and stained in a separate booth pass. A factory with a mature color matching process produces end caps that blend seamlessly. A factory still dialing in its process may ship end caps that are a tone darker or lighter than the beam.
Order end caps from the same production batch as the beams whenever possible. If ordering from inventory, request current samples of both the beam and the end cap and check them side by side under daylight conditions. Indoor lighting in a showroom is forgiving in ways that direct sun is not.
Splice plates and the long-span problem
Long ceilings often require beams longer than the standard 12 or 16-foot production length. Shipping constraints and mold sizes typically cap individual pieces at around 20 feet. For spans longer than that, the install joins two beams end to end with a splice plate.
A splice plate is a short internal sleeve, usually 12 to 24 inches long, that slides into the open ends of both beams and locks them together with adhesive and mechanical fasteners. The joint is hidden by an external decorative strap or by careful alignment of the grain pattern across the seam. The right splice plate adds no visible interruption to the beam line.
The wrong splice plate is a weak joint that sags over time. PUR foam beams are light, but the cantilever effect of a 16-foot beam supported only at the ends creates real stress at any mid-span joint. A properly bonded splice plate transfers load from one beam shell to the next and keeps the joint flat under seasonal movement.
Mounting hardware that disappears
Mounting blocks are the brackets, cleats, or back-blocks that connect the beam to the ceiling structure. They are almost always hidden inside the beam or behind it, but their selection determines how secure the install is over decades.
A common approach is a continuous wood cleat screwed into the ceiling joists, with the beam shell sliding over the cleat and screwed through the side walls into the cleat. The cleat handles the structural work, the screws are hidden inside the beam hollow, and the visible ceiling shows nothing but the beam itself.
The cleat material matters. A standard 2-by-3 or 2-by-4 pine cleat is enough for most residential installs. For commercial ceilings with heavier beams or higher fire ratings, a metal strapping system or engineered blocking is often specified. The PUR beam manufacturer should be able to provide a recommended mounting detail for each beam profile, which simplifies coordination with the building inspector.
Decorative straps, iron work, and other cosmetic additions
The vintage timber look often includes black iron straps wrapping the beam at intervals, sometimes with fake bolt heads at the corners. These straps are usually molded PUR or actual metal painted black, and they are pure decoration. They do not carry any structural load.
The straps serve a useful visual purpose: they hide joints, mark the transitions between beam segments, and give the eye a place to rest on what would otherwise be a smooth expanse of faux grain. In a room with multiple beam runs, strategic strap placement can also break up the ceiling into proportional sections that feel more intentional.
Order straps in matching finish to the beam. A matte black strap on a satin-finished oak beam looks deliberate. A glossy black strap on the same beam looks like an afterthought.
Corner pieces and transition fittings
Inside corners, outside corners, and beam-to-beam T-junctions all need purpose-made transition pieces for a clean look. These are usually cast as separate moldings and butt up against the main beam where it meets a wall or another beam.
A 90-degree inside corner is the most common. The transition piece is a short section of beam with one end mitered to wrap the corner. The seam where the transition meets the main beam is hidden by a small decorative bracket or by careful alignment during installation.
Outside corners are trickier because the foam shell of the beam has to wrap the corner without showing a visible joint line. Some manufacturers produce pre-formed outside corner sections that wrap as a single piece. Others rely on the installer to miter two straight beams on site, which is possible with a fine-tooth saw but requires a steady hand.
Ordering quantities and what to keep on hand
The general rule for beam accessories is to order one of each transition piece per junction, two end caps per terminating beam, and splice plates equal to roughly 10 percent of the total beam count if any single span exceeds the standard length. Straps and decorative hardware are usually ordered one set per visible beam segment, though some designers use them more sparingly.
Keep a small surplus of every accessory on hand after the install. End caps occasionally get damaged during handling and need a backup. Splice plates are worth keeping two or three extras because they are small and easy to misplace on a busy job site. Decorative straps are usually low cost and easy to reorder, but having a couple of spares means a damaged strap does not delay the final walk-through.


Sourcing accessories from the same factory
The single most important piece of advice on beam accessories is to source them from the same factory as the beams. Even with careful color matching, a beam from Factory A and an end cap from Factory B will look slightly different up close. The grain pattern, the stain penetration, the topcoat sheen — these all vary from one production line to the next.
A factory that makes its own end caps and splice plates using the same molds, stains, and topcoats produces accessories that integrate with the beams seamlessly. That level of integration is what makes the finished ceiling look like a single, intentional design rather than a collection of parts from different sources. Worth asking the factory specifically whether their accessories are produced in-house or sourced from a partner, because the answer affects how the finished ceiling actually looks once installed.
Technical References
ASTM standards cited in every specification
Test Data
Lab results from internal testing program
Updated 2026
Reviewed against current product specs


