
The promise of a hollow faux wood beam is that it can hide wiring, support light fixtures, and look like solid timber all at once. The reality is that hanging lights from PU beams requires more thought than just drilling a hole and running a wire through. The beam has load limits, the foam substrate does not behave like wood when it comes to anchoring screws, and the wrong installation method can crack the beam or pull the fixture loose over time.
This guide walks through the practical considerations for hanging light fixtures from hollow PU faux beams, from small pendants that weigh a few pounds to heavier chandeliers that need serious reinforcement. The principles are the same regardless of the specific fixture, but the details vary by weight class.
Understanding hollow beam construction
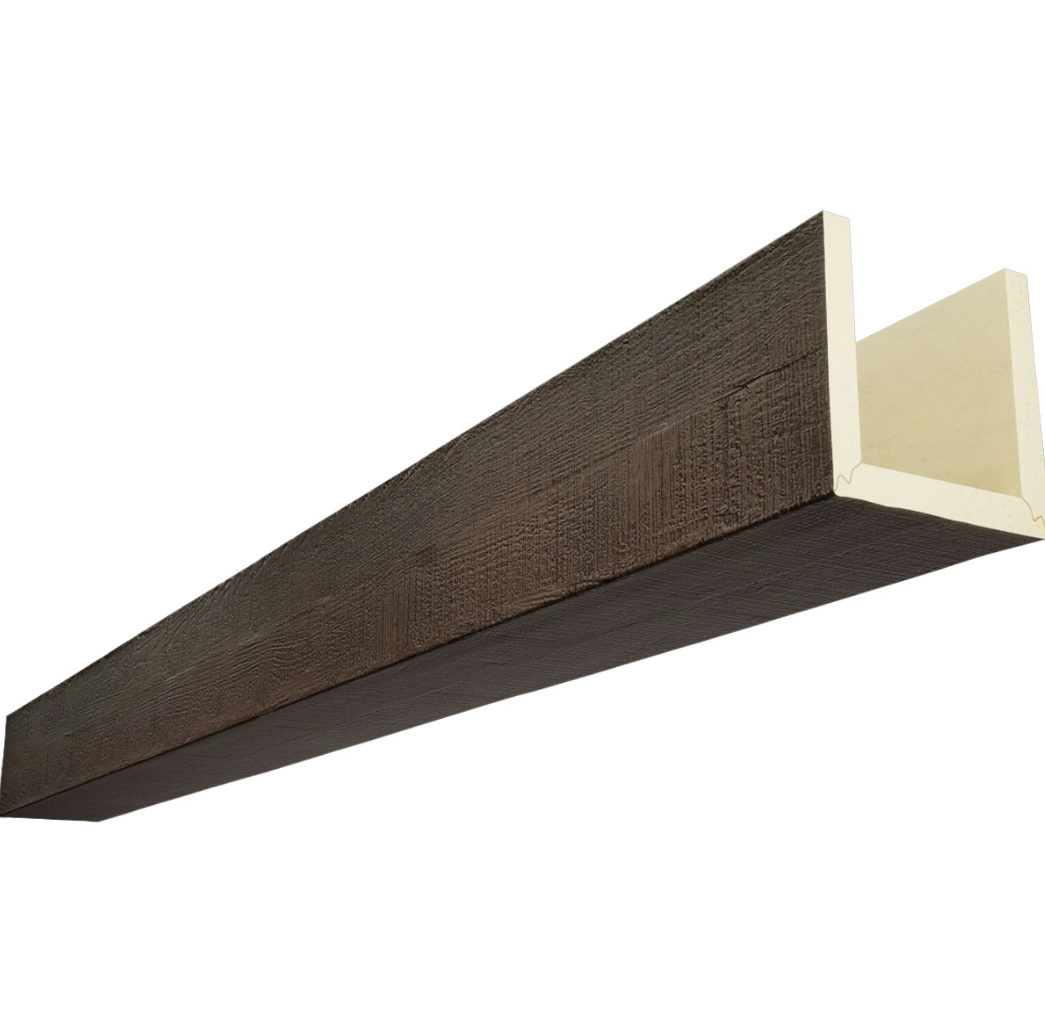
A hollow PU faux beam is essentially a three-sided or four-sided shell made of molded polyurethane foam. The shell thickness is typically 5 to 15 millimeters depending on the beam size and the manufacturer's design. The interior is empty, which is what allows wiring and small mounting hardware to be hidden inside.
The shell material is high-density closed-cell polyurethane foam. It is rigid enough to hold its shape under normal handling, but it does not have the screw-holding strength of solid wood or even medium-density fiberboard. A standard wood screw threaded directly into the foam will pull out under modest load, often within weeks of installation.
This is the central challenge of hanging fixtures from hollow beams. The beam itself is not the structural element; it is a decorative shell. Anything that needs to bear weight — including light fixtures — must be anchored to a structural support behind or inside the beam, not to the foam shell itself.
The three common mounting approaches
The first approach uses a wood blocking cleat mounted to the ceiling structure before the beam is installed. The cleat runs the length of the beam and provides a continuous structural member inside the hollow shell. Light fixtures can then be anchored through the beam shell into the cleat, with the cleat transferring the load to the ceiling joists above.
The second approach uses a metal blocking plate or Unistrut embedded inside the beam during installation. The metal plate provides a stronger anchor point for heavier fixtures, and it can span between ceiling joists when the fixture location does not align with a joist. This approach is common for commercial installations with heavier chandeliers or row of pendants.
The third approach uses the ceiling structure directly, with the beam shell serving only as a decorative cover. A fixture can be mounted to a ceiling box or junction box that is anchored to the ceiling joist, with the wiring routed through the beam via a small hole drilled in the beam shell. The fixture appears to hang from the beam but is actually supported by the ceiling above.
Matching the approach to the fixture weight
Light fixtures vary widely in weight. A small pendant with a thin shade might weigh 2 to 5 pounds. A medium chandelier might weigh 20 to 40 pounds. A large commercial chandelier or a heavy industrial-style fixture can weigh 75 pounds or more. The mounting approach should match the weight class.
For fixtures under 10 pounds, a simpler approach often works. A wood cleat inside the beam shell is sufficient, and the fixture can be anchored with screws that pass through the foam and into the cleat. The screws need to be long enough to reach the cleat but not so long that they protrude through the top of the beam shell and interfere with the ceiling above.
For fixtures between 10 and 40 pounds, a heavier cleat or a metal blocking plate is recommended. The blocking should be sized to distribute the load across a wider area of the beam shell, reducing the stress concentration at the mounting point. Multiple anchor points, with the fixture mounting bracket spanning several inches, also helps distribute the load.
For fixtures over 40 pounds, the ceiling structure should carry the load directly. The beam serves as a decorative cover, and the fixture is mounted to a ceiling box or a structural bridge that is anchored to the ceiling joists. The wiring passes through a hole in the beam shell to reach the fixture.
Step-by-step installation process
The installation process begins before the beam is mounted on the ceiling. If the design includes integrated lighting, the blocking and wiring should be planned during the beam layout phase, not after the beams are already in place.
Step one is to identify the fixture locations and mark them on the ceiling layout. For pendants in a row, the spacing is typically 24 to 36 inches apart. For a chandelier centered on a beam run, the location is marked at the midpoint of the beam. For track lighting, the track length and orientation are determined by the lighting design.
Step two is to install the blocking. Wood cleats are typically 2-by-3 or 2-by-4 lumber cut to length and mounted across the ceiling joists at the planned fixture locations. The cleat should be flush with the top of the beam shell so it does not interfere with the beam installation. For metal blocking, a Unistrut or similar channel is mounted to the ceiling structure at the fixture location.
Step three is to run the wiring. Electrical cable is routed from the source to each fixture location, with enough slack to make the final connections after the beam is in place. The cable is secured to the blocking with cable staples or ties so it does not interfere with the beam installation.
Step four is to install the beam shell. The beam is lifted into place over the blocking, with the fixture cable passing through a pre-drilled hole in the beam shell at the planned location. The beam is secured to the ceiling structure through the mounting brackets or screws specified by the manufacturer.
Step five is to make the fixture connections. The fixture mounting bracket is anchored through the beam shell into the blocking behind. The wiring is connected to the fixture per the electrical code. The fixture is secured to the mounting bracket, and the trim and shade are installed.
Avoiding common mistakes
The most common mistake is anchoring fixtures directly to the foam shell without blocking. This works initially but fails over time as the foam compresses under the sustained load. A fixture that seems solidly mounted on day one can be sagging and pulling loose within a few months.
Another common mistake is using the wrong screw type. Standard wood screws have aggressive threads that can strip the foam before they bite into the blocking behind. Sheet metal screws or construction screws with deeper threads and harder shanks hold better. For heavier fixtures, lag screws or through-bolts are appropriate.
Drilling holes too large for the fixture hardware is another frequent error. A hole that is too large allows the fixture base to sit unevenly and may not provide enough material for the mounting screws to grip. The hole should be just large enough to pass the wiring and the fixture stem, no larger.
Cutting the beam shell to access wiring after installation is a mistake that should be avoided. If wiring access is needed, plan for it during the installation phase. Cutting the beam shell after the fact weakens the structure and is difficult to repair invisibly.
Working with electricians and lighting designers
For projects with multiple integrated light fixtures, coordinating with the electrician and the lighting designer before starting the beam installation saves significant time. The lighting designer specifies the fixture locations and types. The electrician plans the wiring runs and circuit loading. The beam installer positions the blocking to match both.
A coordination drawing that shows the beam layout, the blocking locations, the wiring runs, and the fixture positions is invaluable for these projects. The drawing becomes the reference document during installation, and any changes to fixture locations or beam positions are reflected in updated drawings before they are implemented on the ceiling.
For commercial projects with complex lighting designs, a pre-installation meeting between the beam installer, the electrician, and the lighting designer can prevent costly rework. The meeting confirms the blocking locations, the wiring routing, and the fixture mounting details before anyone gets on a ladder.
When to use a structural engineer
For very heavy fixtures or for installations where the beam is part of a larger decorative assembly, consulting a structural engineer may be appropriate. The engineer can verify that the ceiling structure can support the combined load of the beams, the fixtures, and any other elements mounted to the ceiling.
In most residential and light commercial applications, the loads are well within the capacity of standard ceiling construction, and engineering review is not necessary. For unique installations or for projects with unusual loading, the modest cost of an engineering review is well worth the peace of mind.
Hanging lights from hollow faux wood beams is entirely practical when the installation is planned properly. The key is to recognize that the beam is a decorative shell, not a structural element, and to plan the blocking and wiring before the beam goes up. With that approach, the finished installation looks like the lights are hanging from solid timber while the actual structure is properly supported by the ceiling behind.

Technical References
ASTM standards cited in every specification
Test Data
Lab results from internal testing program
Updated 2026
Reviewed against current product specs


