Popcorn ceilings were a staple of homes built through the 1980s, and if you're working on a property with one, you might assume that decorative beams are off the table. The rough, stippled texture creates a bonding surface that resists standard adhesives, and the uneven profile makes flush mounting feel like an impossible task. But with the right approach, you can absolutely install faux wood beams on popcorn ceilings and get results that look like they were done during the original construction.
The key lies in understanding what makes a popcorn surface different. That bumpy texture isn't just unsightly to some—it actively works against adhesives and fasteners by reducing the actual contact area between the beam and the ceiling. A beam pressed against popcorn will still rock slightly, leaving visible gaps along the edges that ruin the illusion of a structural beam. Before you even think about lifting the beam into place, you need to flatten the playing field.
Surface Preparation: The Foundation of a Lasting Hold
Start by examining the ceiling closely. Popcorn texture varies in thickness and adhesion depending on how it was originally applied and how it's aged. In some homes, it's a thin, brittle layer that flakes at the slightest touch. In others, it's a thick, almost spackle-like coating that holds firm. Either way, the goal is the same: create a flat band across the ceiling where the beam will sit.
Mark the centerline of your planned beam placement using a pencil and a chalk line or laser level. Then, using a wide putty knife—a six-inch or eight-inch blade works well—scrape the popcorn texture away along that line. You're not trying to remove all the texture from the ceiling, just a strip roughly four inches wider than the beam itself. If the texture is thick, you may need to go back over it with a second pass.
Once you've scraped, check the results with a straightedge. You want a surface that, when you hold the beam against it, makes contact along its entire length with no rocking. If you find a high spot, scrape a little more. If you expose bare drywall or plaster beneath, that's fine—just know that you'll have a visible flat strip on your ceiling when the beam comes down. If the beam is wide enough or mounted high enough on the wall, this strip won't be noticeable once everything is in place.
After scraping, vacuum the area thoroughly to remove dust and loose texture particles. Wipe it down with a damp cloth and let it dry completely. Any residual dust or debris left on the surface will act as a barrier between the adhesive and the ceiling, weakening the bond.
Selecting the Right Adhesive for Textured Surfaces
Not all construction adhesives are created equal, especially when you're bonding to a porous, uneven substrate like scraped popcorn. Look for an adhesive that is both high-bond and flexible when cured. Polyurethane construction adhesive is an excellent choice because it expands slightly as it cures, helping to fill minor gaps and creating a bond that is more resistant to temperature changes and humidity—two factors that affect ceiling installations more than wall applications.
Apply the adhesive in a thick, continuous bead along the back of the beam, keeping it about an inch from the edges. On the ceiling side, apply a matching bead along the scraped strip. Some installers prefer to "butter" the ceiling surface with a notched trowel for more uniform coverage, but on a previously textured surface, a thick bead works well because it fills the microscopic valleys left by scraping.
Do not use latex-based or water-based adhesives for this application. They absorb moisture from the ceiling and cure unpredictably, and they lack the grab strength needed to hold a beam against gravity over time. Solvent-based polyurethanes and hybrid polymer adhesives are the most reliable for ceiling work.

Mechanical Fastening: Your Insurance Policy
Adhesive alone, even on a properly prepared surface, is not enough for ceiling-mounted beams. Ceilings experience more stress from gravity and building movement than walls, and a beam that falls even a few inches can cause damage or injury. Every ceiling-mounted beam needs mechanical fastening as a backup system.
For popcorn-textured ceilings, the challenge is reaching the structural framing without the beam sitting proud of the ceiling surface. The solution is to use blocking—pieces of wood shimmed and shimmed flush with the scraped ceiling plane and screwed into the ceiling joists above. If your ceiling joists run perpendicular to your planned beam direction, you can locate them with a stud finder and drive screws directly through the beam and into the joists.
Install the blocking before applying adhesive. Cut strips of one-by lumber to fit snugly between the joists at two-foot intervals along the beam's planned length. Position them so their top face sits exactly flush with the plane of the scraped ceiling. Then, with the blocking in place, you can drive deck screws up through the blocking into the joists. Countersink the screw heads slightly so they sit below the surface.
When you mount the beam, drive screws through the front face of the beam and into the blocking, placing them in inconspicuous locations—inside any routed decorative groove, or in a spot that will be hidden by crown molding or trim. The adhesive takes the load initially and the screws hold it long-term.
The Mounting Process Step by Step
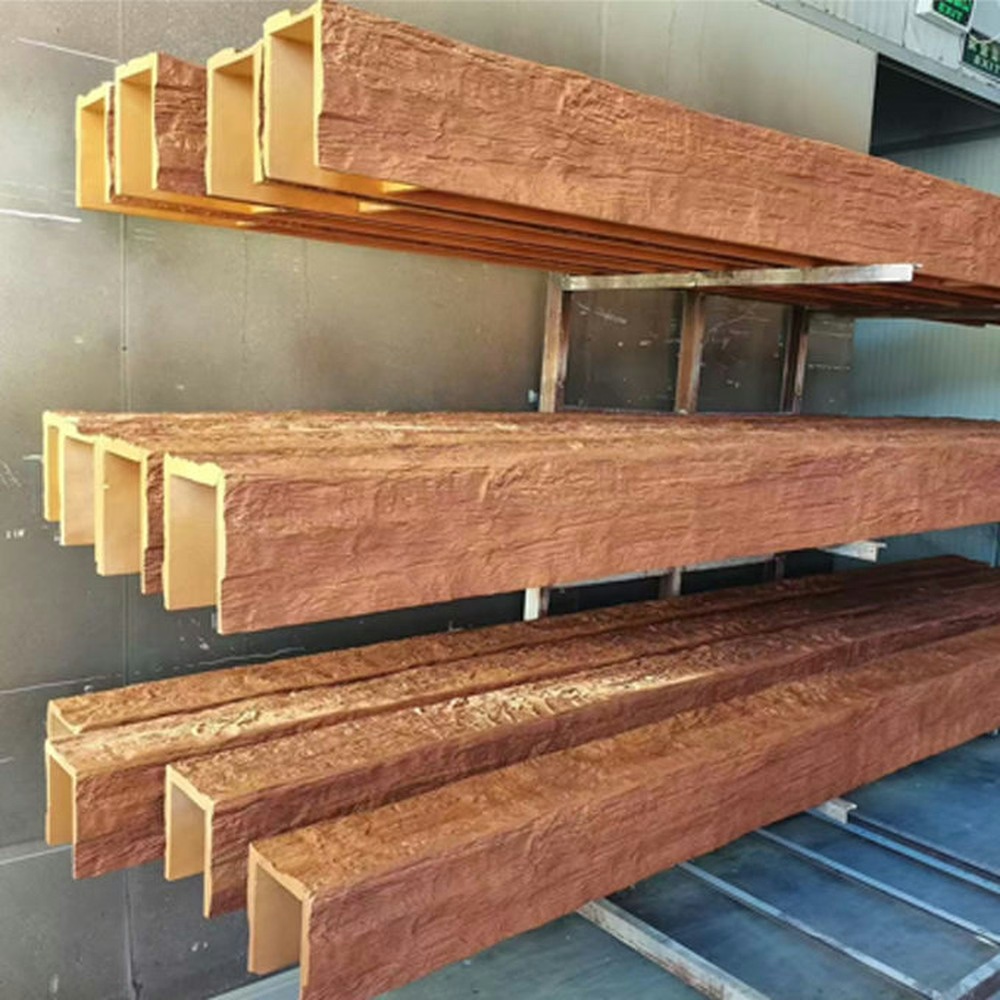
With the ceiling prepped, blocking installed, and adhesive ready, it's time to lift the beam into position. Faux wood beams made from polyurethane are significantly lighter than real timber, but a full-length ceiling beam can still be awkward for one person to handle. Use a helper or employ a temporary support system—a T-brace made from a撑竿 or a pair of adjustable ladder jacks can hold the beam in place while you align and fasten it.
Apply adhesive to both surfaces and lift the beam into position. Press it firmly against the ceiling, checking your level as you go. Polyurethane adhesive typically has a working time of fifteen to twenty minutes before it begins to set, so you have some adjustment room. Once you're satisfied with the alignment, drive your first screw through the beam into the blocking at the center of its length, then work outward toward the ends.
Continue driving screws every sixteen to twenty-four inches along the beam's length, alternating between top and bottom positions to keep the beam pressed flat against the ceiling. Wipe away any adhesive that squeezes out from the edges before it cures—it is much easier to remove when fresh.
Let the adhesive cure fully before removing any temporary supports. Most polyurethane adhesives reach full cure in twenty-four to seventy-two hours depending on temperature and humidity. During this period, avoid activities that cause vibration in the ceiling structure, such as slamming doors on the floor below.
Finishing Touches and Gap Management
After the adhesive has fully cured, inspect the seams where the beam meets the ceiling. Even with careful scraping and shimming, small gaps can appear along the edges, especially in older homes where ceiling movement is more pronounced. Use caulk that matches the beam's finish to fill these gaps—squeeze a thin bead into the crack and smooth it with a wet finger or a plastic smoothing tool.
For a fully seamless look, you can run a thin line of paintable caulk along the entire length of both top edges of the beam after installation. When the beam and ceiling are different colors, this caulk line prevents the visual break between the two surfaces. If you plan to paint the beam to match the ceiling, use a paintable caulk and prime the beam before painting.
Seams between beam sections should be treated with the same care. Apply adhesive to both mating surfaces and clamp the joint tight using pipe clamps or bar clamps for thirty minutes to an hour while the adhesive sets. For beams that will be cut on-site to fit, always seal the cut ends with primer or a coat of the same finish you'll apply to the rest of the beam—this prevents moisture absorption through the exposed polyurethane, which can cause swelling or delamination over time.

Installing faux wood beams on popcorn ceilings is entirely achievable with the right preparation and materials. The process takes a bit longer than a standard drywall installation because of the scraping and blocking steps, but the result—a beam that appears to grow naturally from the ceiling—is well worth the extra effort. Once installed, polyurethane beams require no ongoing maintenance beyond occasional dusting, and they'll hold their appearance for years without the splitting, warping, or insect damage that plague real wood beams in challenging environments.
Technical References
ASTM standards cited in every specification
Test Data
Lab results from internal testing program
Updated 2026
Reviewed against current product specs


