A room with ceiling beams can feel dramatically different depending on how those beams are spaced. Tight, closely spaced beams create a sense of warmth and coziness, almost like sitting beneath the exposed rafters of a mountain lodge. Wide, generously spaced beams open the ceiling up, giving the room a lighter, more contemporary feel. Get the spacing wrong, and even the most beautiful beams can make a space feel cramped, awkward, or just off. Understanding the principles behind good beam spacing is one of the most impactful design decisions you'll make in any beam installation project.
The Role of Room Proportion
Spacing isn't arbitrary. It follows from the dimensions of the room itself, and the first step in planning your layout is to measure the space accurately. You need to know the total length and width of the ceiling, the ceiling height, and the planned dimensions of your beams—their width, depth, and length. With these numbers in hand, you can begin to see what will and won't work.
A common rule of thumb is that the spacing between beams should be approximately one to one-and-a-half times the beam's width. If you're installing eight-inch-wide beams, aim for spacing of eight to twelve inches between them. This ratio keeps the beams visually connected as a cohesive ceiling treatment rather than appearing as isolated objects floating on a flat plane. That visual connection is what makes a beam installation feel intentional rather than random.
Ceiling height plays an equally important role. In rooms with nine-foot ceilings or lower, tighter spacing prevents the ceiling from feeling empty while also maintaining a sense of intimacy. In rooms with twelve-foot or higher ceilings, wider spacing allows the architecture to breathe and keeps the beams from visually overwhelming the space. A fifteen-inch gap between beams reads differently on a ten-foot ceiling than it does on a fourteen-foot ceiling—the latter feels balanced, the former can feel sparse and underwhelming.
Structural Patterns and Visual Rhythm
Ceiling beams create rhythm. That rhythm can be regular and predictable, or it can follow a more deliberate pattern that responds to the room's architecture. Most interior installations use one of three basic patterns: uniform spacing, symmetric spacing with a central focal point, or graduated spacing that responds to specific ceiling features.
Uniform spacing is the most straightforward. All beams are equally spaced across the ceiling, creating a clean, orderly appearance that works well in modern, transitional, and contemporary spaces. It requires the least calculation—you simply divide the ceiling width by the number of beam spaces you want, accounting for the beam widths themselves. The math looks like this: if your ceiling is 200 inches wide and you want six beams that are six inches wide each, you have 200 minus 36 inches of beam material, leaving 164 inches to distribute across seven gaps. That works out to roughly twenty-three inches of spacing per gap.
Symmetric spacing places a beam directly over the room's focal point—typically a fireplace, a large window, or the center of a seating arrangement—and mirrors the spacing on both sides. This pattern feels more formal and traditional, and it works particularly well in dining rooms, grand living spaces, and entryways where a sense of order reinforces the room's architecture. To calculate this layout, find the center point of the ceiling, position the central beam, and then work outward in both directions, adjusting the spacing between the outer beams and the walls as needed. Often the end spacings will be slightly narrower than the interior spacings, which is perfectly acceptable and often looks better than forcing all spacings to be identical.
Graduated spacing is the most artistic approach. You might bring beams closer together over a kitchen island, for example, and space them wider apart over an adjacent open living area. This requires a more detailed plan because the irregular spacing needs to feel deliberate rather than accidental. The key is to anchor the transitions between spacing zones at architectural boundaries—above a change in ceiling height, at the edge of a soffit, or along a wall line that marks a functional zone change.
Accounting for Existing Architecture
Before locking in your spacing plan, walk through the room and identify features that will interact with the beam layout. Can lights, ceiling fans, HVAC vents, smoke detectors, and sprinkler heads all need clearance, and the beams need to be positioned to either frame these elements or route around them cleanly.
In many homes, the ceiling joists run in a specific direction and are spaced at standard intervals—typically sixteen or twenty-four inches on center. If you're mounting beams that rely on joist attachment for mechanical fastening, your spacing is partially constrained by joist locations. You can span across multiple joists with a single beam, but each beam needs at least two attachment points to the structural ceiling. Planning your spacing around the existing joist grid often produces the cleanest installation.
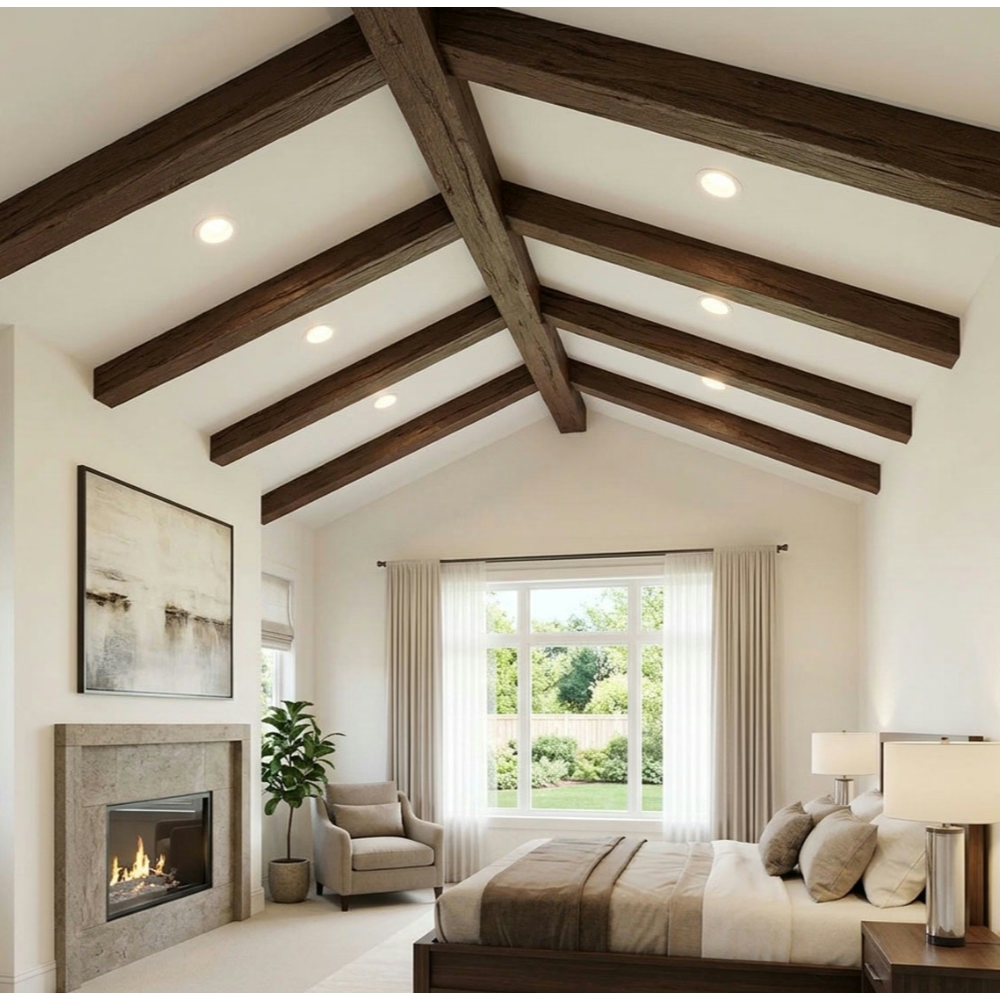
Vaulted ceilings introduce their own considerations. If you're working with a vault that narrows toward the ridge, beams that are equally spaced at the eave may appear to converge awkwardly near the top. In vaulted situations, it often makes sense to use slightly wider spacing at the bottom and tighter spacing near the peak, or to run the beams on a diagonal that responds to the vault's angle. Either approach preserves the visual rhythm rather than fighting the geometry of the space.
The Beam-to-Spacing Balance for Different Room Types
Different rooms have different functions, and those functions influence what kind of ceiling rhythm feels right. In an open-plan kitchen and living area, beams that span continuously across both zones can unify the space, but spacing that works over the kitchen island—where the ceiling is typically lower and the space feels more contained—may feel too tight over the adjacent living area with its higher, more open volume. Treating these as two separate spacing calculations joined at a common beam line often produces the best result.
Bedrooms tend to be smaller and more intimate, and tighter beam spacing enhances that intimacy. Five to eight inches of gap between beams on an eight-foot-wide ceiling, using four to six-inch-wide beams, creates a rich, almost coffered effect without overwhelming a modestly sized room. Master bedrooms with higher ceilings can support wider spacing in the twelve to eighteen-inch range, especially if the beams are substantial—ten or twelve inches deep—which anchors the ceiling and gives the room a sense of weight and permanence.
Home offices and studies benefit from moderate spacing that keeps the ceiling feeling structured without being oppressive. The goal in a workspace is alertness and focus, not relaxation, so a clean, evenly spaced beam arrangement that provides visual interest without drawing the eye upward constantly is ideal. Spacing of ten to fourteen inches between beams that are six to eight inches wide works well in most home office ceilings.

Documenting Your Layout Before You Drill
Whatever spacing scheme you choose, mark it out on the ceiling before you commit to any adhesive or fasteners. Use a pencil and a long straightedge to draw the centerlines of each beam across the full length of the ceiling. Step back and look at the layout from multiple angles—particularly from the door, from the main seating area, and from any raised vantage points. This dry run reveals problems that aren't visible from directly beneath: a spacing that looked even from below might reveal an awkward gap at one end when viewed from across the room.
While you're marking, also mark the locations of all joists, electrical fixtures, and any other features that intersect the beam lines. This gives you a complete picture of what the installation will involve and lets you make adjustments to the spacing in either direction—slightly tighter here, slightly wider there—to achieve a layout that is both structurally sound and visually balanced.

Taking the time to plan your spacing carefully is one of the highest-return activities in any faux beam project. A well-spaced beam layout feels right the moment you step into the room, and that feeling comes not from any single measurement but from the cumulative effect of proportions that respond intelligently to the room's architecture and purpose.
Technical References
ASTM standards cited in every specification
Test Data
Lab results from internal testing program
Updated 2026
Reviewed against current product specs


