
The moment someone decides they want exposed timber beams in their home, a mental calculation usually follows: how complicated is this going to be? For decades, the answer involved contractors, structural engineers, and equipment rentals. Natural timber beams are genuinely heavy, genuinely awkward to maneuver through finished rooms, and genuinely demanding in terms of the mounting hardware required to hang them safely. That calculation stopped being so daunting when polyurethane faux wood beams entered the mainstream. Today, a growing number of homeowners are discovering that adding architectural beam character to their spaces is a weekend project rather than a major construction undertaking.
Why DIY Installers Choose Polyurethane Over Real Timber
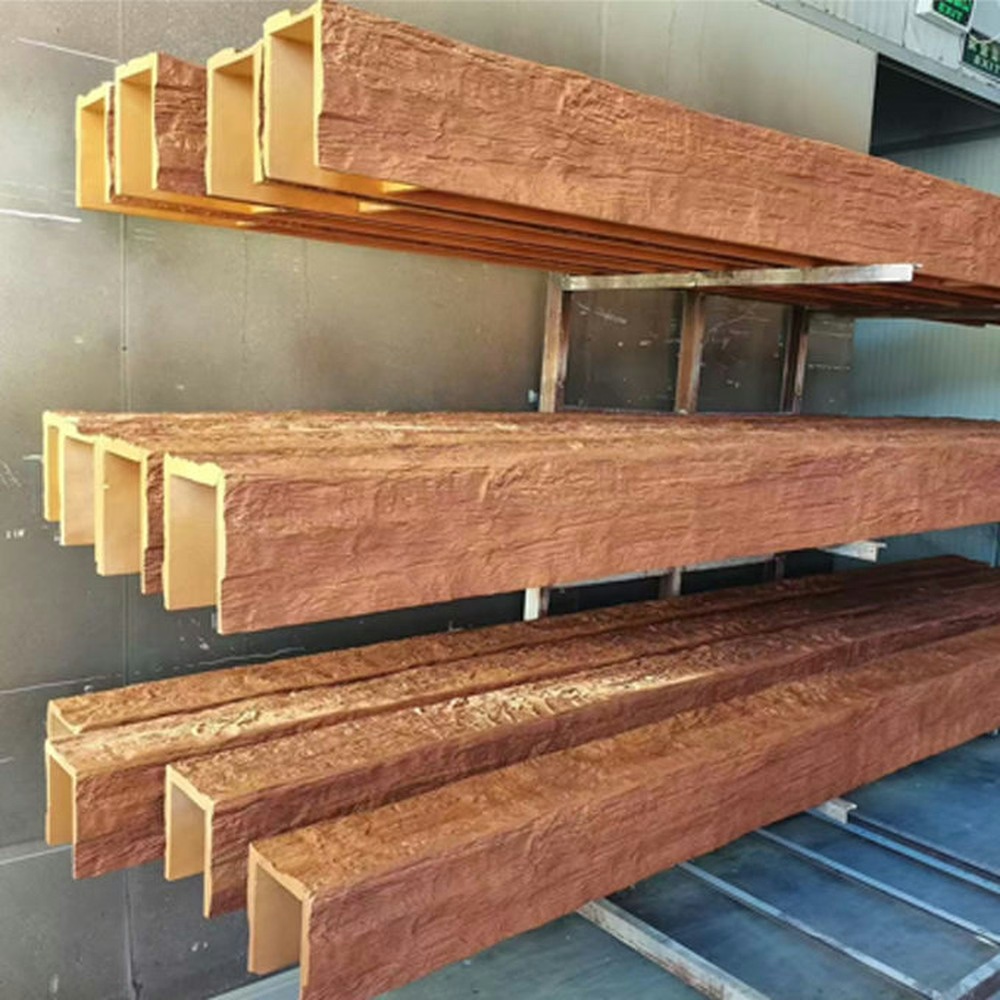
The weight difference between polyurethane and natural timber is the primary reason DIY installation becomes feasible. A typical 8-foot section of solid oak beam might weigh 80 to 100 pounds. That is a two-person job at minimum, and maneuvering it through doorways, around corners, and up ladders requires coordination and care. The same visual profile in hollow polyurethane weighs somewhere in the range of 8 to 15 pounds. A person with moderate upper body strength can handle that comfortably, and the beam's lighter mass means it is far less likely to cause damage if it shifts or needs repositioning during installation.
Beyond weight, polyurethane beams arrive with finished surfaces that require no sanding, staining, sealing, or ongoing maintenance. Natural timber beams typically arrive raw and need multiple coats of stain or paint followed by a protective sealer. Each coat requires drying time, and the overall process can stretch across several weekends. Polyurethane beams arrive ready to hang. The color and texture are baked into the surface during manufacturing, and the only finishing step is possibly touching up small drill holes or cut ends with the matching touch-up compound that reputable suppliers include with each order.
The consistency of manufactured polyurethane also eliminates the uncertainty that comes with natural wood. Every beam in your order will be identical in profile, texture, and color. Natural timber varies from piece to piece even when cut from the same tree, which can create visual mismatches that require additional finishing work to resolve.
Tools Required for a Professional-Looking Install
One of the most appealing aspects of installing polyurethane faux beams as a DIY project is the minimal tool requirement. For most ceiling installations, a homeowner needs only a tape measure, a pencil, a level, a power drill or driver, a stud finder, screws appropriate to the ceiling substrate, construction adhesive, and a step ladder of appropriate height. That is a tool collection that most homeowners already own or can assemble for under fifty dollars.
For wall-mounted applications such as faux beam mantels or accent panels, the same basic tools apply, with the addition of a miter saw if any trimming to length is required. Polyurethane cuts cleanly with standard woodworking blades — carbide-tipped blades last longer but are not strictly necessary for occasional cuts. The material saws without splintering or tear-out, which makes clean, accurate cuts straightforward even for less experienced operators.
A few practical tips make the tool list even shorter. Using an oscillating multi-tool with a flexible blade allows cutting behind already-mounted beams when fitting end caps or making final adjustments — a detail that can save significant frustration. Magnetic stud finders are more reliable in modern construction where joists may be spaced inconsistently or where metal plates indicate wiring runs. A laser level, while not essential, produces perfectly aligned results across long spans with less effort than a traditional bubble level.


Planning the Layout Before Installing Anything
Good installations start on paper before anything goes on the ceiling. The first step is measuring the ceiling space carefully and sketching a layout that accounts for beam spacing, end conditions, and any fixtures that will need to be worked around. For parallel beam installations, the goal is usually symmetrical spacing — equal gaps between beams and between the outermost beams and the walls. Achieving symmetry may mean adjusting the nominal spacing slightly from what a strict even-division calculation produces.
When beams will cross or intersect — for example, perpendicular beams creating a grid or T-junctions where a main beam meets a secondary beam — the planning stage should include exact positioning of mounting hardware for both pieces. The sequence of installation matters in these situations: typically, the longer or lower-priority run goes in first, and the intersecting piece is then fitted around it.
For rooms with vaulted or cathedral ceilings, layout planning is more complex because beam runs follow the slope of the roof structure. Measuring angles accurately requires careful use of an angle finder or digital protractor app. Many homeowners find it helpful to create cardboard templates of the beam profile to test the fit before committing to permanent mounting positions.
Step-by-Step Installation Process
With a layout plan in hand, the installation process follows a logical sequence. First, locate and mark ceiling joists using a stud finder, then transfer the layout marks from the sketch onto the ceiling with a pencil line. These pencil lines should be the reference lines that guide every subsequent placement decision.
Second, install mounting cleats or brackets at each joist location along the reference line. Use screws long enough to penetrate at least 1.5 inches into the structural joist — typically 3-inch screws for wood joists with drywall overhead. For steel joists, self-tapping screws work well. For concrete or masonry, concrete anchors with appropriate adhesive provide a secure base.
Third, apply construction adhesive to the inner surfaces of the beam that will contact the ceiling and the mounting hardware. The adhesive adds structural bond strength and helps prevent any creaking or movement that might develop over time. Do not skip this step even though the mechanical fasteners seem sufficient on their own.
Fourth, position the beam by sliding it over the mounting cleats starting from one end. Work the beam along the cleat until it reaches its final position, checking alignment against the reference lines as you go. Once aligned, drive screws through the top of the beam into the cleat at each mounting point. The beam should feel secure and stable after this step.
Finally, fill any visible screw holes with the touch-up compound provided by the supplier, and clean up any adhesive squeeze-out with a damp cloth before it dries. The result should be a beam that appears to have grown naturally from the ceiling structure — no visible hardware, clean lines, and consistent spacing with adjacent beams.
Common DIY Mistakes and How to Avoid Them
The most frequent error in DIY beam installation is failing to account for the actual thickness of ceiling materials when choosing screw lengths. Drywall alone is not a structural fastening point. Screws must reach solid wood or engineered structural members to provide adequate pull-out resistance. Homeowners who skip the stud-finding step or rely on drywall anchors for primary mounting are setting themselves up for failure.
Another common issue is uneven spacing that becomes obvious once the second or third beam goes up. The solution is to mark reference lines for every beam before installing any of them, then check alignment against those global references rather than adjusting based on the previous beam. Working from a center line outward toward both walls typically produces the most symmetrical result.
Finally, rushing the adhesive cure time leads to squeaking beams. Most construction adhesives require 24 to 48 hours to reach full bond strength, and the beam should not be subjected to impact or load during that period. Planning the installation over two weekends — one for mounting hardware and one for beam placement — typically produces better results than trying to complete everything in a single day.
Technical References
ASTM standards cited in every specification
Test Data
Lab results from internal testing program
Updated 2026
Reviewed against current product specs


