
The prospect of installing ceiling beams traditionally conjures images of professional contractors, specialized equipment, and substantial invoices. That mental picture no longer matches reality. Indoor foam PU faux beams have democratized ceiling decoration, making sophisticated architectural treatments accessible to anyone with basic tools and a willingness to learn. Weekend warriors across the country are discovering that professional-looking results don't require professional credentials.
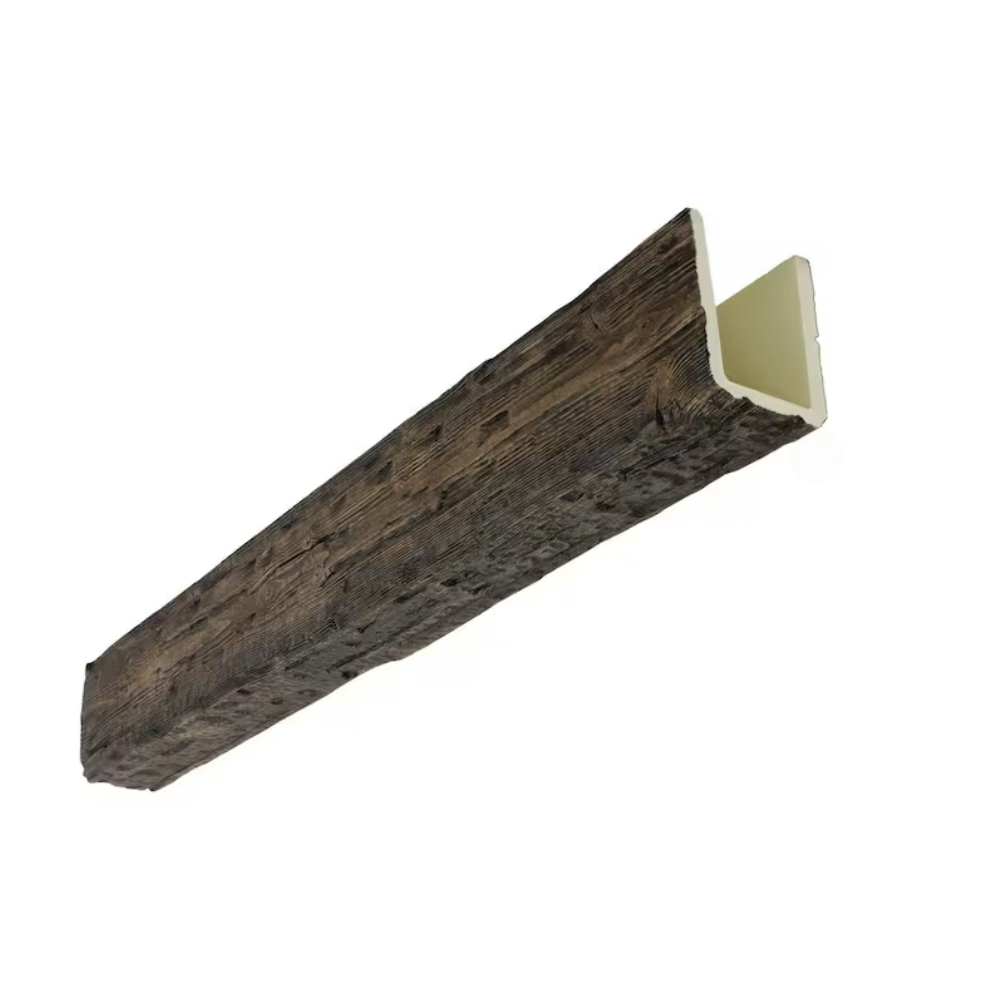
Foam PU beams differ from their solid polyurethane cousins primarily in core construction. While traditional PU beams feature hollow but solid-walled construction, foam beams incorporate a lightweight foam core surrounded by a thin polyurethane skin. This approach reduces weight further still—some foam beam products weigh as little as 1-2 pounds per linear foot—while maintaining sufficient surface durability for typical indoor applications.
Why Foam PU Beams Suit DIY Projects
The lightweight nature of foam PU beams eliminates the most significant barrier to DIY ceiling work: physical handling. Traditional wood beams, whether genuine timber or solid PU alternatives, require two-person handling for longer spans. Foam beams can often be managed by a single installer using simple support techniques. A single person can hold a twelve-foot foam beam in position while securing mounting hardware—a task that would be impossible with solid timber of equivalent length.
The forgiveness of foam material benefits inexperienced installers in other ways. Minor dents or surface scratches from handling typically disappear or become invisible once installation completes. Unlike hardwood that shows every careless mark, foam PU accepts the inevitable bumps and scrapes of DIY work without permanent consequences.
Affordability removes another DIY barrier. Foam PU beams typically cost less per linear foot than solid alternatives, allowing homeowners to attempt projects that budget constraints might otherwise prohibit. When combined with eliminated labor costs, the economics become compelling—professional installation of genuine wood beams might cost five to ten times the material price alone.
Essential Tools and Materials
Successful foam beam installation requires minimal specialized equipment. The typical DIYer already possesses most required tools:
- Tape measure and pencil for layout marks
- Miter saw or hand saw for cutting beams to length
- Drill or driver for mounting hardware
- Level—preferably a long spirit level or laser level
- Caulk gun for adhesive application
- Ladder or scaffolding appropriate for ceiling height
Additional materials include construction adhesive compatible with both foam and ceiling substrates, screws sized appropriately for beam mounting, and any finish materials if the factory finish requires enhancement. Painter's tape proves useful for temporary positioning, and a helper—though not always necessary—simplifies alignment verification.
Some installers prefer to create temporary support systems using adjustable poles or simple T-shaped braces. These supports hold beams in position during adhesive curing, freeing both hands for hardware installation. Commercial beam-support products are available, or simple DIY versions using lumber scraps accomplish the same purpose.

Surface Preparation Fundamentals
Ceiling surfaces must accept adhesive bonding reliably for successful installation. Clean the mounting area thoroughly, removing dust, cobwebs, and any loose material. Painted ceilings should receive light sanding—220-grit sandpaper works well—to create texture for better adhesion. Allow any cleaning solvents to dry completely before proceeding.
Identify structural elements that will receive mounting hardware. Wooden joists reveal themselves through subtle ceiling imperfections or can be located using stud finders. Mark joist locations clearly so mounting hardware finds solid wood rather than hollow drywall. For ceiling types without accessible joists, floating mounting systems using boards spanning between structural elements provide alternative attachment points.
Temporary layout marks help ensure accurate beam positioning. Use chalk lines or long straightedges to establish reference lines representing beam edges. These visual guides prove invaluable when working alone, providing alignment references that prevent cumulative positioning errors across multiple beams.
Handling and Cutting Foam Beams
Foam PU beams require gentle handling to avoid surface damage. Support beams along their full length during movement—flexing can cause cracking at stress points, particularly with longer pieces. Carrying beams vertically, as you would carry a long piece of lumber, distributes weight appropriately and minimizes flexural stress.
Cutting foam beams presents no particular difficulty using standard woodworking tools. Circular saws, miter saws, and even hand saws cut through foam cleanly. The key consideration is supporting the beam securely during cutting—foam's lightweight nature means it can shift or vibrate during cutting if not properly secured.
Blade selection matters for finish quality. Fine-toothed blades minimize tear-out at cut edges. Carbide-tipped blades maintain sharpness through foam's abrasive characteristics. For the cleanest possible cuts, adhesive-backed sandpaper can smooth any minor roughness left by saw marks.
When cutting beams at angles for corner joints, miter angles follow the same principles as wood cutting. A standard miter saw handles common angles efficiently. For compound angles required at complex intersections, some trial and error on scrap pieces helps verify fit before committing to finished pieces.
Adhesive Selection and Application
Construction adhesive bonds foam beams to ceiling surfaces. Select products specifically formulated for foam materials—standard construction adhesives containing solvents may dissolve or damage foam substrates. Water-based latex construction adhesives generally prove compatible, as do specialized foam construction adhesives available at building supply retailers.
Apply adhesive in continuous beads along the beam's upper mounting surfaces. Typically, one bead along each edge where the beam contacts the ceiling provides sufficient bonding area. For larger beams, additional spots or strips in central areas increase bond strength. Avoid excessive adhesive that might squeeze out and create messy appearance on visible surfaces.
Application temperature affects adhesive performance. Most construction adhesives work best between 50°F and 90°F (10°C to 32°C). Extreme cold slows curing; extreme heat accelerates it beyond workable timeframes. If working in temperature extremes, allow extra time or choose products formulated for challenging conditions.
Press beams firmly against ceiling surfaces during initial positioning. The mechanical contact between adhesive and substrate determines bond strength—simply setting beams in place without pressure produces weak bonds that may fail over time. Maintain pressure along the entire beam length during adhesive curing, typically 15 to 30 minutes depending on product and conditions.

Securing Beams and Verifying Alignment
Mechanical fasteners supplement adhesive bonding, providing immediate holding power while adhesive cures and permanent security afterward. Drive screws through the beam into underlying joists or mounting boards at regular intervals—typically every 24 to 36 inches along the beam length. Predrill screw holes slightly smaller than screw shank diameter to prevent splitting or cracking the foam material.
Fastener placement considers both security and appearance. Countersink screws slightly below the surface, then fill holes with matching material. For painted beams, wood filler or spackle accepts paint well. For stained or natural-finish beams, colored wood fillers can approximate the finish, though some installers prefer to locate fasteners at less visible positions along beams.
Alignment verification ensures beams run parallel and at consistent heights. A long straightedge spanning multiple beams reveals height variations that might not be apparent when viewing individual pieces. Adjust beam position while adhesive remains workable—most products allow 10 to 15 minutes for positioning corrections before initial curing prevents movement.
Level checking should occur both during installation and after adhesive fully cures. Temporary shifts during handling or curing sometimes alter beam position slightly. Catching these variations early allows correction; discovering them after adhesive sets requires more involved repairs.
Finishing and Detailing
Joint areas between beams deserve attention for professional results. Mitered corners should align precisely, with minimal visible gap. Small gaps can be filled with latex caulk after installation and painted or stained to match. Larger gaps indicate cutting errors requiring piece replacement or recutting.
End returns at wall intersections complete the installation visually. Either cut returns extending into the wall cavity or install decorative end caps that provide clean terminations. End caps work particularly well for DIY installations where precise return cutting might prove challenging.
Touch-up finishing addresses any remaining imperfections. Light sanding smooths rough spots, caulk fills gaps and holes, and spot-priming prepares repaired areas for finish coats. For painted beams, a single coat over the entire surface unifies appearance and conceals minor variations between pieces.
Common DIY Mistakes and Corrections
Inadequate surface preparation causes many installation failures. Dusty, greasy, or glossy surfaces prevent adhesive bonding effectively. Taking time to properly clean and prepare mounting surfaces prevents callbacks and repairs that cost more than the original installation time.
Insufficient adhesive coverage produces weak bonds that may fail under stress or vibration. Using adequate adhesive along full beam lengths—rather than spot application—distributes loads appropriately and ensures long-term security.
Rushing alignment adjustments wastes materials when imperfect positioning requires removal and reinstallation. Taking time during the adhesive working period to verify and correct alignment prevents these time-consuming corrections.
Ignoring manufacturer instructions for specific products leads to problems avoidable through simple attention to documentation. Different foam beam products may have specific requirements for adhesives, fasteners, or finishing materials—following these guidelines ensures optimal results.
Maintaining Your DIY Installation
Foam beam installations require minimal ongoing maintenance. Regular dusting with soft cloths or gentle vacuuming keeps surfaces clean. Avoid abrasive cleaners or aggressive scrubbing that might damage finish surfaces.
Periodically inspect mounting connections, particularly in new construction where building settling might stress attachments. Tightening any loose fasteners and addressing developing gaps promptly prevents more significant problems.
Finish refreshment may become necessary after many years of service. Light sanding, priming, and new topcoat application typically restore original appearance effectively for painted installations. Stained or natural-finish beams may require more specialized refinishing techniques.
Technical References
ASTM standards cited in every specification
Test Data
Lab results from internal testing program
Updated 2026
Reviewed against current product specs


