
Every beam installation eventually confronts the same fundamental challenge: how to terminate the beam cleanly where it meets a wall, column, or simply ends in open space. The difference between a professional-looking installation and an amateur effort often comes down to these seemingly minor details. End caps serve as the punctuation mark for beam installations, providing clean terminations that complete the visual narrative the beams have established.
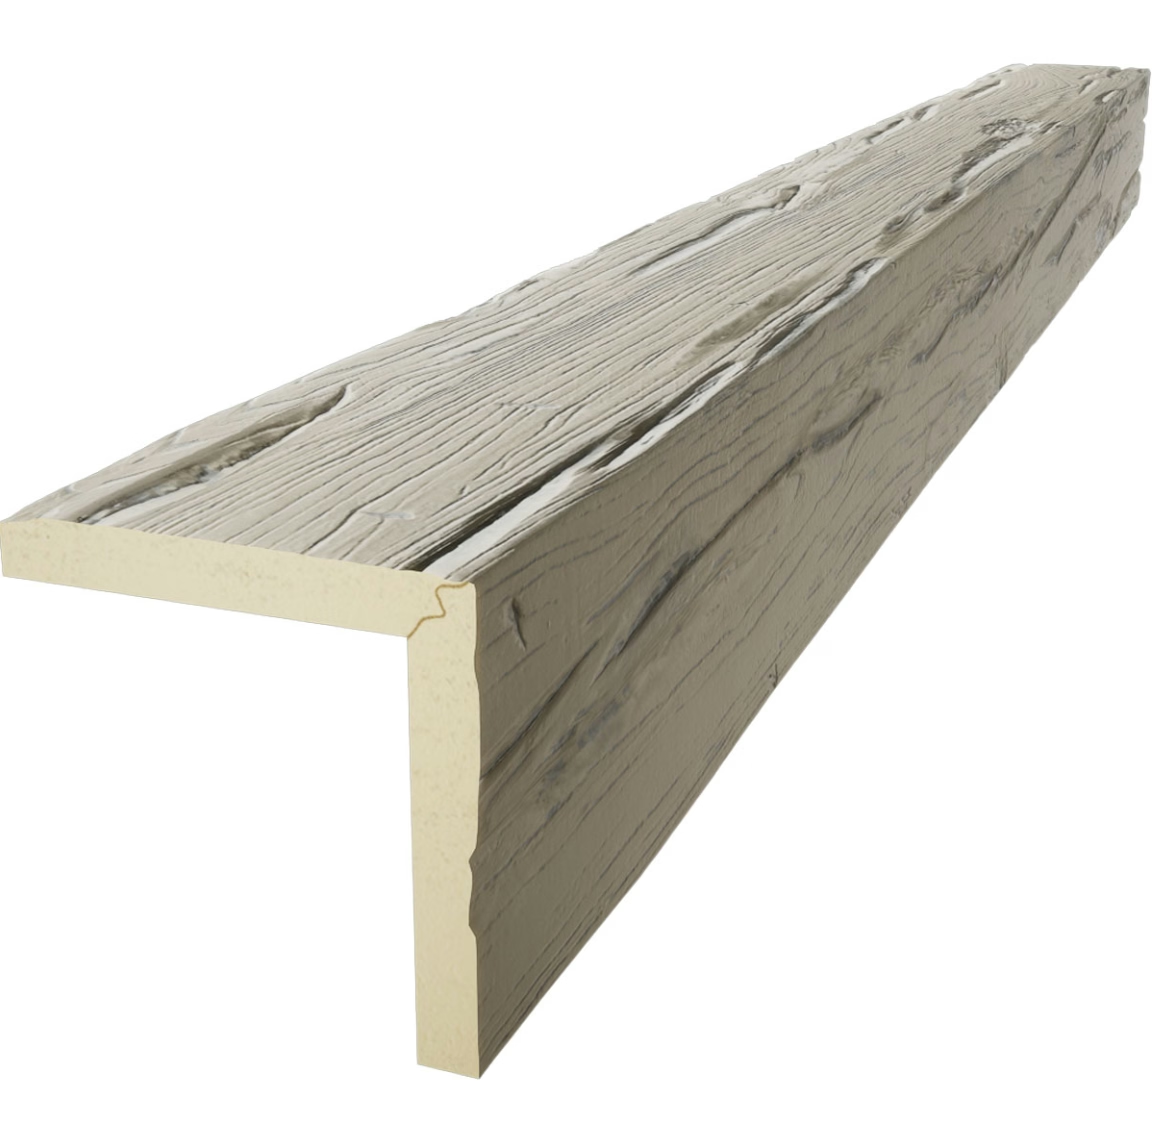
Polyurethane faux beam end caps are engineered components that match specific beam profiles, creating seamless transitions from the beam's structural body to its terminating edge. Unlike improvised solutions involving cut wood or filler compounds, these accessories are manufactured to precise specifications that ensure proper fit and finish from the moment they leave the package. The investment in proper end caps pays dividends in both immediate appearance and long-term durability.
The Functional Purpose of End Caps
Beyond their aesthetic contribution, end caps serve practical functions that justify their inclusion in any complete installation. The termination point of a polyurethane beam represents a potential vulnerability where the material's edge is exposed. End caps seal this edge against moisture intrusion, physical impact, and the accumulation of dust and debris in small gaps that would otherwise form between the beam and adjacent surfaces.
Structural considerations also favor end cap use, particularly in beams that span significant distances or support additional weight from attached fixtures. The end cap reinforces the beam's termination point, distributing loads more evenly and preventing the edge damage that can occur with repeated stress. While polyurethane is remarkably durable, its engineered cellular structure benefits from the additional support that properly fitted end caps provide.
Thermal movement in building structures creates subtle stresses at beam terminations that compound over years of seasonal temperature cycling. End caps accommodate these movements through flexible sealing properties and engineered connection points that flex slightly without cracking or separating. This accommodation prevents the hairline separations that plague installations where beams terminate without adequate consideration of structural dynamics.
Matching End Caps to Beam Profiles
Polyurethane beam manufacturers produce multiple profile types, each requiring specifically designed end caps. Three-sided box beams, which mount against ceiling surfaces with one open face, use end caps that cover three surfaces while maintaining the beam's terminated appearance. Four-sided beams, designed to appear as solid timber from all viewing angles, require end caps that complete all visible surfaces seamlessly.
The complexity of profile matching increases with decorative beam designs that incorporate carved details, irregular surfaces, or non-standard proportions. Attempting to match generic end caps to specialized beams rarely produces satisfactory results—the seams become visible, the proportions look wrong, and the overall effect diminishes rather than enhances the installation. The minor cost premium for profile-matched end caps represents genuine economy when measured against the visual cost of mismatched alternatives.
Some manufacturers offer universal end cap systems designed to accommodate slight variations in beam dimensions within specified ranges. These adaptable solutions work adequately for applications where absolute precision is less critical than general visual improvement. For visible installations where every detail receives scrutiny, dedicated profile-matched end caps remain the preferred choice despite their higher specificity requirements.

Installation Techniques for Clean Terminations
Proper end cap installation begins with careful preparation of the beam's termination point. The beam edge must be cut cleanly if the original termination doesn't align with the installation requirements—straight cuts produce the cleanest results, though mitered cuts accommodate angular terminations when architectural conditions require them. A fine-toothed saw blade minimizes surface tear-out and preserves the integrity of any wood grain texture at the cut edge.
Dry-fitting the end cap before applying adhesive or mechanical fasteners reveals any fitting issues that might otherwise result in gaps or misalignment. Minor adjustments to the end cap's interior dimensions can accommodate variations in beam manufacture while still producing satisfactory results. These adjustments should be made incrementally, testing fit repeatedly to avoid over-correction that produces its own problems.
Attachment methods vary depending on installation conditions and manufacturer recommendations. Construction adhesive provides strong bonds for horizontal terminations where gravity assists the connection. Mechanical fasteners—brads, pins, or small screws—provide additional security for vertical applications or situations where adhesive alone might be insufficient. Many installers use both methods in combination, applying adhesive to the mating surfaces and then securing with fasteners until the adhesive cures.
Finishing End Caps to Match Beam Surfaces
The end cap's surface must match the beam's surface to produce a truly seamless appearance. Polyurethane materials accept various finishing treatments, but the specific formulation matters for color matching and texture coordination. End caps from the same manufacturer as the beams they terminate typically match most reliably since they share identical material formulations and surface treatments.
When end caps require painting, the process should begin before installation if possible, allowing all surfaces to be finished without masking requirements. If finishing after installation is necessary, careful masking of adjacent surfaces prevents overspray or drip marks that would compromise the installation's professional appearance. The goal is color and texture continuity that makes the end cap invisible except to viewers who know exactly where to look.
Textured surfaces present additional finishing challenges that require careful attention to technique. Simulated wood grain patterns must align across the joint between beam and end cap, or the mismatch becomes immediately apparent. Some installers use additional texturing techniques—staining, dry brushing, or transparent toning agents—to blend end caps more effectively with beams that have been deliberately weathered or distressed.

Special Considerations for Outside Corners
Outside corner installations present unique end cap challenges because both the wall termination and the corner itself require attention. Mitered end caps create clean corner transitions, but the miter joint represents a potential weakness if not properly supported and finished. Some manufacturers offer pre-mitered corner end caps that simplify this transition, though these require precise corner angle measurement for proper fit.
Non-standard corner angles—common in older homes or architectural renovations—require either custom end cap fabrication or creative adaptation of standard components. The tolerance for error in these situations is minimal; even small gaps or misalignments become glaringly obvious at outside corners where multiple planes converge. Investing extra time in measurement and dry-fitting for these critical locations pays dividends in the final appearance.
Reinforcement of corner terminations beyond standard end cap attachment provides insurance against the higher stress concentrations these locations experience. Additional adhesive fillets at the miter joint, metal corner reinforcement behind the polyurethane surface, or mechanical fasteners placed to cross the joint all contribute to long-term durability. These precautions add minimal cost but significantly reduce the likelihood of failure at the installation's most visible points.
Maintaining End Cap Installations
Once properly installed, polyurethane end caps require minimal maintenance beyond periodic cleaning to remove accumulated dust or environmental deposits. The material's resistance to moisture, insects, and decay eliminates the rot and deterioration concerns that plague wood trim alternatives. UV-resistant finishes, where applied, maintain their appearance for years without refinishing.
Periodic inspection identifies any developing issues before they escalate into visible problems. Checking for gaps at the joint between end cap and beam, verifying that fasteners remain secure, and assessing the condition of any sealants at wall intersections all contribute to installation longevity. Catching and addressing minor separation early prevents the more significant remediation that delayed attention inevitably requires.
Replacement of damaged end caps proves relatively straightforward since the underlying attachment methods remain accessible. Unlike painted trim where removal risks wall damage, polyurethane end caps can typically be pried free without significant substrate harm, provided reasonable care is exercised during removal. Having spare end caps on hand for emergency replacement makes sense for commercial installations where appearance maintenance is ongoing operational concern.
Technical References
ASTM standards cited in every specification
Test Data
Lab results from internal testing program
Updated 2026
Reviewed against current product specs


