
The difference between exceptional and mediocre faux beam installations often comes down to installation technique. Even the highest quality polyurethane beams can disappoint when improperly mounted, while competent installation transforms modest materials into satisfying results. Comprehensive installation guides serve contractors seeking efficiency and homeowners attempting DIY projects, ensuring that products perform as intended throughout their service lives.
Multilingual installation documentation removes language barriers that might prevent proper technique adoption. Spanish-speaking contractors and homeowners comprise significant market segments in North America and throughout Latin America. Providing installation guidance in both English and Spanish ensures that these audiences can achieve results matching those of English-only audiences with equivalent expertise.
Pre-Installation Planning and Preparation
Successful beam installation begins long before the first component reaches the ceiling. Accurate measurement forms the foundation of professional results, requiring multiple passes to confirm dimensions before cutting or ordering. Measurements should account for joist spacing, corner conditions, and any irregularities in existing construction that might affect fit.
Room layout planning determines beam positioning and ensures that installations achieve intended design effects. Drawings showing beam locations, junction configurations, and relationship to existing features prevent surprises during installation. This planning phase identifies potential conflicts with electrical, plumbing, or HVAC systems that might require coordination or adjustment.
Material verification upon delivery confirms that received products match ordered specifications. Checking finish color against samples, verifying dimensions against order confirmations, and inspecting for shipping damage prevents problems that become difficult to address after installation begins. Documenting any discrepancies immediately enables prompt resolution before irreversible installation decisions.
Surface and Structure Assessment
Existing ceiling conditions significantly influence installation approach and preparation requirements. Solid wood joists accept standard fasteners directly, while engineered joists, I-joists, or manufactured ceiling systems may require specific mounting hardware or additional blocking. Understanding the structural system before beginning prevents attachment failures that might compromise installation integrity.
Wall conditions at beam termination points require equal attention. Beams ending at walls require blocking or backing that may not exist in current construction. Locating studs, verifying blocking presence, and planning termination details before installation ensures secure attachment throughout the installation.
Moisture assessment identifies conditions that might affect installation or long-term performance. Water staining, active leaks, or elevated humidity readings suggest problems that should be addressed before covering surfaces with beam installations. Concealing moisture sources behind beams guarantees future problems that may require beam removal for remediation.

English Installation Instructions
Step 1: Layout and Marking
Begin by establishing reference lines that guide beam positioning throughout the installation. Using a chalk line or laser level, mark the centerline of each planned beam location across the ceiling surface. These reference lines ensure that beams align properly and maintain consistent spacing where multiple beams install.
Corner and termination points require special attention during layout. Marks should indicate exact locations where beams will meet at corners, transition to walls, or join with other beams. Complex compositions with intersecting beams need detailed drawings showing each component's position and relationship to others.
Verification of layout marks before committing to cutting or drilling prevents irreversible errors. Stepping back to view marks from typical viewing positions reveals alignment issues invisible at close inspection. Adjustments made during layout phase cost nothing; corrections after cutting require replacement materials and additional labor.
Step 2: Mounting Hardware Installation
Most beam installations require mounting brackets, channels, or blocking that secure beams to structural elements. Following manufacturer specifications, install these mounting components at locations corresponding to beam positions. Mounting hardware must attach to structural members capable of supporting beam weight plus any additional loads.
Bracket spacing typically ranges from 24 to 48 inches depending on beam weight and ceiling conditions. Closer spacing provides additional security and reduces deflection for longer spans or heavier beams. Manufacturer guidelines establish minimum requirements, but professional installers often exceed these for added assurance.
Level verification during mounting hardware installation prevents beams that appear crooked when completed. Small adjustments during hardware placement cost nothing; adjusting installed beams risks visible gaps or misalignment. Taking time to verify level and alignment at this stage prevents problems later.
Step 3: Beam Fitting and Cutting
Trial fitting beams before permanent attachment identifies fit issues that might require adjustment. Place beams in mounting hardware without adhesive to verify alignment and positioning. This dry run reveals clearance issues, alignment problems, or measurement errors before irreversible decisions.
Cutting requirements vary based on room conditions and beam composition. Polyurethane cuts cleanly with standard woodworking tools, producing smooth surfaces that accept finishing without additional work. Miter cuts for corners should be precise, with gaps exceeding 1/16 inch requiring shimming or adjustment.
End matching at wall terminations requires particular attention. Clean joints where beams meet walls appear professional; visible gaps suggest hasty or careless installation. Where perfect joints prove impossible due to wall irregularities, wood filler or caulk matching beam color provides acceptable concealment.
Step 4: Adhesive Application and Beam Mounting
Construction adhesive applied to mounting surfaces enhances security beyond mechanical fastening alone. Following manufacturer guidelines for adhesive type and application method, apply adhesive to beam backs and mounting hardware contact surfaces. Excess adhesive should wipe away before curing; cured adhesive requires scraping that may damage surfaces.
Beam placement proceeds from one end to the other, with final positioning verified before adhesive sets. Temporary bracing keeps beams in position until adhesive cures sufficiently to support weight independently. Bracing should remain in place for the duration specified by adhesive manufacturer, typically 24 to 48 hours.
Mechanical fastening supplements adhesive bonding for permanent installations. Screws through mounting brackets into structural elements provide immediate security while adhesive cures. Hidden fastener locations—inside beam cavities, behind decorative elements—maintain authentic appearance while providing reliable attachment.
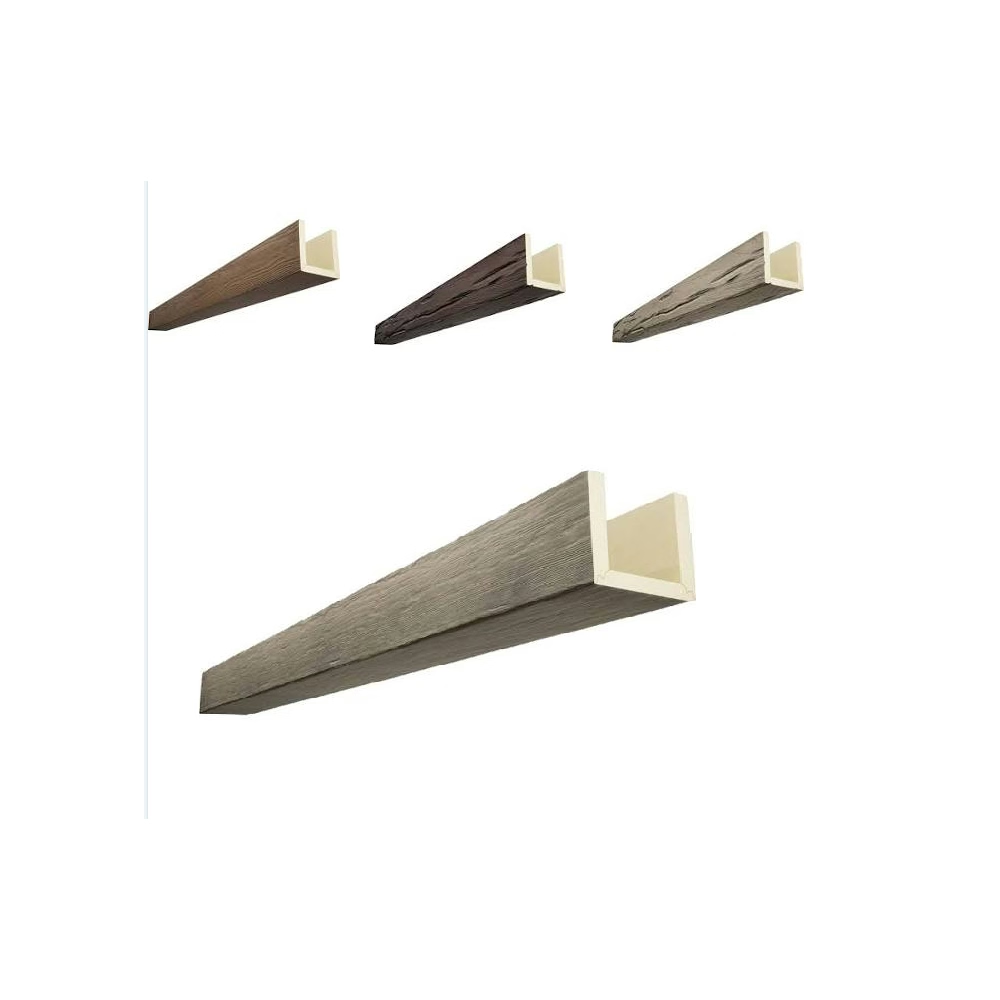
Instrucciones de Instalación en Español
Paso 1: Diseño y Marcado
Comience estableciendo líneas de referencia que guíen el posicionamiento de las vigas durante toda la instalación. Usando una línea de tiza o nivel láser, marque la línea central de cada ubicación planificada de viga en la superficie del techo. Estas líneas de referencia aseguran que las vigas se alineen correctamente y mantengan espaciado consistente donde se instalen múltiples vigas.
Las esquinas y puntos de terminación requieren atención especial durante el diseño. Las marcas deben indicar ubicaciones exactas donde las vigas se encontrarán en las esquinas, transicionarán a las paredes, o se unirán con otras vigas. Composiciones complejas con vigas que se intersecan requieren dibujos detallados mostrando la posición de cada componente y su relación con los demás.
La verificación de las marcas de diseño antes de comprometerse con cortes o perforaciones previene errores irreversibles. Retroceder para ver las marcas desde posiciones de visualización típicas revela problemas de alineación invisibles a inspección cercana. Los ajustes realizados durante la fase de diseño no cuestan nada; las correcciones después de cortar requieren materiales de reemplazo y mano de obra adicional.
Paso 2: Instalación de Herrajes de Montaje
La mayoría de las instalaciones de vigas requieren soportes de montaje, canales o bloqueos que aseguren las vigas a elementos estructurales. Siguiendo las especificaciones del fabricante, instale estos componentes de montaje en ubicaciones correspondientes a las posiciones de las vigas. Los herrajes de montaje deben unirse a miembros estructurales capaces de soportar el peso de la viga más cualquier carga adicional.
El espaciado de los soportes típicamente varía de 60 a 120 centímetros dependiendo del peso de la viga y las condiciones del techo. El espaciado más cercano proporciona seguridad adicional y reduce la deflexión para tramos más largos o vigas más pesadas. Las pautas del fabricante establecen requisitos mínimos, pero los instaladores profesionales a menudo exceden estos para mayor seguridad.
La verificación del nivel durante la instalación de herrajes de montaje previene vigas que aparecen torcidas cuando se completan. Los pequeños ajustes durante la colocación de los herrajes no cuestan nada; ajustar vigas instaladas arriesga huecos visibles o desalineación. Tomarse el tiempo para verificar el nivel y alineación en esta etapa previene problemas más adelante.
Paso 3: Ajuste y Corte de Vigas
El ajuste de prueba de vigas antes de la unión permanente identifica problemas de ajuste que podrían requerir ajuste. Coloque las vigas en los herrajes de montaje sin adhesivo para verificar alineación y posicionamiento. Este ensayo revela problemas de espacio libre, problemas de alineación, o errores de medición antes de decisiones irreversibles.
Los requisitos de corte varían según las condiciones de la habitación y la composición de la viga. El poliuretano corta limpiamente con herramientas estándar de carpintería, produciendo superficies lisas que aceptan acabado sin trabajo adicional. Los cortes a inglete para esquinas deben ser precisos, con huecos que exceden 1.5 milímetros requiriendo cuñas o ajuste.
La unión de extremos en las terminaciones a las paredes requiere atención particular. Las juntas limpias donde las vigas encuentran las paredes parecen profesionales; huecos visibles sugieren instalación apresurada o descuidada. Donde las juntas perfectas resultan imposibles debido a irregularidades de la pared, el relleno de madera o masilla del color de la viga proporciona ocultación aceptable.
Paso 4: Aplicación de Adhesivo y Montaje de Vigas
El adhesivo de construcción aplicado a las superficies de montaje mejora la seguridad más allá del sujetador mecánico solo. Siguiendo las pautas del fabricante para el tipo de adhesivo y método de aplicación, aplique adhesivo a los respaldos de las vigas y superficies de contacto de los herrajes de montaje. El exceso de adhesivo debe limpiarse antes de curar; el adhesivo curado requiere raspar que puede dañar las superficies.
La colocación de vigas procede de un extremo al otro, con el posicionamiento final verificado antes de que el adhesivo se asiente. Los soportales temporales mantienen las vigas en posición hasta que el adhesivo cures suficientemente para soportar peso independientemente. Los soportales deben permanecer en su lugar por la duración especificada por el fabricante del adhesivo, típicamente 24 a 48 horas.
La sujetador mecánico suplementa el pegado de adhesivo para instalaciones permanentes. Los tornillos a través de los soportes de montaje hacia los elementos estructurales proporcionan seguridad inmediata mientras el adhesivo cura. Las ubicaciones de sujetadores ocultos—dentro de cavidades de la viga, detrás de elementos decorativos—mantienen apariencia auténtica mientras proporcionan unión confiable.
Post-Installation Inspection and Touch-Up
Completed installations require systematic inspection to verify quality before final acceptance. Walking through the space at normal viewing distances reveals issues invisible from ladder height. Imperfections noticed during inspection can often be addressed with simple touch-up procedures before they become permanent concerns.
Gap filling addresses minor separations at joints and terminations that are normal in field installations. Color-matched wood filler applied with a flexible putty knife fills gaps seamlessly. The filled areas should blend with surrounding surfaces, with any visible distinction indicating overfilling or improper application technique.
Surface cleaning removes adhesive residue, dust, and handling marks that accumulate during installation. Clean surfaces with mild detergent and soft cloth, avoiding abrasive materials that might damage finish. The cleaning process also provides opportunity to examine surfaces closely for damage or quality issues requiring attention.
Troubleshooting Common Issues
Gaps exceeding tolerance may indicate measurement errors or wall irregularities. Small gaps respond to caulk application; larger gaps may require adding trim pieces or adjusting beam positioning. Understanding the cause of gaps prevents recurrence in adjacent installations.
Sagging or deflection between support points suggests insufficient mounting or adhesive failure. Addressing this issue typically requires removing affected beams, adding mounting support, and reinstalling with corrected technique. Catching sag early prevents progressive failure that complicates remediation.
Finish damage during installation may require touch-up or replacement of affected components. Minor scratches often disappear with careful blending of finish materials. Significant damage may require replacing individual components rather than attempting repairs that prove unsatisfactory.
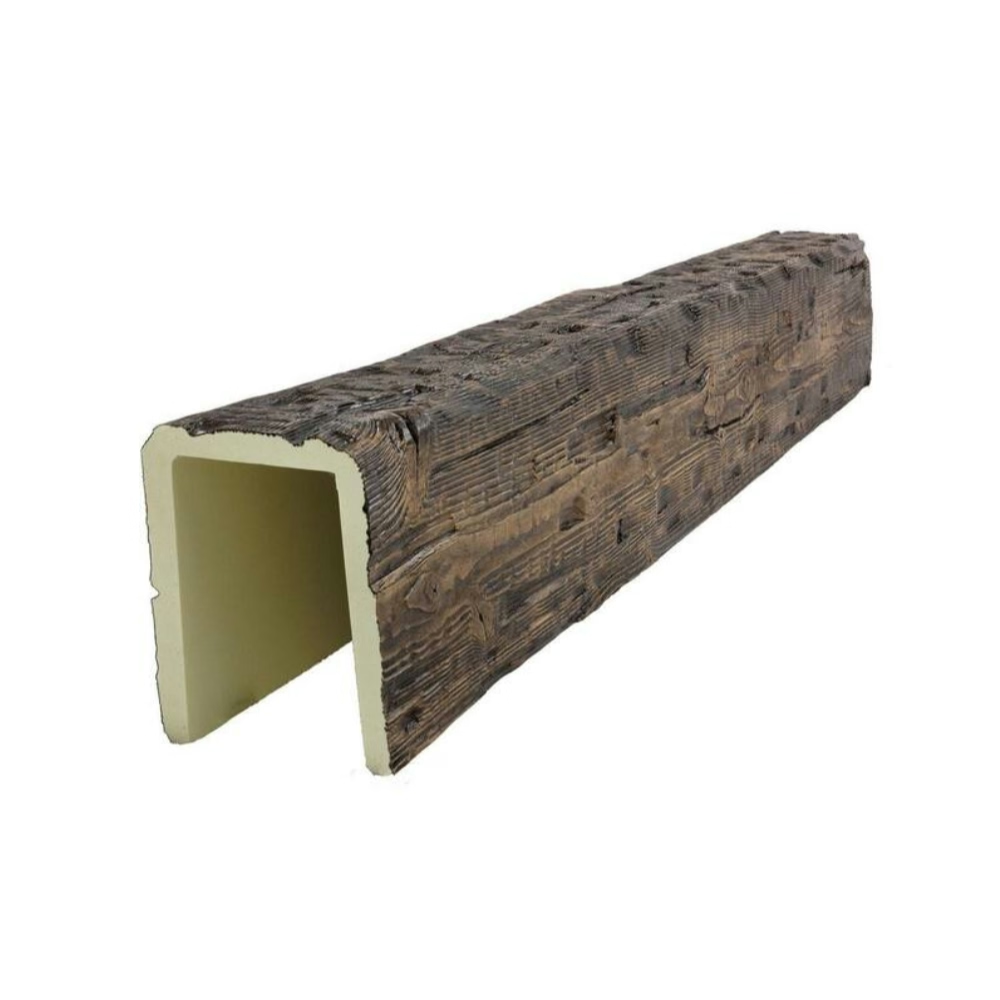
Maintenance Guidance
Post-installation maintenance for polyurethane faux beams requires minimal ongoing attention. The durable surfaces resist the wear and environmental factors that demand maintenance for natural wood alternatives. Regular cleaning with mild detergents maintains appearance without specialized care products.
Periodic inspection should verify continued secure attachment, particularly in the first year after installation when settling and initial curing might stress attachment systems. Tightening any loosened fasteners and verifying adhesive bond integrity prevents progressive issues from developing into problems.
Finish touch-up materials should be retained from installation for future repairs. Minor scratches and damage can be addressed with these materials without visible evidence of repair. Professional touch-up kits matching specific beam finishes are available from manufacturers for more significant repair needs.
Technical References
ASTM standards cited in every specification
Test Data
Lab results from internal testing program
Updated 2026
Reviewed against current product specs


