Home improvement enthusiasm often collides with the reality of specialized tool requirements that transform simple projects into expensive equipment investments. When project scope exceeds available capabilities, enthusiasm wanes and improvements remain unimplemented. The good news for homeowners dreaming of architectural ceiling details is that faux wood beam installation requires no specialized construction equipment, no rental tools, and no contractor relationships. Every required tool likely already resides in a garage toolbox or can be acquired for the cost of a restaurant dinner.
The accessibility of faux wood beam installation through common tools represents a deliberate design choice by manufacturers responding to the DIY market. Natural timber beams demand重型 equipment for handling and precision equipment for fitting. These requirements historically limited beam installations to contractor-managed projects where tool costs could be absorbed across multiple installations. Polyurethane construction eliminates these barriers, enabling quality results through familiar tools and techniques.
Tools Every Homeowner Already Owns
Measuring and marking tools form the foundation of accurate installation. A tape measure extending at least twenty-five feet handles most residential beam lengths without repositioning. A pencil or marking knife creates visible cutting lines, while a speed square enables quick crosscut alignment. These basic items rarely require purchase, as they accompany virtually every homeowner engaged in minor property maintenance.
Cutting tools for PU beams match those used for standard dimensional lumber. Circular saws provide straight crosscuts for beam ends, while jig saws handle the occasional angle cut or curved profile that some designs require. Blade selection matters more than saw brand, with fine-tooth blades minimizing surface tear-out on the polyurethane material.
Drilling tools create fastener holes and manage mounting hardware. A standard cordless drill handles the vast majority of installation requirements, with a full recharge cycle providing ample capacity for complete residential installations. Drill bit selection includes standard twist bits for fastener holes and spade bits or hole saws for any electrical routing that beam installations might intersect.
Clamping tools hold beams during fitting and while securing attachments. Spring clamps work well for lightweight PU beams, while bar clamps provide additional holding power for longer spans or more complex assemblies. The lightweight nature of the material means that modest clamping pressure provides adequate security without requiring heavy-duty equipment.

Understanding Beam Mounting Systems
Contemporary faux wood beam installations typically employ bracket systems that secure to ceiling framing while engaging beam profiles. These systems eliminate the need for direct ceiling attachment through the beam face, creating invisible connections that preserve the authentic appearance of direct timber mounting. The hardware components are few and simple, requiring only basic tools for installation.
Surface mounting utilizes metal clips that attach to ceiling joists and engage slots cut into the beam backs. The system supports full beam weight while remaining completely hidden after installation. Alignment adjustments accommodate minor ceiling irregularities without requiring beam modification or visible shimming.
Suspended mounting employs chains or rods that descend from ceiling structures to beam connection points. This approach creates visual separation between beams and ceilings, emphasizing the architectural impact of the installation. The technique works particularly well for creating the appearance of heavy timber in spaces where direct ceiling contact would feel busy or excessive.
Floating mounting systems accommodate ceiling movement and dimensional changes that occur in some construction types. Flexible connections prevent the binding that rigid attachment might cause, preserving installation integrity across seasonal humidity cycles and structural settling. These systems require slightly more complex hardware but still install with common tools.

Step-by-Step Installation Without Specialty Equipment
Initial planning establishes the layout that determines cutting requirements and mounting point locations. This phase requires only measuring and marking tools, with careful attention to spacing that ensures even distribution and proper clearance around any ceiling obstacles. Sketching the planned layout on paper or digitally provides reference during the physical installation.
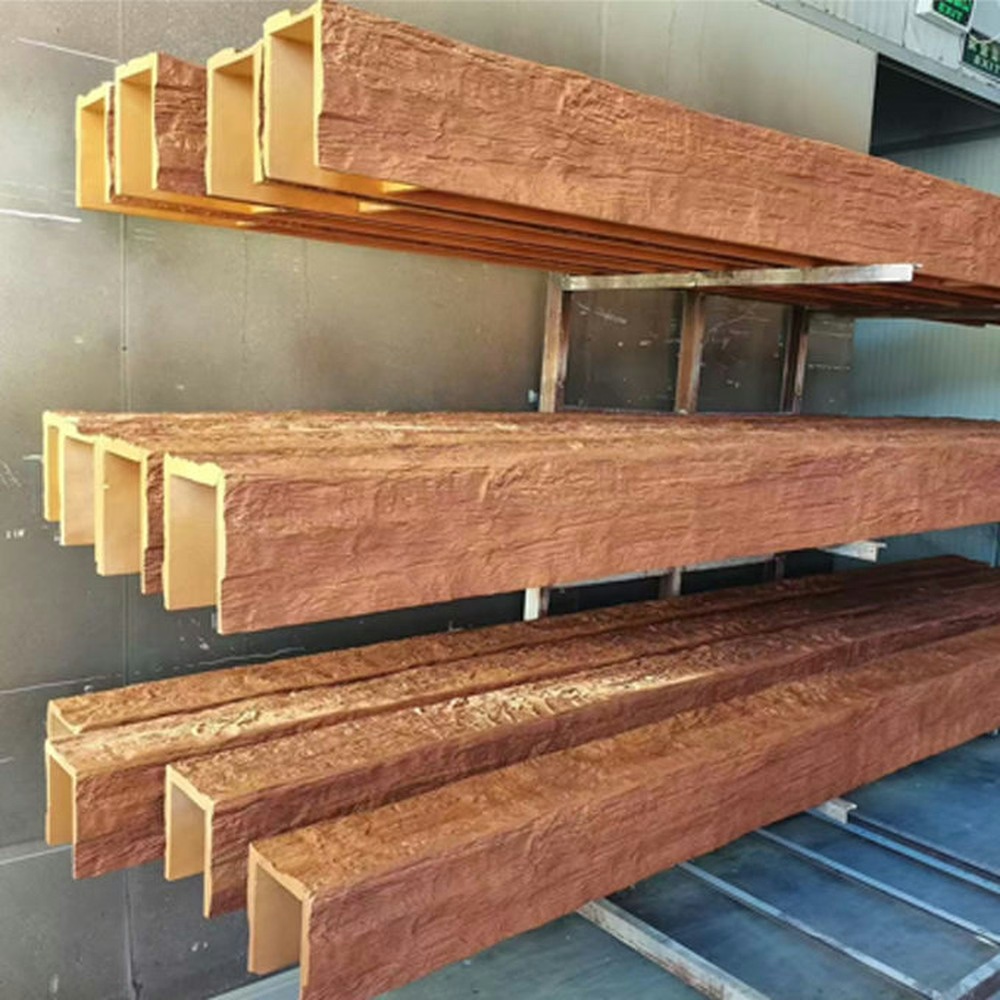
Cutting beams to length uses standard woodworking techniques adapted for polyurethane material. The lighter weight makes one-person cutting practical where timber would require feed assistance. Scoring cut lines with a knife before sawing reduces surface tear-out, producing cleaner edges that require less finishing work. The process feels familiar to anyone who has cut dimensional lumber for any previous project.
Mounting bracket installation requires locating ceiling joists accurately using a stud finder. Marking joist edges and centers guides bracket positioning that aligns with beam spans. Securing brackets with provided fasteners completes the structural connection between beams and ceiling structure. The process mirrors standard shelving or heavy mirror installation that most homeowners have attempted.
Beam placement engages mounting hardware after brackets are secured. The lightweight construction allows one person to position beams while making final alignment adjustments. Checking level and position before final fastener engagement ensures that beams install straight and true. Minor adjustments remain possible until all fasteners are fully seated.
Finishing details complete the installation with professional-quality appearance. Gap filling around mounting hardware and at beam joints creates seamless surfaces. The lightweight material accepts standard wood fillers that sand smooth and accept stain or paint. This final phase separates adequate installations from impressive ones that add genuine architectural character.
Tips for First-Time Installers
Starting with simpler configurations builds confidence before attempting complex layouts. Single-beam installations or parallel beam patterns present fewer variables than intricate coffered designs. The skills developed in straightforward applications transfer directly to more ambitious projects as experience accumulates.
Dry-fitting all components before permanent attachment reveals fit issues that might otherwise cause problems during final installation. The lightweight nature of PU beams makes this practice particularly convenient, as components can be handled and repositioned without significant effort. Taking time for dry-fitting prevents懊恼 of irreversible mistakes.
Working systematically from one end of the installation to the other maintains consistent quality throughout. Jumping between different areas risks inconsistent technique and uneven results. The methodical approach ensures that attention to detail remains uniform across the complete installation.
Documenting the process with photographs provides reference for future maintenance or expansion. Understanding how components connect proves valuable when modifications become necessary. The documentation also helps when consulting with professionals for advice or assistance with related projects.
Maintaining Your Installation Long-Term
Faux wood beams require minimal ongoing maintenance compared to natural alternatives. Periodic dusting maintains appearance in most environments, while occasional cleaning with mild detergent removes accumulated grime. The sealed surface resists staining and does not require periodic refinishing that natural wood demands.
Inspecting mounting connections annually ensures continued security as the building settles and ages. Tightening any loosened fasteners maintains proper bearing and prevents movement that might damage beam surfaces or surrounding finishes. The inspection takes only minutes but provides assurance that the installation remains safely secured.
Addressing any damage promptly prevents minor issues from progressing. Small dents or scratches can be filled and refinished without removing beams from their mounting. The repairability of PU surfaces exceeds that of natural wood, as filled areas accept stain or paint uniformly without grain pattern concerns.
Should future renovations require beam removal, the process reverses installation without damage to surrounding surfaces. The lightweight construction simplifies handling, while bracket systems release cleanly. Beams can be stored for reinstallation or repurposed in other locations within the home.

Technical References
ASTM standards cited in every specification
Test Data
Lab results from internal testing program
Updated 2026
Reviewed against current product specs


