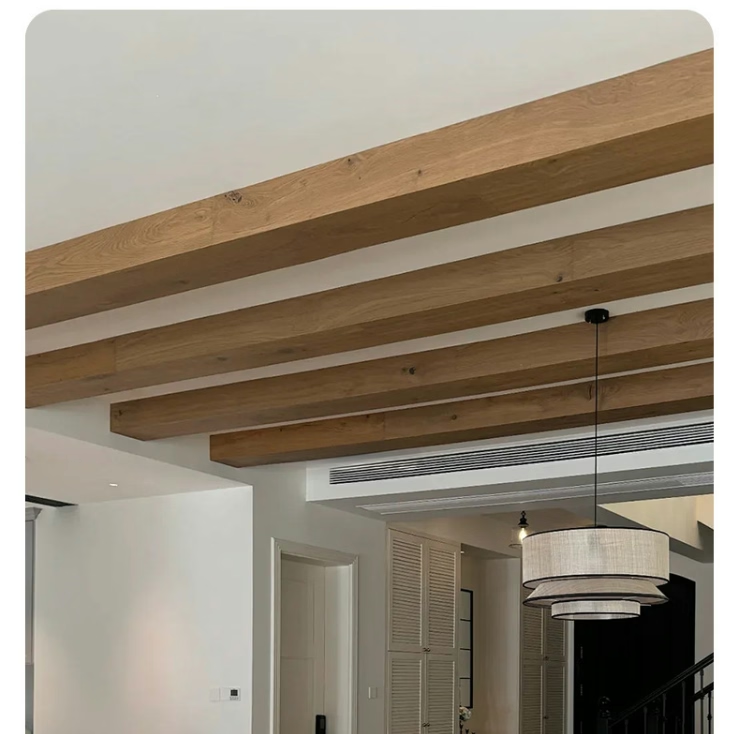
Every craftsman who has spent hours perfecting a mitered corner only to see it open after seasonal changes understands the frustration that natural wood presents. The expansion and contraction that makes natural wood beautiful in furniture makes it unpredictable in architectural applications. Mitered corner polyurethane faux beams sidestep this problem entirely, providing the consistent dimensions and stable joints that modern clients expect. The result is corner installations that look perfect years after installation, not just on completion day.
The shift toward polyurethane in premium interior installations reflects broader trends in construction materials toward engineered consistency. Architects specifying polyurethane beams know exactly what will arrive at the jobsite, eliminating the variables that complicate natural wood scheduling. Builders appreciate the reduced callbacks when joints remain tight and finishes stay consistent. Property owners benefit from installations that maintain their beauty without the maintenance natural wood demands.
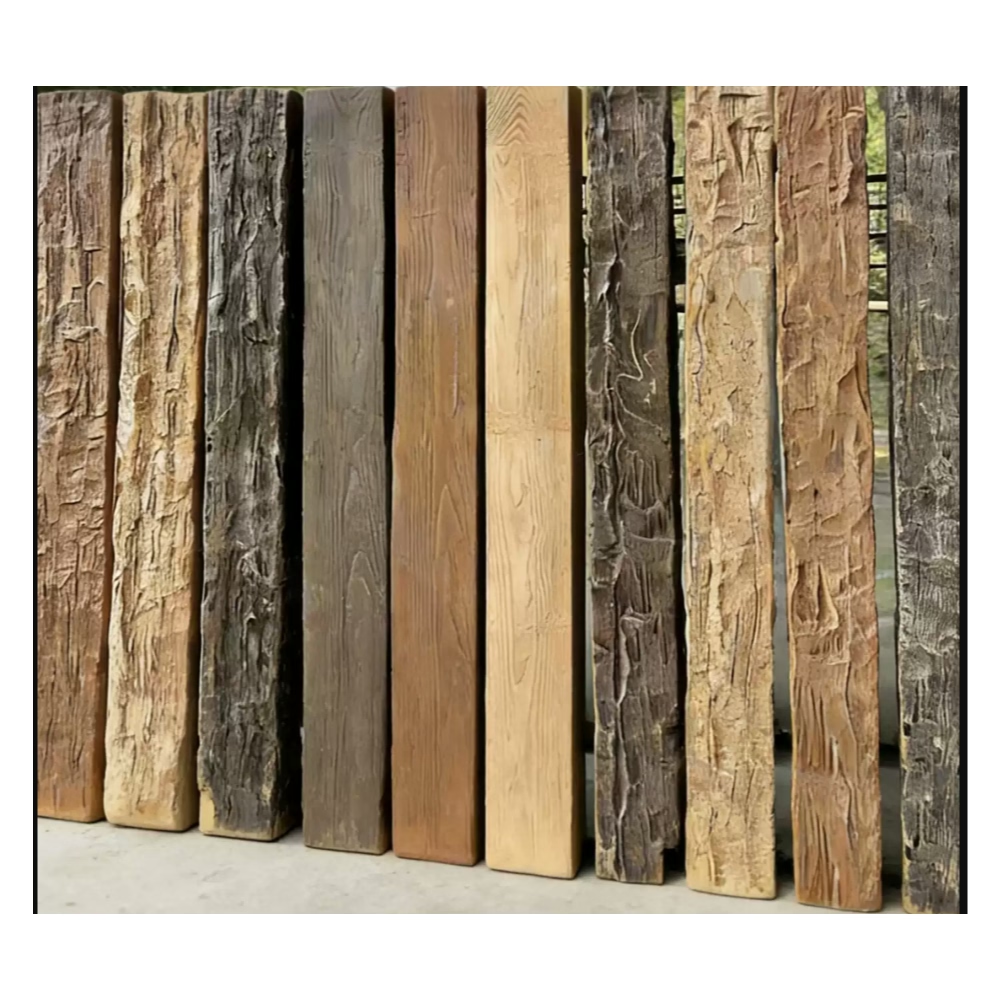
Beyond stability, polyurethane enables design possibilities that natural wood cannot practically achieve. Intricate profiles, complex textures, and large-scale pieces that would be prohibitively heavy in natural wood become routine with polyurethane's favorable strength-to-weight ratio. These capabilities expand the design vocabulary available for ceiling treatments, allowing architects to pursue visions that materials limitations previously constrained.
Planning Complex Corner Configurations
Multi-beam corner intersections present planning challenges that require careful consideration before fabrication begins. Three or more beams meeting at a single point create compound angle requirements that must be calculated precisely. Skipping this planning step leads to components that don't fit, extended installation times, and compromised aesthetics.
Drawing the intersection in elevation view clarifies the visual relationships between meeting beams. Each beam appears as its cross-sectional profile, revealing how the surfaces will interact at the corner. This visualization identifies potential conflicts where beams might intersect in ways that create gaps or overlaps requiring resolution through modified cuts or additional trim pieces.
Three-dimensional modeling takes this visualization further, allowing rotation to examine the intersection from any viewing position. Computer-aided design tools generate precise cut angles automatically from the model geometry, eliminating calculation errors and ensuring that all components arrive ready for assembly. This investment in planning pays dividends during installation.
Material Selection for Corner Work
Profile selection affects corner installation difficulty significantly, with simpler profiles offering more forgiving tolerances. Complex multi-surface profiles present multiple opportunities for alignment errors that compound at corners. When corner quality is paramount, selecting beams with simpler profiles often produces better results than struggling with complex geometry.
Size considerations for corner beams extend beyond appearance to include structural and practical factors. Larger beams provide more surface area for adhesive bonding but create heavier components requiring more substantial mounting systems. The optimal size balances these factors based on ceiling structure, installation access, and aesthetic requirements.
Finish consistency becomes critical at corners where color or texture variations would be immediately apparent. Ordering all beams for a corner installation from the same production batch maximizes the likelihood of consistent appearance. When ordering from multiple batches, requesting batch samples allows verification of acceptable consistency before committing to full installation.
Installation Methodology
The mounting approach for corner beams should provide continuous support along the entire beam length, not just at endpoints. Corners accumulate stress from thermal expansion, building movement, and gravity, all of which concentrate at the intersection point. Adequate backing and fastening distributes this stress across broader areas, preventing localized failures.
Adhesive selection requires attention to the specific polyurethane materials being joined. Most construction adhesives bond adequately to polyurethane, but some products designed for natural wood may not achieve optimal adhesion. Verifying adhesive compatibility through manufacturer documentation or test bonding prevents the joint failures that result from incompatible adhesives.
Clamping strategy must address the three-dimensional nature of corner stress. Forces acting on corner joints include tension pulling beams apart, shear sliding beams relative to each other, and compression compressing the joint. Effective clamping resists all these forces simultaneously, which may require multiple clamps positioned from different angles.
Finishing Strategy
Joint finishing begins before adhesive fully cures, as minor adjustments may still be possible during the initial cure period. Identifying any gaps or misalignments while the adhesive remains workable allows correction without disassembly. Waiting until after full cure forecloses these correction possibilities.
Filler selection for corner gaps must account for both appearance and flexibility requirements. Rigid fillers may crack as building movement stresses the joint, while overly flexible fillers might compress and create visible depressions. Products specifically formulated for polyurethane trim work provide appropriate balance.
The finishing sequence should address corners early in the process before installing beams that might obstruct access. Working from the top down allows gravity to assist rather than hinder finish application. This sequence also allows inspection and touch-up of corner finishes without working around already-installed beams.
Common Failure Modes
Adhesive failure at corners typically results from inadequate surface preparation or improper adhesive application. Contamination from dust, oils, or previous finishes prevents adhesive contact with the substrate. Following preparation protocols ensures that adhesive bonds develop full strength.
Mechanical failure occurs when fastening systems cannot resist the accumulated stresses at corner locations. Identifying the specific failure mode helps diagnose the underlying cause. Failure in shear indicates inadequate fastener strength or spacing; failure in tension suggests insufficient adhesive coverage or bond strength.
Finish deterioration at corners often results from stress concentrations that crack the coating film. These cracks prove unsightly while allowing moisture intrusion that accelerates substrate deterioration. Flexible finish products or additional reinforcement at stress points prevents this failure mode.
Maintenance and Repair
Regular inspection identifies developing problems before they progress to visible failure. Quarterly visual inspection of corner joints should include checking for gaps, cracks, or other anomalies. Early intervention prevents minor issues from becoming major repairs.
Repair approaches depend on failure severity, with minor gaps responding to caulking and touch-up while severe failures may require disassembly and reinstallation. Documenting the original installation details facilitates repair work, as understanding the original approach guides the repair strategy.
Cleaning protocols for polyurethane beams should avoid harsh chemicals that might damage finishes or adhesive bonds. Mild detergent solutions applied with soft cloths maintain appearance without risking the damage that abrasive or solvent cleaners might cause. Regular cleaning prevents the accumulation that makes restoration more difficult.
Technical References
ASTM standards cited in every specification
Test Data
Lab results from internal testing program
Updated 2026
Reviewed against current product specs


