
Surface damage on installed beams creates disproportionate concern out of proportion to its actual significance. A small scratch or dent that represents a tiny fraction of the total surface area catches the eye disproportionately because our attention focuses on imperfections. Professional touch-up technique eliminates this distraction by restoring damaged areas to match their surroundings so completely that the repair becomes invisible.
The key to successful touch-up work lies in understanding that PU faux beam surfaces respond to repair materials differently than real wood. The material accepts paint and stain inconsistently compared to natural timber, and repair materials that work perfectly on wood may produce poor results on polyurethane. Successful repairs require materials and techniques specifically suited to the substrate characteristics.
Assessing Damage and Planning Repairs
Before beginning any repair work, evaluate the damage thoroughly to determine the appropriate approach. Scratches that penetrate only the surface finish require different treatment than dents that compress the underlying material. Gouges that remove material entirely need filling before finishing. Identify the damage type before selecting your repair strategy.
Measure and document damage locations for repair planning. Small repairs scattered across an installation may be addressed individually, while concentrated damage in one area might suggest addressing the entire section. Understanding the scope helps determine whether spot repairs suffice or whether broader refinishing becomes necessary.
Match repair materials to the existing finish system. If beams arrived pre-finished from the manufacturer, identify the finish type and select compatible repair products. Field-applied finishes may have different characteristics than factory finishes, requiring testing on scrap material or hidden areas before applying to visible damage. Incompatible repair materials create appearance problems worse than the original damage.
Consider lighting conditions at repair locations. Damage that appears obvious under direct light may disappear in diffuse illumination, and vice versa. Evaluate repairs from multiple lighting angles and adjust your acceptance criteria accordingly. Repairs that look perfect under job site lighting may reveal themselves under the client's permanent light fixtures.
Surface Preparation for Repair
Clean damaged areas thoroughly before beginning repair work. Construction dust, fingerprints, and airborne contaminants interfere with finish adhesion and can become trapped under repair materials. Wipe surfaces with a clean cloth dampened with appropriate cleaner, then allow complete drying before proceeding.
Lightly sand the damaged area to create a surface that repair materials can bond to effectively. Use fine sandpaper, typically 220 grit or finer, and sand only the immediate area of damage. Aggressive sanding creates visible scratches that require additional repair. The goal is roughening the surface slightly without creating additional damage.
Remove sanding dust completely before applying any repair materials. Compressed air blows dust from crevices effectively, followed by wiping with a tack cloth or slightly damp cloth. Remaining dust creates texture problems under repair materials and prevents proper bonding. Take time for thorough cleaning— it directly affects repair quality.
Protect surrounding undamaged areas from accidental finish application. Mask adjacent surfaces with appropriate tape and backing material, particularly when working on textured surfaces where finish might spread beyond the intended area. Prevention costs less than cleanup of stray finish material.

Filling and Patching Techniques

Deeper damage requires filling before finishing. Select a filler compatible with the beam material and intended finish system. Two-part wood fillers provide excellent adhesion and sandability for repairs that must accept stain or clear finishes. Pre-mixed fillers work well for paint finishes where color matching is less critical.
Apply filler in thin layers that build up to the required depth gradually. Thick applications shrink during curing and crack when stressed, creating problems worse than the original damage. Allow each layer to cure fully before applying subsequent layers, and slightly overfill the damage area to allow for sanding flat.
Sand filled areas level with the surrounding surface once filling is complete. Use progressive sandpaper grits, starting with medium grit to remove excess material and progressing to fine grit that creates a smooth surface ready for finishing. The filled area should feel completely smooth when traced with a fingertip, with no edges or texture differences detectable.
Feather the repair edge into the surrounding surface rather than creating a distinct repair boundary. The transition from repair material to original surface should be gradual and undetectable. This feathering requires careful sanding technique and may need multiple application and sanding cycles for larger repairs.
Color Matching and Finish Application
Match repair color by building from the background color outward. Most beam finishes contain multiple color tones that layer to create the final appearance. Start with the base tone that predominates, then add secondary tones in appropriate proportions to create a match. This layering approach produces better results than attempting to match the finished appearance directly.
Apply finish in thin translucent layers that build toward the final appearance. Thick applications emphasize texture differences between the repair and original surface, while thin applications integrate more naturally. Allow each layer to dry fully before evaluating color match and applying subsequent layers.
feather technique distributes finish smoothly from the repair area into the surrounding surface. Load the brush or applicator lightly, then apply finish with progressively lighter pressure as you move away from the repair center. This gradual transition prevents hard edges where the repair becomes obvious.
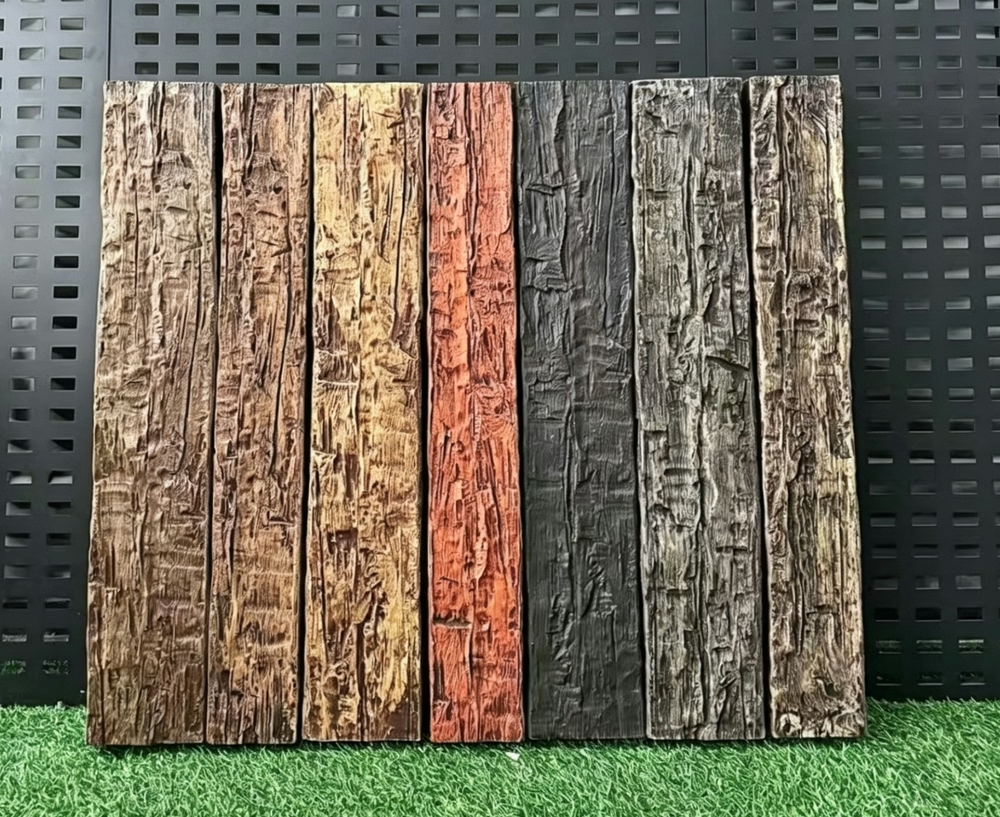
Texture matching completes the repair on textured beam surfaces. If the original beam has wood grain texture, raised grain, or other surface character, the repair must replicate this texture to disappear completely. Texturing techniques range from stamped patterns that match manufactured textures to freehand reproduction of natural wood characteristics.
Finishing and Sealing Repairs
Protect repaired areas from abrasion during the curing period. Even after surface drying, finishes continue hardening for days or weeks. Avoid cleaning or contact that might mark the fresh finish, and advise clients about appropriate care during the curing period.
Apply topcoat finish over repaired areas to seal the repair and match the surrounding sheen. The repair area may have different porosity than the original surface, absorbing topcoat differently and creating visible differences. Multiple thin topcoat applications usually achieve better integration than single heavy applications.
Evaluate repairs under multiple lighting conditions before considering work complete. Natural daylight, artificial incandescent and fluorescent lighting, and the client's permanent light fixtures all reveal repairs differently. Final approval should come from viewing under the actual conditions where the beams will be seen.
Document repairs with photographs and notes for warranty and quality purposes. Note the materials used, the techniques applied, and the final appearance achieved. This documentation helps if questions arise later about repair quality or if touch-up becomes necessary in the future.
Technical References
ASTM standards cited in every specification
Test Data
Lab results from internal testing program
Updated 2026
Reviewed against current product specs


