A twelve-foot ceiling beam looks impressive. A forty-foot continuous beam run, flowing uninterrupted across a great room or commercial atrium, transforms the space entirely. It speaks to ambition, to a design confidence that refuses to accept interruption as inevitable. But beams, like most building materials, come in standard lengths, and large projects routinely require multiple pieces to be joined together. The question is never whether splicing will be necessary but whether the splice will be invisible.
That is where PU resin invisible joint connectors have changed the game for professional installers and ambitious DIYers alike.
The Challenge of Beam Splicing in Faux Construction
Unlike structural beams, which derive their load-bearing capacity from the continuous material of a single piece, faux beams are decorative elements that must achieve their visual impact through appearance alone. A seam in a structural beam would represent a serious engineering failure. A visible seam in a decorative beam represents an aesthetic failure that undermines the entire installation.
Traditional approaches to hiding beam joints have included mitered corner joints, splines set into routed channels, and face-plates that cover the joint entirely. Each of these methods has drawbacks. Mitered joints require extremely precise cuts and are still visible as thin lines. Splined joints are stronger but require machining that may not be available on-site. Face-plates add thickness and visual weight that can look bulky in more refined installations.
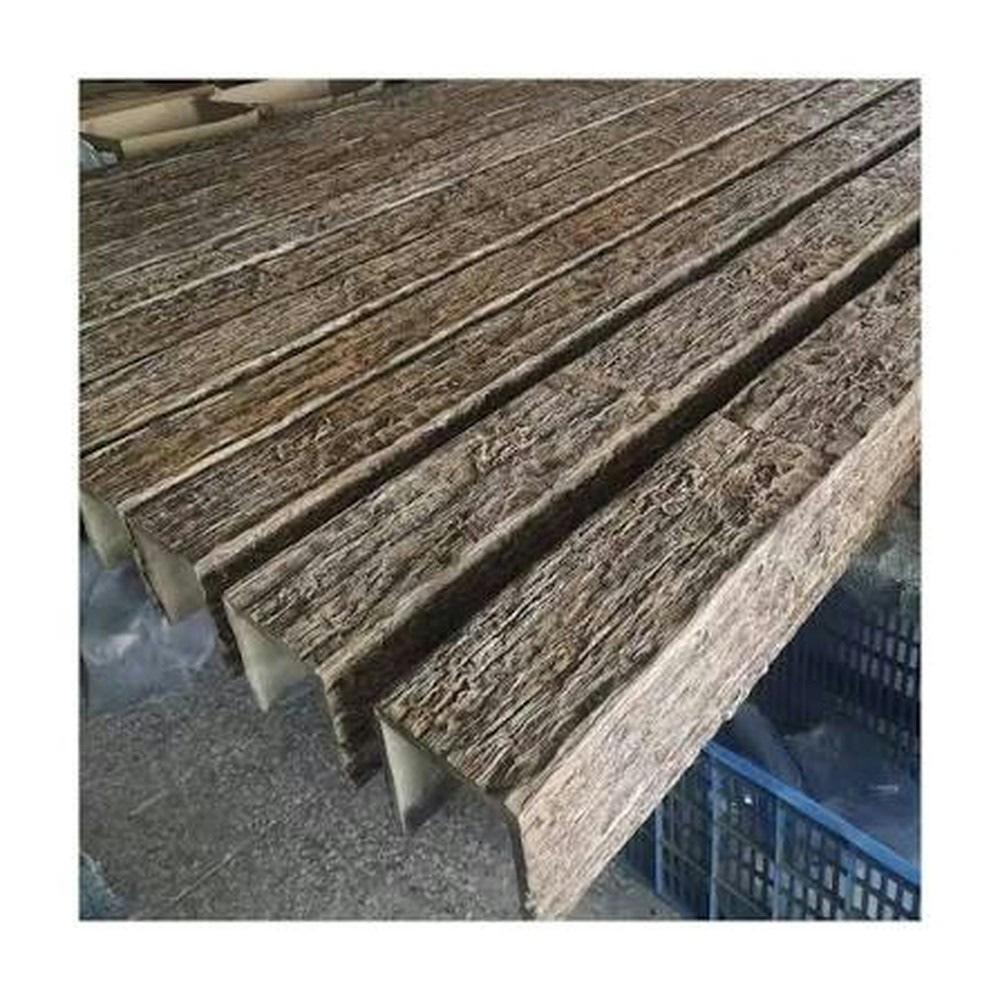
PU resin invisible joint connectors address the problem at the hardware level. These are structural elements, usually injection-molded from high-density polyurethane or a glass-reinforced resin composite, that are designed to fit inside the hollow core of standard faux beams. They bridge the joint between two beam sections, providing mechanical continuity and a clean surface for finishing.
How Invisible Joint Connectors Work
The typical connector system consists of two primary components: a male insert and a female sleeve, or a two-piece clamshell design that wraps around the joint from both sides. The connector slides into the hollow interior of the beam sections, spanning the joint by a predetermined overlap distance that provides sufficient bearing surface for a secure connection.
Installation follows a straightforward sequence. The first beam section is positioned and temporarily supported. The connector is inserted into the open end of that section to the specified depth. Adhesive is applied to the connector surfaces that will contact the beam interior. The second beam section is then brought into alignment and slid onto the protruding portion of the connector. The two sections are drawn together until the joint is closed, and the assembly is clamped or braced until the adhesive cures.
The result is a joint that, once finished with joint compound, sandpaper, and texture, becomes completely indistinguishable from the surrounding beam surface. The connector inside the hollow space provides enough structural integrity that the joined beam behaves as a single piece when handled, transported, or mounted.


Designing for Long Runs: Layout Considerations
Successful long-beam installations begin at the design stage, long before any connectors are touched. The layout plan should account for beam lengths, connector positions, and the location of support points or mounting brackets. Ideally, joints should be positioned away from high-stress points, such as the midpoint of long spans or locations directly above support columns. A joint placed at a structural support point creates unnecessary complexity and can interfere with the mounting hardware.
In some installations, designers choose to use joints at regular intervals intentionally, creating a pattern of evenly spaced seams that read as authentic timber construction. In genuine old-growth timber frames, joints and pegged connections are celebrated as evidence of craftsmanship. A well-executed faux beam installation that features periodic joints can actually enhance realism rather than diminish it, provided the joints are executed with the same care as the rest of the installation.
For projects where absolute invisibility is the priority, such as high-end residential living rooms or hospitality lobbies where guests will be viewing the ceiling at close range, minimizing the number of joints and positioning them in less visible locations requires collaboration between the designer, the installer, and often the supplier who can provide custom-length beams to reduce splicing requirements.
Adhesive Selection and Joint Strength
The mechanical connection provided by the invisible joint connector is only as strong as the adhesive bond between the connector and the inner surface of the beam. Not all adhesives are appropriate for this application. The interior surface of a PU faux beam may be smooth or slightly textured, and the connector material must be compatible with the adhesive selected.
Polyurethane construction adhesives are generally the preferred choice for this application. They bond aggressively to both the beam interior and the connector surface, cure to a flexible but firm state that absorbs minor vibrations without cracking, and are resistant to temperature extremes and humidity fluctuations. Two-part epoxy adhesives offer even greater bond strength but require more precise mixing and have a shorter working time before they begin to set.
Before applying adhesive, both surfaces should be clean and dry. Any dust from the cutting process, release agents from the molding process, or surface moisture will weaken the bond. Some installers prefer to lightly sand the interior surface of the beam where the connector will contact it, creating a slightly rough texture that improves mechanical adhesion. Wiping the sanded surface with a clean cloth before applying adhesive removes the dust and any residual contamination.
Finishing the Joint for a Seamless Appearance
Once the adhesive has fully cured, the joint itself must be finished to match the surrounding beam surface. This is where the difference between a good installation and a great installation becomes apparent. The goal is to eliminate any visible seam by blending the joint line into the surrounding texture.
For beams with a smooth surface, a thin application of spackling compound or painter's putty over the joint line, followed by careful sanding once dry, usually produces excellent results. The key is to apply very thin layers, allowing each to dry completely before applying the next. Building up the fill in multiple thin passes is slower than a single heavy application, but it minimizes the risk of cracking and produces a smoother result.
For beams with wood grain texture, the finishing process is more involved. A flexible spackling compound or texture compound that can be tooled to match the surrounding grain pattern works better than standard fillers. Some installers use a small artist's brush to stipple the wet compound, creating a texture that approximates the surrounding wood grain. Once the compound is dry, the area is lightly sanded to blend it flush with the adjacent surface.
After priming and painting or staining to match the beam finish, the joint should be completely invisible even under close inspection.
Sourcing the Right Connectors for Your Beam System
Not all invisible joint connectors are compatible with all faux beam products. The internal dimensions of hollow beams vary by manufacturer, and connectors are designed to specific tolerances. Before ordering connectors, confirm the internal dimensions of your beam product and verify that the connector is rated for that specific profile.
For custom beam profiles or unusual installation configurations, some manufacturers offer engineering consultation services to help specify the appropriate connector system or, in some cases, to produce custom connector hardware for non-standard applications. This level of support is particularly valuable for large commercial projects where the cost of a connector mismatch discovered mid-installation can be significant in both materials and labor.
Technical References
ASTM standards cited in every specification
Test Data
Lab results from internal testing program
Updated 2026
Reviewed against current product specs


