Ceiling treatments offer some of the most dramatic returns on interior design investment, yet many homeowners avoid beam installations because they assume the project requires professional contractors, specialized tools, and structural engineering. Lightweight polyurethane faux timber beams challenge this assumption, making ceiling upgrades accessible to capable homeowners willing to invest a weekend in transformation. The results can rival professional installations while requiring only basic tools and straightforward techniques.
The lightweight advantage of polyurethane beams cannot be overstated when considering DIY installation. A sixteen-foot beam that would weigh over 100 pounds in solid timber might weigh fifteen pounds in polyurethane foam construction. This weight difference affects every aspect of the installation: one person can manage polyurethane beams where two or three would be needed for timber; lighter mounting hardware suffices; ceiling structures that couldn't support real timber can accommodate polyurethane. The practical implications of this weight reduction make ambitious ceiling designs achievable without professional assistance.
Assessing Your Ceiling for Beam Installation
Ceiling assessment determines the feasibility of beam installation and influences the design approach. Start by examining the ceiling structure to identify joist locations and spacing. In most homes, ceiling joists run parallel to the shortest ceiling dimension and are typically spaced 16 or 24 inches on center. This information determines where mounting points can be located and how beams must be positioned to achieve secure attachment.
Load evaluation considers whether your ceiling can support beam weight. With polyurethane, the weight contribution is minimal, but attachment hardware still requires structural support. If you can access the attic space above the ceiling, inspect joist conditions and confirm that the wood is sound and appropriately sized. For inaccessible ceilings, the existing drywall or plaster typically provides adequate support for the light loads involved.
The condition of the ceiling surface affects preparation requirements and mounting options. Peeling paint, water damage, or textured surfaces may require repair or treatment before beams can be installed. The goal is a clean, stable surface that will accept adhesive and hardware properly. Addressing surface issues before beginning beam installation prevents complications once the project is underway.
Clearance considerations ensure that beams will fit properly in the intended space. Measure ceiling height at multiple points and calculate the maximum beam depth that will maintain adequate headroom throughout the room. Also consider the impact of beams on door openings, window placements, and light fixture locations. These constraints influence both beam sizing and placement decisions.

Choosing the Right Beam Style
Beam style selection aligns aesthetic preferences with practical constraints. The range of available profiles includes options ranging from rustic hand-hewn appearances to clean contemporary profiles. Browsing manufacturer catalogs and online galleries reveals the possibilities, while physical samples allow evaluation of texture and color in your actual room conditions. This research investment pays dividends in satisfaction with the final result.
Profile proportion affects how beams appear in the finished installation. Deep, substantial beams create dramatic impact but require sufficient ceiling height to avoid making spaces feel compressed. Shallower beams provide design enhancement without the visual weight of massive timbers, working well in more modest ceiling heights. The key is achieving visual balance between beam proportions and room dimensions.
Finish selection determines the color and texture that beams will contribute to the room's appearance. Options include natural wood tones from pale ash to rich walnut, painted whites and neutrals, and custom colors matched to specific design requirements. The finish should complement existing colors in the room while providing the warmth and character that motivates the installation. Requesting samples for evaluation at home provides the best basis for this decision.
Length and layout planning creates the blueprint for the installation. Consider whether beams will span the full ceiling width or terminate at walls; whether parallel or crossed configurations work better; how beam spacing affects visual balance. Sketching the ceiling with proposed beam positions helps identify potential issues before committing to the installation. This planning step distinguishes thoughtful installations from impulsive projects.
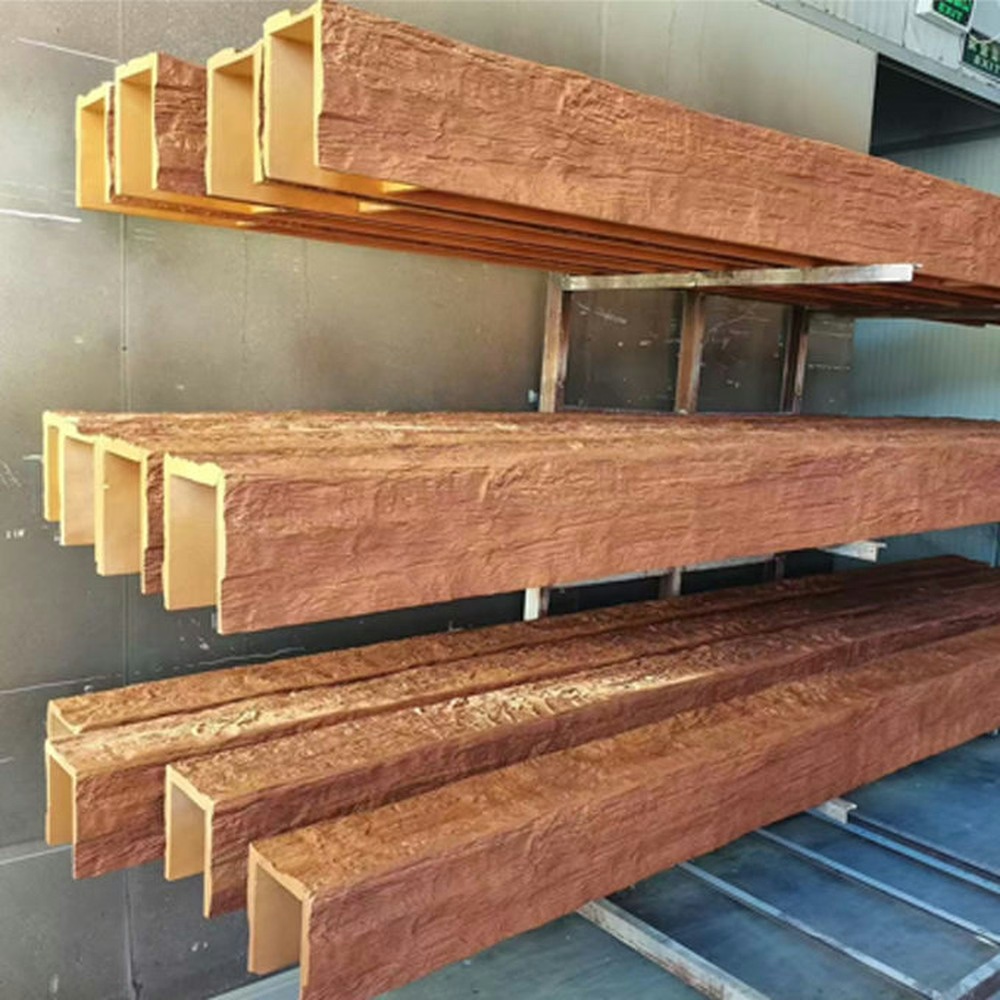
Installation Day Preparation
Gathering tools and materials before installation day eliminates frustrating delays once the work begins. The basic tool kit includes a tape measure, level, pencil, drill with appropriate bits, saw for cutting if field trimming is needed, adhesive gun, and safety equipment. Having everything organized and accessible keeps momentum through the installation process.
Beam staging arranges pieces in the order they will be installed, with longer beams positioned for easy handling and shorter pieces accessible when needed. This staging reveals whether all necessary components are available and whether beam lengths match the measurements that guided purchasing decisions. Any discrepancies discovered at this stage can be addressed before adhesive application begins.
Work area preparation protects surfaces from adhesive, dust, and the inevitable minor spills that occur during construction projects. Covering floors with drop cloths and moving or protecting furniture simplifies cleanup while preventing damage to valued items. Good preparation creates a workspace that allows focus on installation quality rather than damage prevention.
Understanding the mounting approach before beginning enables confident execution. Whether using adhesive directly to ceiling surfaces, mounting boards as intermediaries, or mechanical hardware, the technique should be mastered through reading and perhaps practice on scrap material. This preparation prevents hesitation during actual installation that could compromise results.
Enjoying Your Transformation
The transformation that occurs when beams are installed often exceeds expectations, even when the improvement is anticipated. What appeared to be merely adequate in planning becomes genuinely impressive in reality. The dimensional interest that beams create changes how the room feels, adding warmth and character that flat ceilings simply cannot provide. This transformation happens in a single weekend, with results that will be enjoyed for years.
Maintenance of polyurethane beams proves simpler than their timber counterparts, requiring only occasional dusting to maintain appearance. The sealed surface doesn't require the periodic refinishing that natural timber demands, and the material's resistance to moisture and temperature variations eliminates concerns about seasonal movement or humidity damage. This practical benefit enhances the appeal of the initial investment.
The confidence gained from a successful DIY beam installation often leads to additional home improvement projects. Skills developed during beam work—precision measurement, adhesive technique, finish application—transfer to many other construction tasks. The experience demonstrates that ambitious projects are achievable with proper preparation and systematic execution.
Sharing the results with friends and family provides satisfaction that extends beyond the personal enjoyment of the transformed space. The project becomes a topic of conversation, with visitors often expressing surprise at learning the beams are not real timber. This validation confirms that the accessible approach to beam installation delivers results indistinguishable from professional work.


Technical References
ASTM standards cited in every specification
Test Data
Lab results from internal testing program
Updated 2026
Reviewed against current product specs


