
The satisfaction of completing home improvement work with one's own hands creates connections between homeowners and their living spaces that hired work simply cannot replicate. When you install something yourself, you understand its presence in ways that watching contractors work never provides. The beam you lifted, positioned, and secured becomes more than an aesthetic addition— it becomes evidence of capability and investment. Snap-on quick installation PU faux beams make this satisfying outcome achievable for renovation enthusiasts who might otherwise lack the skills or equipment to attempt ceiling work.
DIY home renovation culture has grown substantially over recent decades, with television programs, online tutorials, and social media communities providing inspiration and instruction for projects across the skill spectrum. However, certain project categories have remained firmly in contractor territory, requiring tool collections, construction knowledge, and physical capabilities that casual renovators might not possess. Ceiling beam installation exemplified this exclusivity— until snap-on systems introduced assembly approaches that match the accessibility of furniture building.
The psychology of renovation projects matters considerably to outcomes. When homeowners tackle projects within their capabilities, they build confidence that enables increasingly ambitious work. Snap-on beam installation provides an excellent intermediate project: complex enough to feel meaningful, achievable enough to ensure success, and impactful enough to provide lasting satisfaction. Completing this project successfully often encourages homeowners to attempt additional improvements they might previously have dismissed as beyond reach.
The Evolution of DIY-Accessible Beams
Early faux beam products emerged primarily for professional installation, with mounting methods that assumed construction experience and tool access. Adhesive applications required surface preparation and cure times. Mechanical fastening required understanding of structural requirements and fastener selection. The learning curve excluded many homeowners who might have benefited from beam installations.
Recognizing this exclusion, manufacturers developed snap-on systems specifically for the DIY market. These systems prioritize user-friendliness without sacrificing appearance or durability. Design engineers created connection mechanisms that guide correct installation through physical feedback— clicks, snaps, and other sensations that confirm proper seating. The result is installation that feels intuitive rather than learned.

Market research shaped these developments, with manufacturers gathering input from homeowners about installation barriers and frustrations with existing products. The insights informed engineering decisions about component sizes, connection methods, and instructional materials. What emerged represents genuine understanding of user needs translated into product improvements.
System Components and Their Functions
Snap-on beam systems typically include mounting brackets, support rails, decorative beam shells, and finishing pieces. Each component serves a specific function within the overall system, and understanding these functions helps renovators plan their installations effectively.
Mounting brackets attach to ceiling structure and provide the anchor points that carry beam weight. These brackets install using standard fasteners— typically screws appropriate for the ceiling substrate— driven into ceiling joists or other structural elements. The brackets include features that engage with other system components, translating ceiling attachment into beam support.
Support rails span between mounting brackets and provide the framework onto which decorative elements attach. These rails might be visible in finished installations, or might be concealed entirely depending on beam profile and mounting configuration. Either way, the rails establish the beam's position and provide the structural backbone that holds everything together.
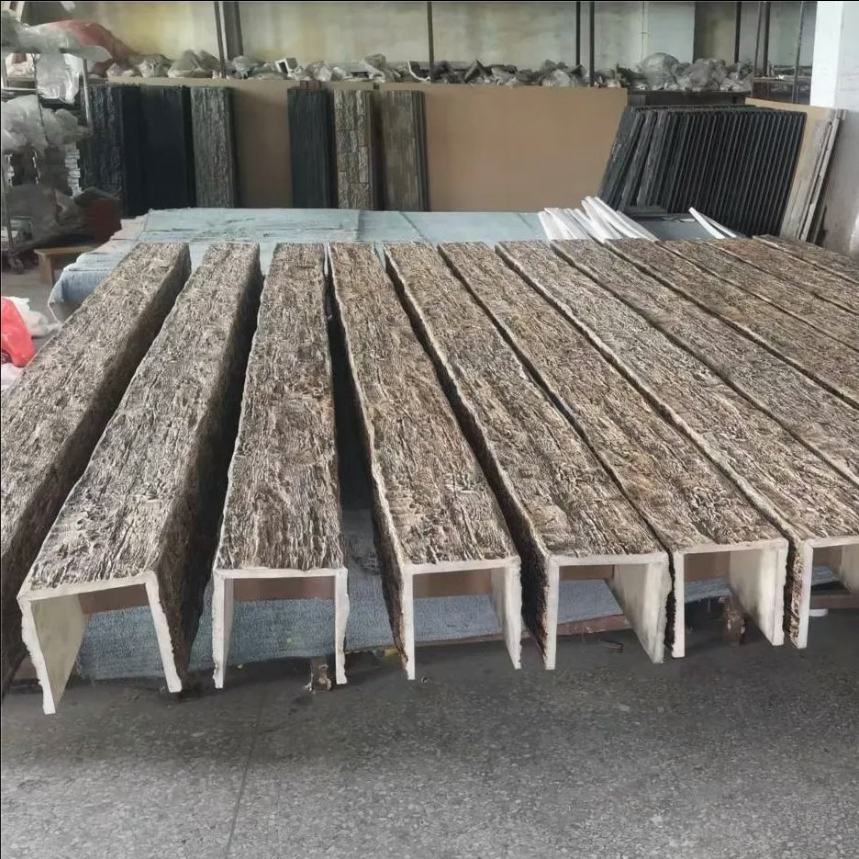
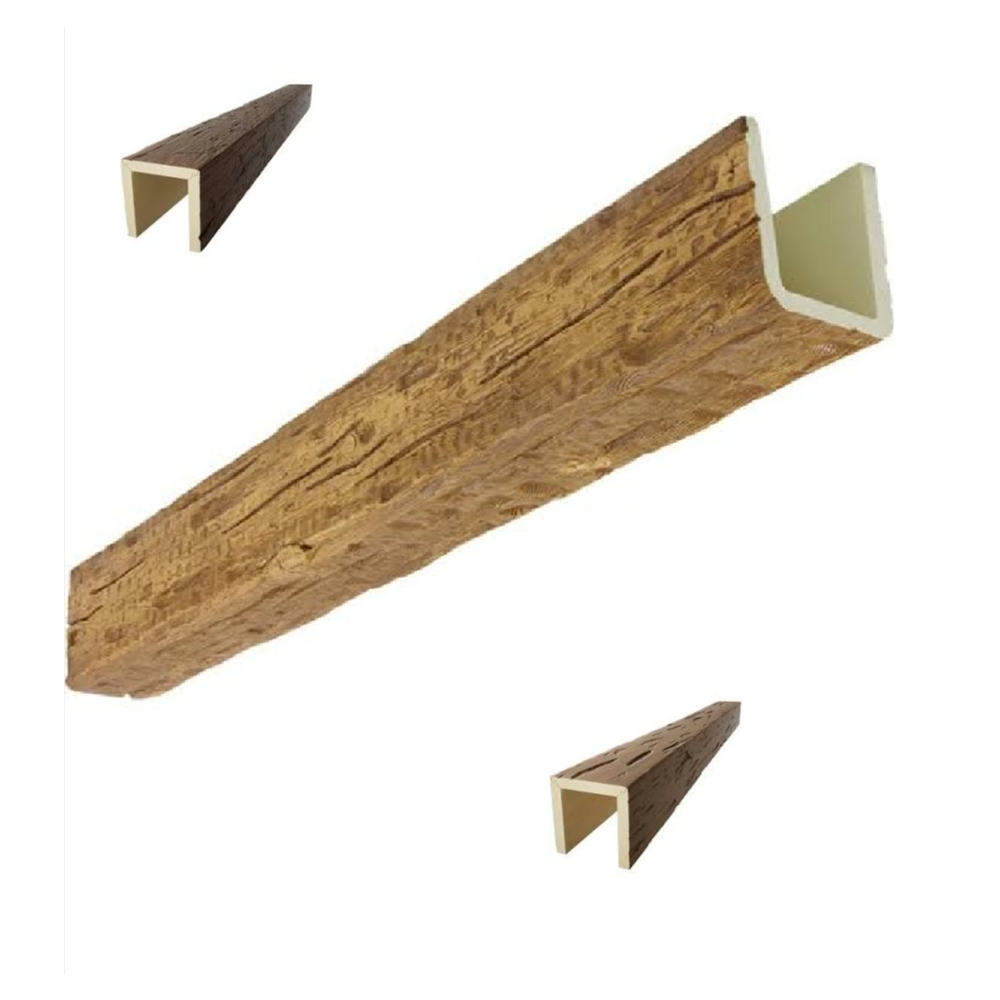
Decorative beam shells— the visible faux wood elements— snap or slide onto support infrastructure. These shells incorporate the wood grain appearance, color, and surface texture that define the beam's aesthetic contribution. The shells are hollow, allowing them to slide over rails or clip onto brackets without bearing structural loads themselves.
Step-by-Step Installation Process
Successful snap-on beam installation follows a logical sequence that builds from preparation through completion. Understanding this sequence before beginning prevents mistakes that might require correction later.
The process typically begins with ceiling preparation and layout planning. Homeowners mark beam positions according to design objectives, establishing reference lines that guide subsequent work. This planning phase might involve measuring rooms, sketching layouts, and making decisions about beam spacing and positioning.
Next, mounting brackets install at predetermined locations. Each bracket must align with ceiling structure— joists or rafters— to provide secure attachment. Homeowners locate structural elements using stud finders or by measuring from known reference points. Bracket spacing follows manufacturer guidelines that ensure adequate support throughout beam runs.
Support rails attach to mounting brackets once all brackets are secured. These rails might span between adjacent brackets, run continuously across multiple bracket positions, or connect at specialized junction points depending on the specific system design. Proper rail installation establishes the framework onto which beam shells will attach.
Finally, decorative beam shells snap or slide onto the support infrastructure. This final step transforms the structural framework into the finished appearance that the project aims to achieve. The satisfying moment when shells click into final position provides the completion sensation that rewards the preceding work.
Common Mistakes and How to Avoid Them
Even user-friendly systems present opportunities for error that attentive renovators can avoid. Understanding common mistakes helps homeowners navigate around them successfully.
Insufficient structural attachment represents the most serious potential error. Mounting brackets must engage solid ceiling structure— not merely ceiling finish materials like drywall. Homeowners who skip the joist-locating step or who underestimate the weight they're adding may discover attachment failures later. Taking time to locate structural elements accurately prevents this outcome.
Misalignment between beam sections creates visible imperfections that undermine the professional appearance the system aims to achieve. Reference lines established during planning must translate accurately to bracket and rail positioning. Taking measurements twice before making permanent attachments prevents the misalignment that results from rushing through this critical phase.
Failure to test-fit components before permanent installation sometimes creates problems that require disassembly to correct. Homeowners should dry-fit all components before applying adhesive or tightening fasteners to ensure that everything aligns and connects as expected. This precaution adds minimal time while preventing significant frustration.
Coordination with Other Renovation Work
Snap-on beam installation often occurs as part of larger renovation projects where multiple improvements proceed simultaneously. Coordinating beam installation with other work requires attention to sequencing that prevents damage or interference.
Paint and finish work should precede beam installation whenever possible. The clean surfaces that result from painting enable better adhesion and appearance than trying to paint around installed beams. Painting first also eliminates the risk of paint overspray damaging beam finishes.
Electrical work should be completed before beams obscure ceiling surfaces. Any new lighting, outlet, or switch additions should be wired and tested before beams cover the access points. This sequencing prevents the discovery— after beam installation— that electrical work remains incomplete.
Similarly, any ceiling work involving HVAC, plumbing, or entertainment system wiring should finish before beams go up. While snap-on systems allow eventual access, avoiding the need for access entirely simplifies installation and preserves appearance.
Achieving Professional-Quality Results
The accessibility of snap-on systems doesn't mean that results must appear amateurish. Attention to details that distinguish professional work from DIY attempts elevates outcomes significantly.
Consistent spacing between parallel beams creates the rhythmic appearance that ceiling beam installations aim to achieve. Professional installers establish even spacing as a primary objective; DIY renovators should do the same. Even slight variations become obvious when beams run across visible ceiling areas.
Clean joint appearance at beam intersections and terminations completes the professional look. End caps, corner pieces, and transition components should fit snugly without gaps or visible fasteners. The snap-on design accommodates these clean terminations when components are properly seated.
Level and plumb attention ensures that beams appear straight and true rather than wavy or crooked. While minor variations might escape notice in natural wood beams with irregular surfaces, the smooth surfaces of polyurethane beams reveal alignment issues more clearly. Taking time to achieve accurate positioning pays dividends in finished appearance.
Maintenance and Future Modifications
Snap-on systems accommodate future changes more readily than conventional installations. Understanding maintenance requirements and modification possibilities helps homeowners plan for the long term.
Regular cleaning maintains appearance without special procedures. Dust accumulation on ceiling beams— often significant in rooms with forced-air heating— responds to dusting with extended-reach tools or vacuuming with brush attachments. The smooth surfaces of polyurethane beams clean more easily than textured natural wood alternatives.
Should beam repositioning become necessary— for room rearrangement or design changes— snap-on systems allow removal without damage. The reversible nature of snap connections enables relocation to different ceiling positions, extending the useful life of the beam investment.
Individual component replacement addresses localized damage without requiring complete system replacement. Impact damage, staining, or other isolated issues can be resolved by replacing affected shells while leaving surrounding elements in place. This repairability represents a significant advantage over permanently installed alternatives.
Technical References
ASTM standards cited in every specification
Test Data
Lab results from internal testing program
Updated 2026
Reviewed against current product specs


